跳转到主内容

BObsweep Robotic Vacuum's Main Brush Motor Replacement

你所需要的

  1. BObsweep Robotic Vacuum's Main Brush Motor Replacement, bObsweep's cover: 步骤 1 中的图像 1,3 BObsweep Robotic Vacuum's Main Brush Motor Replacement, bObsweep's cover: 步骤 1 中的图像 2,3 BObsweep Robotic Vacuum's Main Brush Motor Replacement, bObsweep's cover: 步骤 1 中的图像 3,3
    • Flip Bob over and remove the 7 screws around which hold the cover together.

    • Remove the main brush. Unscrew the holder, and lift the brush out. Reminder: Keep this screw separate from the others so you can use it later to reinstall.

    • Depending on your model, there may be only 6 screws installed on bObsweep.

  2. BObsweep Robotic Vacuum's Main Brush Motor Replacement: 步骤 2 中的图像 1,3 BObsweep Robotic Vacuum's Main Brush Motor Replacement: 步骤 2 中的图像 2,3 BObsweep Robotic Vacuum's Main Brush Motor Replacement: 步骤 2 中的图像 3,3
    • There are two screw holes inside the brush compartment: one in the centre, one on the left end. Remove both and keep aside for reassembly.

    • There are five more screws around bObsweep's edges. Two are installed at the top and bottom, and one on the right end of the main brush.

  3. BObsweep Robotic Vacuum's Main Brush Motor Replacement: 步骤 3 中的图像 1,2 BObsweep Robotic Vacuum's Main Brush Motor Replacement: 步骤 3 中的图像 2,2
    • Flip bOb back over so you can see the screen. Lift the cover up to reveal bObsweep’s main board.

    • Detach the power inlet from the cover. Grip and slide it out.

  4. BObsweep Robotic Vacuum's Main Brush Motor Replacement: 步骤 4 中的图像 1,2 BObsweep Robotic Vacuum's Main Brush Motor Replacement: 步骤 4 中的图像 2,2
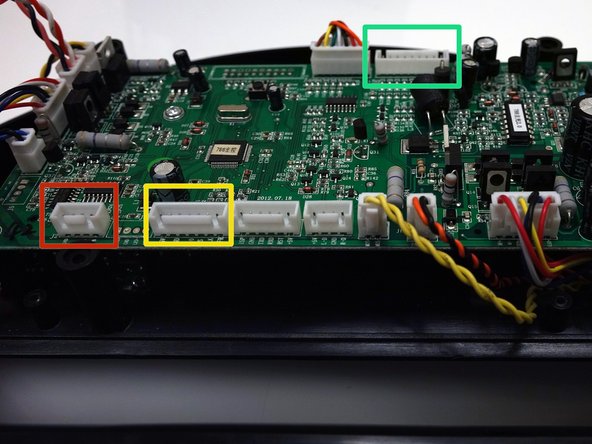
    • Remove three circuit plugs from the motherboard. Pinch the small white tab on the side of each circuit plug and pull straight up to release each from the motherboard.

    • 1. On the bottom left corner: a small connector with red, black and white wires.

    • 2. One thick white wire that attaches on the right side of the previous connector.

    • 3. On the top edge of bOb’s motherboard: a wide multicoloured connector.

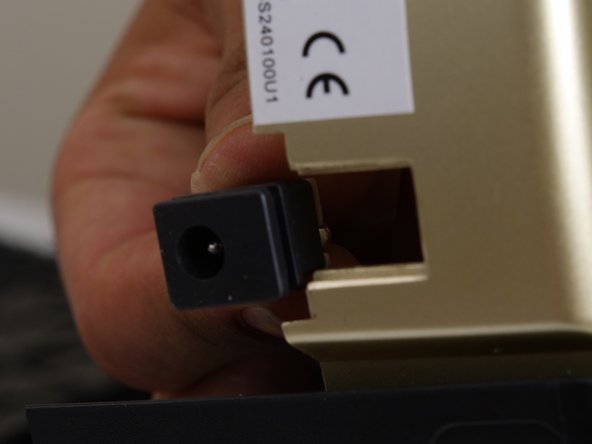
    • Place the cover aside and begin your repair.

  5. BObsweep Robotic Vacuum's Main Brush Motor Replacement, Main Brush Motor: 步骤 5 中的图像 1,3 BObsweep Robotic Vacuum's Main Brush Motor Replacement, Main Brush Motor: 步骤 5 中的图像 2,3 BObsweep Robotic Vacuum's Main Brush Motor Replacement, Main Brush Motor: 步骤 5 中的图像 3,3
    • The main brush motor sits in front of bOb’s left wheel, attached to the motherboard by two pairs of twisted wires, one pair is red and white, the other pink and black.

    • Press on the white tab and pull up to release the circuit plug.

    • Lift the brush motor up to remove.

  6. BObsweep Robotic Vacuum's Main Brush Motor Replacement: 步骤 6 中的图像 1,3 BObsweep Robotic Vacuum's Main Brush Motor Replacement: 步骤 6 中的图像 2,3 BObsweep Robotic Vacuum's Main Brush Motor Replacement: 步骤 6 中的图像 3,3
    • Attach the circuit plug of the replacement motor to the motherboard in the newly opened space.

    • Line up the protruding sides of the brush motor with the two square gaps inside it’s holder.

    • Slide the motor straight downward until it locks inside bObsweep.

  7. BObsweep Robotic Vacuum's Main Brush Motor Replacement: 步骤 7 中的图像 1,3 BObsweep Robotic Vacuum's Main Brush Motor Replacement: 步骤 7 中的图像 2,3 BObsweep Robotic Vacuum's Main Brush Motor Replacement: 步骤 7 中的图像 3,3
    • Close the Bobsweep back up by following the cover closing guide, or by folowing the above instructions in reverse.

结论

To reassemble your device, follow the Closing bObsweep Guide.

Tatiana

于06/28/14注册

737 声望

创作了17篇指南

0条评论

添加评论

浏览统计数据:

过去 24 小时: 0

过去 7 天: 3

过去 30 天: 7

总计 990