跳转到主内容

Axess SPBT1031 Subwoofer Replacement

你所需要的

  1. Axess SPBT1031 Subwoofer Replacement, Subwoofer: 步骤 1 中的图像 1,1
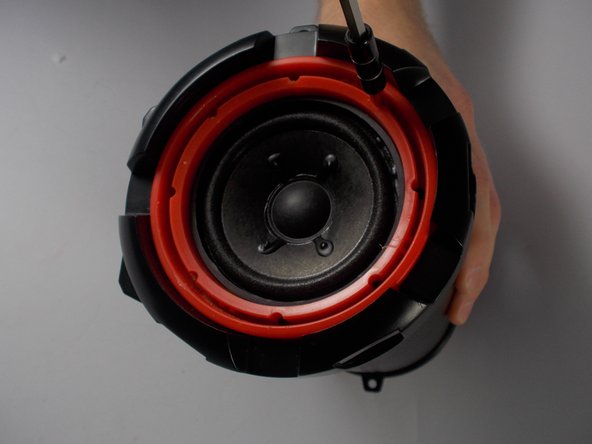
    • Look at the side of the speaker without the red interface plate; there will be a red ring around the mesh but no buttons on the side.

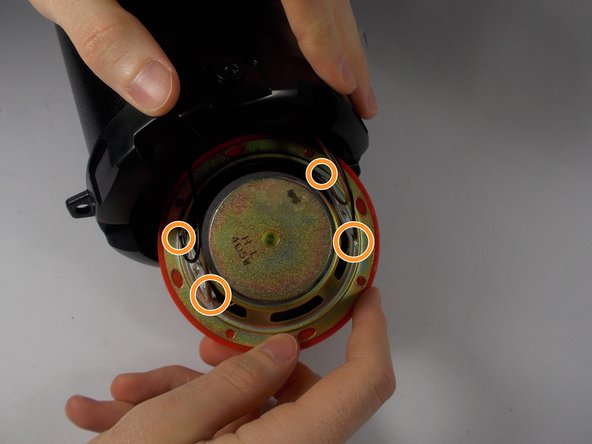
    • Remove the two 5.5 mm screws from the top and bottom of the black face plate using a Phillips #1 screwdriver.

    • Do not remove the plate yet.

  2. Axess SPBT1031 Subwoofer Replacement: 步骤 2 中的图像 1,1
    • Use a metal spudger to remove the mesh speaker cover by wedging the narrow end into the center of the outer edge of the mesh touching the red plate.

  3. Axess SPBT1031 Subwoofer Replacement: 步骤 3 中的图像 1,2 Axess SPBT1031 Subwoofer Replacement: 步骤 3 中的图像 2,2
    • Remove four 5.5 mm screws from the red panel under the mesh using a Phillips #1 screwdriver.

    • For subwoofer replacement there will be four screws to remove and four bolts as well. The bolts are used for alignment and cannot be removed.

  4. Axess SPBT1031 Subwoofer Replacement: 步骤 4 中的图像 1,1
    • If the screws are difficult to remove, use the tweezers to twist and pick them out.

  5. Axess SPBT1031 Subwoofer Replacement: 步骤 5 中的图像 1,1
    • Separate the red plate from the black face plate by removing the black plate from the tube and pushing on the inside of the subwoofer.

    • Be careful not to damage the black face plate or red plate as you pull them apart.

    • You may place the black faceplate back on the tube, but do not screw it back in yet.

  6. Axess SPBT1031 Subwoofer Replacement: 步骤 6 中的图像 1,2 Axess SPBT1031 Subwoofer Replacement: 步骤 6 中的图像 2,2
    • To remove the the wires from the subwoofer terminals, use a soldering iron to reheat the solder at each of the four points of connection.

  7. Axess SPBT1031 Subwoofer Replacement: 步骤 7 中的图像 1,1
    在这个步骤中使用的工具:
    Desoldering Pump
    $3.99
    购买
  8. Axess SPBT1031 Subwoofer Replacement: 步骤 8 中的图像 1,1
    • Remove the old subwoofer.

    • Connect the brown wires to the positive terminals and the black ones to the negative terminals when re-soldering.

结论

To reassemble your device, follow these instructions in reverse order.

2等其他人完成本指南。

团队

UMass Dartmouth, Team 8-6, Botvin Spring 2016 UMass Dartmouth, Team 8-6, Botvin Spring 2016 的会员

UMASSD-BOTVIN-S16S8G6

3 名成员

创作了8篇指南

一条评论

I Ned to replace the charger conection and I need the parts please u can email me at elpaleterolopez@Gmail.com or call me at 6613402547

Ramon lopez - 回复

添加评论

浏览统计数据:

过去 24 小时: 1

过去 7 天: 7

过去 30 天: 7

总计 1,653