你所需要的
-
-
1. Check the farm-n-storm website for that node to make sure node has sent a reading in the last hour.
-
2. Contact the Real-Time Water Systems Lab to update the sampling frequency to every 5 minutes to make testing easier.
-
-
-
3. Disconnect the plug to the solar panel.
-
Then, grabbing the green connector, pull the battery connector from the solar charge controller.
-
4. Disconnect the plugs for the autosampler battery.
-
5. Disconnect the connector that plugs into the battery port of the sampler.
-
-
-
-
Now we will trigger a sample from the autosampler to confirm the sampling works.
-
7. Press the "MANUAL SAMPLE" button and then "ENTER/PROGRAM".
-
-
-
Get the modified 6-pin connector to test the autosampler
-
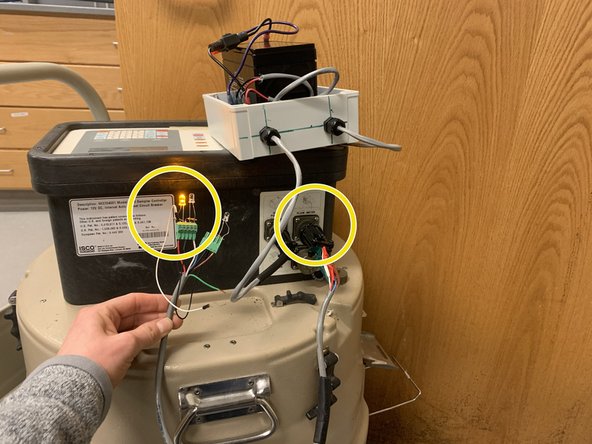
Connect the 12V battery to the autosampler
-
Push the On button and then Start Sampling
-
-
-
-
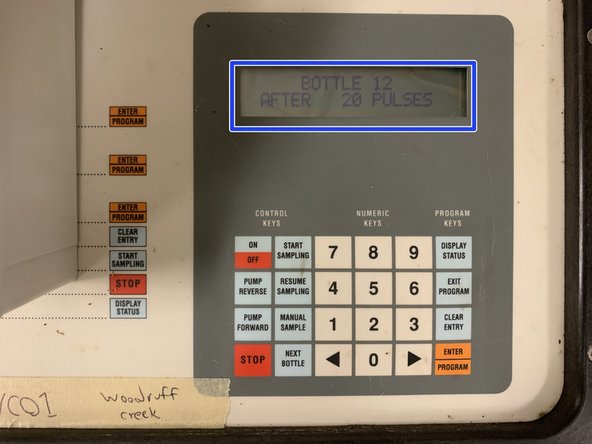
Set the sample bottle to 12 for easier verification. And then press Enter.
-
Screen should say "Bottle 12 After 20 Pulses"
-
Plug in the 6-pin connector to the autosampler. The yellow LED should light up immediately.
-
-
-
Touch the jumper wire to the LED attached to the white wire 20 times. This wire is for sending pulses to the autosampler.
-
You will see the pulse count decreasing on the LCD screen.
-
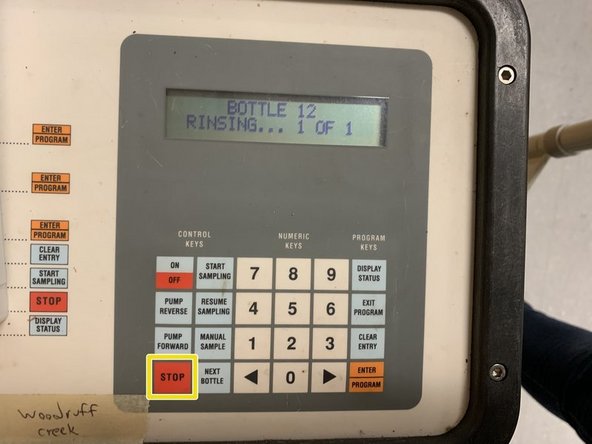
You will hear the autosampler making noises as it moves to bottle 12. You will then see the green LED flash 12 times to indicate the 12th bottle.
-
-
-
You will see the LCD start indicating the sampling steps. Press Stop.
-
-
-
8. Confirm there are no breaks in the wiring between the interface board the autosampler. See this tutorial for more details.
-
-
-
Disconnect the relay board from the Open-Storm board.
-
Connect a red, black, and white jumper wire into the pluggable header (that was attached the board).
-
Connect a XX resistor in the same holes as the black and white wires. Resistors are blind to the polarity in a circuit. So you don't have to worry about installing them backwards.
-
-
-
Plug in the battery box into the autosampler.
-
Switch the battery box switch to "Manual Mode". Press the On button, then the Start Sampling button, then the Enter button.
-
Set the sample bottle to 12 for easier verification. And then press Enter.
-
-
-
Screen should say "Bottle 12 After 20 Pulses".
-
Plug in the 6-pin connector, and connect the battery box to the node box.
-
Plug in the red and black jumper wire into the correct terminals of the 3.7V node battery. The. yellow LED should turn on immediately.
-
-
-
Touch the white jumper wire to the red jumper wire 20 times. This wire is for sending pulses to the autosampler. You will see the blue LED blink with each touch.
-
You will see the pulse count decreasing on the LCD screen.
-
You will hear the autosampler making noises as it moves to bottle 12. You will see the red LED light go on, telling us the autosampler is busy taking a sample.
-
-
-
You will then see the green LED flash 12 times to indicate the 12th bottle.
-
You will see the LCD start indicating the sampling steps. Press Stop.
-


另外一个人完成了本指南。

团队
