简介
This guide will help teach you how to remove and replace the motorized accelerator near the the tip of the gun by first disassembling the gun, and then showing removal of the accelerator itself. The guide will require a #00 Phillips head screwdriver and requires you to keep track of a few small parts, but is very doable as long as you follow each step!
你所需要的
-
-
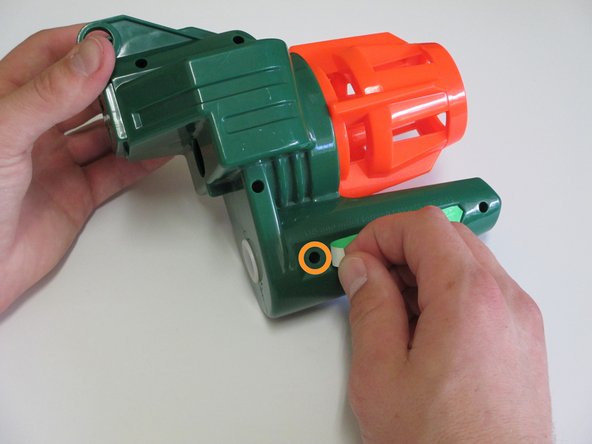
Locate the orange slider on the front side of the gun.
-
Pull the orange slider towards the back of the gun while lifting up on the nose the gun.
-
-
-
-
Remove all five 1/16 in. screws holding the nose of the gun together using a Phillips #00 screwdriver.
-
Look out for the hidden fifth screw behind the thin light green tape near the bushing itself. Peel the tape using your finger to gain access.
-
-
-
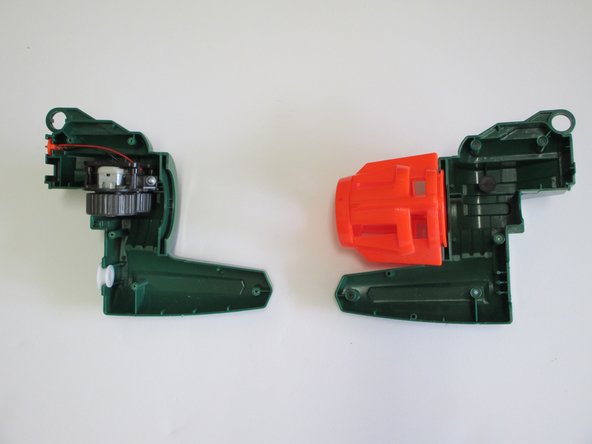
Pick up the now split half of the nose of the gun that does not still have the orange tip attached to it.
-
Remove the bushing by simply pulling it away from the plastic.
-
-
-
Unscrew the two screws holding the accelerator in place with a Phillips #00 screwdriver
-
-
-
Pull back on the accelerator away from the plastic to remove from frame.
-


To reassemble your device, follow these instructions in reverse order.
To reassemble your device, follow these instructions in reverse order.
3等其他人完成本指南。
团队

Cal Poly, Team 6-22, Maness Fall 2014 Cal Poly, Team 6-22, Maness Fall 2014 的会员
CPSU-MANESS-F14S6G22
4 名成员
创作了6篇指南