跳转到主内容

Asus Zenbook UX303L Keyboard Replacement

你所需要的

  1. Asus Zenbook UX303L Keyboard Replacement, Keyboard: 步骤 1 中的图像 1,1
    • Make sure the device is turned off and disconnected from the battery charger.

  2. Asus Zenbook UX303L Keyboard Replacement: 步骤 2 中的图像 1,3 Asus Zenbook UX303L Keyboard Replacement: 步骤 2 中的图像 2,3 Asus Zenbook UX303L Keyboard Replacement: 步骤 2 中的图像 3,3
    • Remove all the nine screws from the bottom of the device using a T5 screwdriver.

    • Carefully remove the bottom cover.

  3. Asus Zenbook UX303L Keyboard Replacement: 步骤 3 中的图像 1,2 Asus Zenbook UX303L Keyboard Replacement: 步骤 3 中的图像 2,2
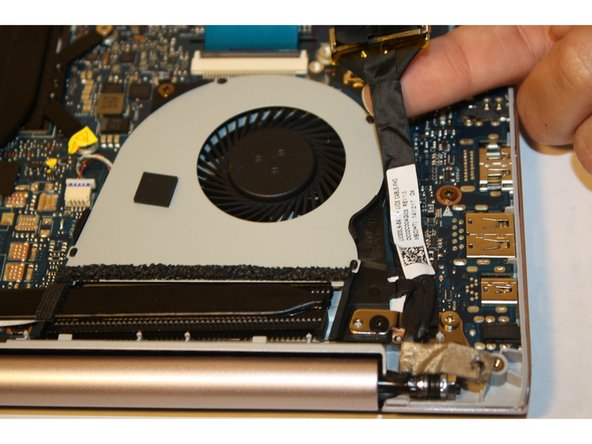
    • Remove the LVDS cable next to the cooling fan.

  4. Asus Zenbook UX303L Keyboard Replacement: 步骤 4 中的图像 1,3 Asus Zenbook UX303L Keyboard Replacement: 步骤 4 中的图像 2,3 Asus Zenbook UX303L Keyboard Replacement: 步骤 4 中的图像 3,3
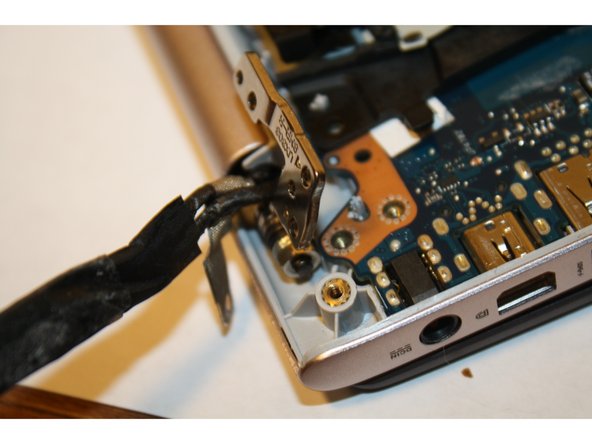
    • Remove the three screws from the hinges using a PH-1 screwdriver.

    • Open the device at a 90 degree angle to free the hinges.

  5. Asus Zenbook UX303L Keyboard Replacement: 步骤 5 中的图像 1,3 Asus Zenbook UX303L Keyboard Replacement: 步骤 5 中的图像 2,3 Asus Zenbook UX303L Keyboard Replacement: 步骤 5 中的图像 3,3
    • Remove the screw attaching the cooling fan to the motherboard by using a PH-1 screwdriver.

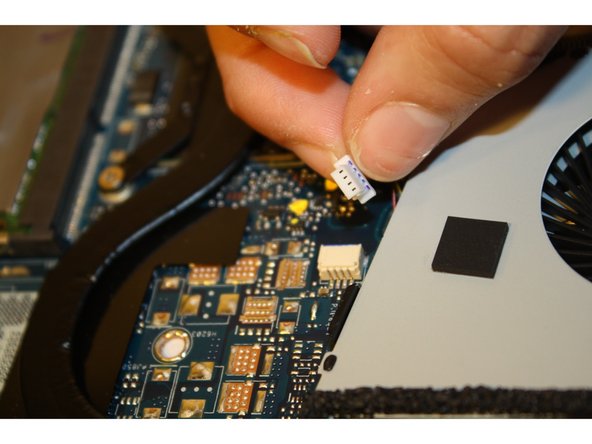
    • Disconnect the wire attaching the cooling fan to the motherboard.

    • Gently lift and pull out the cooling fan.

  6. Asus Zenbook UX303L Keyboard Replacement: 步骤 6 中的图像 1,2 Asus Zenbook UX303L Keyboard Replacement: 步骤 6 中的图像 2,2
    • Remove the four screws attached to the black covered copper bar next to the cooling fan using a PH-1 screwdriver.

    • Gently lift and remove the copper bar.

  7. Asus Zenbook UX303L Keyboard Replacement: 步骤 7 中的图像 1,1
    • Remove the five screws from the battery pack using a PH-1 screwdriver.

  8. Asus Zenbook UX303L Keyboard Replacement: 步骤 8 中的图像 1,3 Asus Zenbook UX303L Keyboard Replacement: 步骤 8 中的图像 2,3 Asus Zenbook UX303L Keyboard Replacement: 步骤 8 中的图像 3,3
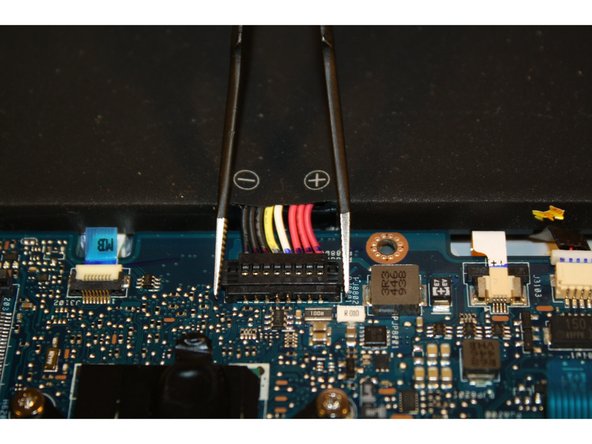
    • Unhook the black, red, and white switch using the tweezers.

    • Detach the positive and negative red, white, yellow, and black switch.

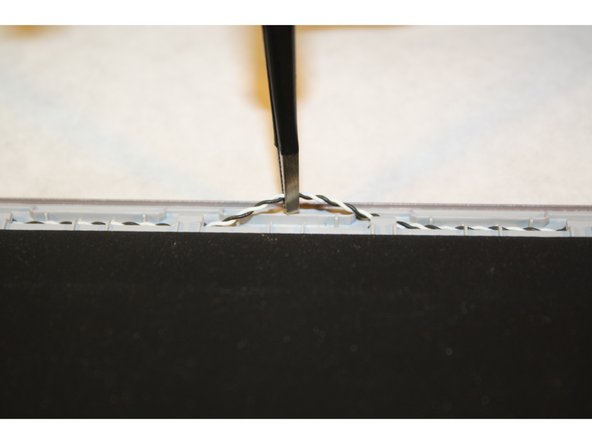
    • Unhook the black and white coiled wire.

    • Lift and remove the battery pack.

  9. Asus Zenbook UX303L Keyboard Replacement: 步骤 9 中的图像 1,3 Asus Zenbook UX303L Keyboard Replacement: 步骤 9 中的图像 2,3 Asus Zenbook UX303L Keyboard Replacement: 步骤 9 中的图像 3,3
    • Remove the three screws attaching the drive to the motherboard using a PH-1 screwdriver.

    • Gently lift and pull out the drive.

  10. Asus Zenbook UX303L Keyboard Replacement: 步骤 10 中的图像 1,2 Asus Zenbook UX303L Keyboard Replacement: 步骤 10 中的图像 2,2
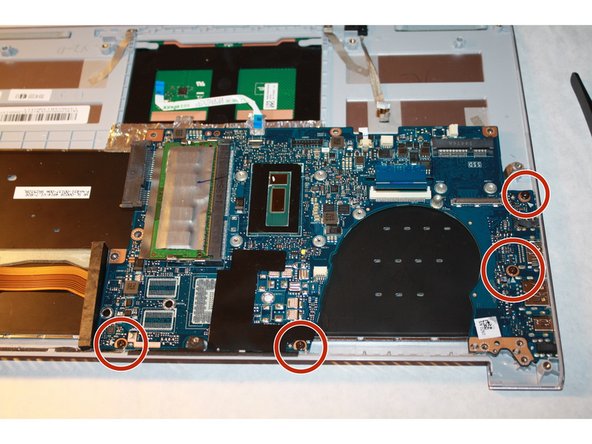
    • Remove the silver tape to free the fourth screw attaching the motherboard.

    • Remove the four screws attaching the motherboard using a PH-1 screwdriver.

  11. Asus Zenbook UX303L Keyboard Replacement: 步骤 11 中的图像 1,2 Asus Zenbook UX303L Keyboard Replacement: 步骤 11 中的图像 2,2
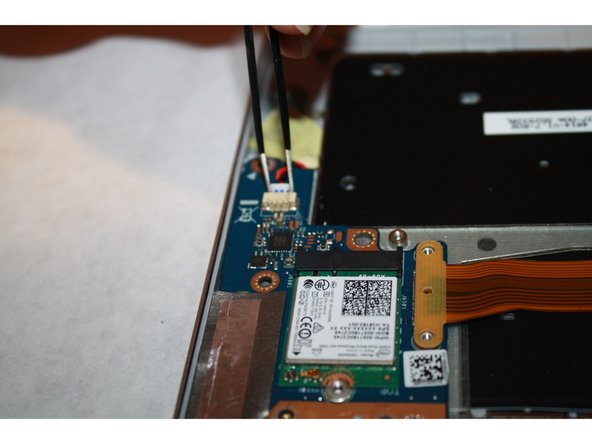
    • Detach the four wires connected to the motherboard using tweezers.

    • Gently lift up and pull out the motherboard.

  12. Asus Zenbook UX303L Keyboard Replacement: 步骤 12 中的图像 1,3 Asus Zenbook UX303L Keyboard Replacement: 步骤 12 中的图像 2,3 Asus Zenbook UX303L Keyboard Replacement: 步骤 12 中的图像 3,3
    • Remove the small piece of the motherboard on the lower left hand corner by removing the four screws using a PH-1 screwdriver.

    • Detach the black and red coiled wire from the motherboard using tweezers.

    • Gently lift and remove the small piece of the motherboard.

  13. Asus Zenbook UX303L Keyboard Replacement: 步骤 13 中的图像 1,2 Asus Zenbook UX303L Keyboard Replacement: 步骤 13 中的图像 2,2
    • Place the plastic opening tool under the corners of the keyboard and use it to detach the keyboard all around.

    • Gently lift and remove the keyboard from its place.

结论

To reassemble your device, follow these instructions in reverse order.

7等其他人完成本指南。

团队

8条评论

Please tell me where did you buy the keyboard replace, I am looking for it in order to do the replacement for an UX303L (with spanish or english layout with big enter key). Thanks.

Pm - 回复

Step 2: There are screws under the rubber pads (at least on the UX303L).

Peter Sutton - 回复

Step 9: Its removing the hard drive/SSD not RAM.

Peter Sutton - 回复

Step 13: Please show me how to remove the keyboard out. It will break some plastic to pull the keyboard out.

Thanks,

Quang

Quang Nguyen - 回复

Battery pack should be removed first (at least before step 3) in order to avoid possible power surge

Andrey Arkhipov - 回复

添加评论

浏览统计数据:

过去 24 小时: 5

过去 7 天: 14

过去 30 天: 70

总计 20,589