跳转到主内容

Asus ZenFone 5 Motherboard Replacement

已存档的指南
本指南只作为历史记录保留。请使用指南的最新版本来进行维修。

你所需要的

  1. Asus ZenFone 5 Motherboard Replacement, Battery: 步骤 1 中的图像 1,1
    • Heat up the iOpener in the microwave for 30 seconds.

    • Caution: when the iOpener is heated up, hold it by the sides to prevent bodily harm.

  2. Asus ZenFone 5 Motherboard Replacement: 步骤 2 中的图像 1,1
    • Place the iOpener on the side of the phone until the iOpener gets cool (approximately 10-15 minutes).

    • Reheat the iOpener and reapply it to the other side of the phone.

  3. Asus ZenFone 5 Motherboard Replacement: 步骤 3 中的图像 1,2 Asus ZenFone 5 Motherboard Replacement: 步骤 3 中的图像 2,2
    • Gently slide the jimmy along the edges of the phone to break the adhesive.

    • Use opening picks and the opening tool to pry the back cover off.

    • The use of metal tools as shown in the photos is potentially dangerous as the battery is exposed along the edges of the case and risk of puncture is high. Choose an ESD safe tool instead.

    • There are 6 different tabs on each side of the phone that might take force to get apart.

    • Repeat the heating and prying process until the back cover can be fully removed.

  4. Asus ZenFone 5 Motherboard Replacement: 步骤 4 中的图像 1,2 Asus ZenFone 5 Motherboard Replacement: 步骤 4 中的图像 2,2
    • Use the #00 phillips head to take out the six phillips #00 3.175mm screws on the top cover plate.

    • Use the spudger to release the clasps along the edge of the top plate.

  5. Asus ZenFone 5 Motherboard Replacement: 步骤 5 中的图像 1,1
    • Disconnect the press fit connector located near the upper right corner of the battery to disengage the battery from the motherboard.

  6. Asus ZenFone 5 Motherboard Replacement: 步骤 6 中的图像 1,2 Asus ZenFone 5 Motherboard Replacement: 步骤 6 中的图像 2,2
    • Use the same screwdriver to remove the five phillips #00 3.96mm screws along the bottom plate.

    • Use the spudger to pry the bottom plate off.

  7. Asus ZenFone 5 Motherboard Replacement: 步骤 7 中的图像 1,2 Asus ZenFone 5 Motherboard Replacement: 步骤 7 中的图像 2,2
    • Pull on the two black tabs on the bottom of the battery until the battery is released.

    • Gently pull the battery out of its socket.

  8. Asus ZenFone 5 Motherboard Replacement, Front Camera: 步骤 8 中的图像 1,3 Asus ZenFone 5 Motherboard Replacement, Front Camera: 步骤 8 中的图像 2,3 Asus ZenFone 5 Motherboard Replacement, Front Camera: 步骤 8 中的图像 3,3
    在这个步骤中使用的工具:
    Tweezers
    $4.99
    购买
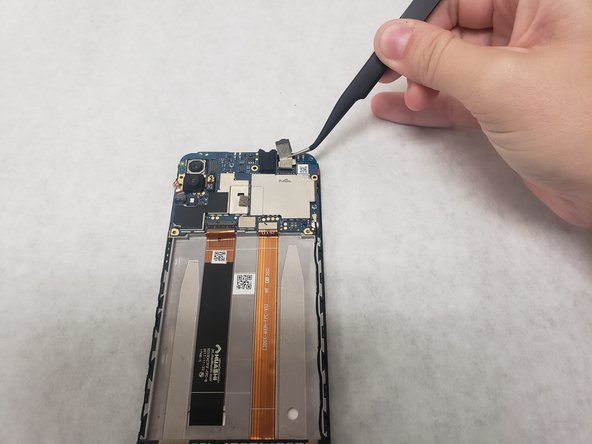
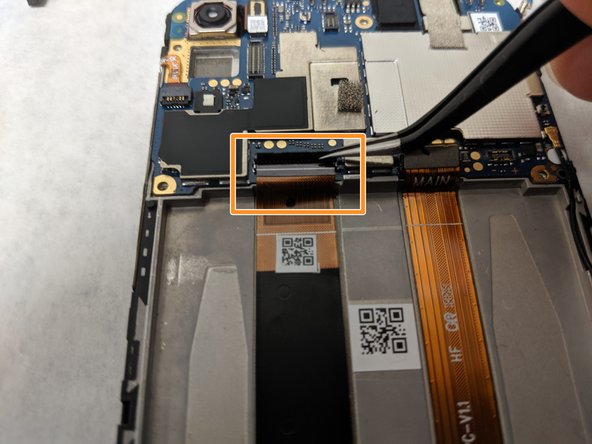
    • Peel off the silver tape that is to the right of the audio jack about halfway, so it is off of the silver plate.

    • Use the tweezers to disconnect the press fit connector underneath the tape, right above the silver plate.

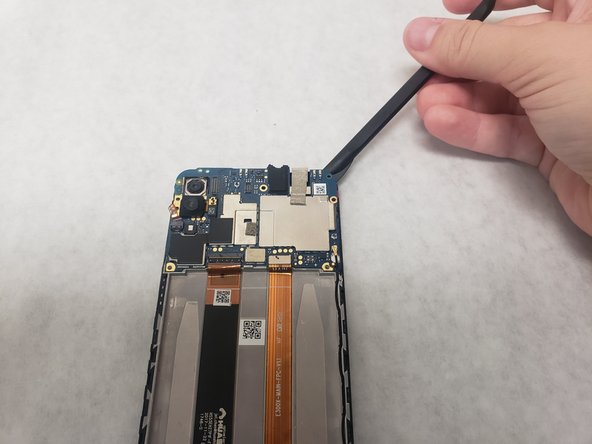
    • Gently lift up until the camera and the connector is removed.

  9. Asus ZenFone 5 Motherboard Replacement, Motherboard: 步骤 9 中的图像 1,3 Asus ZenFone 5 Motherboard Replacement, Motherboard: 步骤 9 中的图像 2,3 Asus ZenFone 5 Motherboard Replacement, Motherboard: 步骤 9 中的图像 3,3
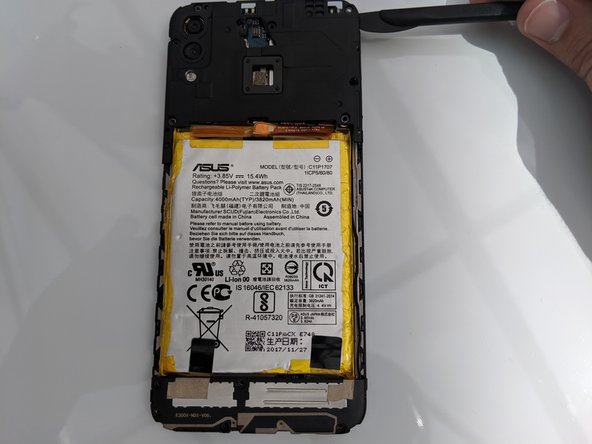
    • Right above the battery socket, pop up the press fit connector at the end of the orange ribbon cable on the right.

    • Pry up the tab of the ZIF connector on the left to disengage the locking connector.

    • Gently pull out the ribbon cable going into the opening created by lifting the tab.

  10. Asus ZenFone 5 Motherboard Replacement: 步骤 10 中的图像 1,3 Asus ZenFone 5 Motherboard Replacement: 步骤 10 中的图像 2,3 Asus ZenFone 5 Motherboard Replacement: 步骤 10 中的图像 3,3
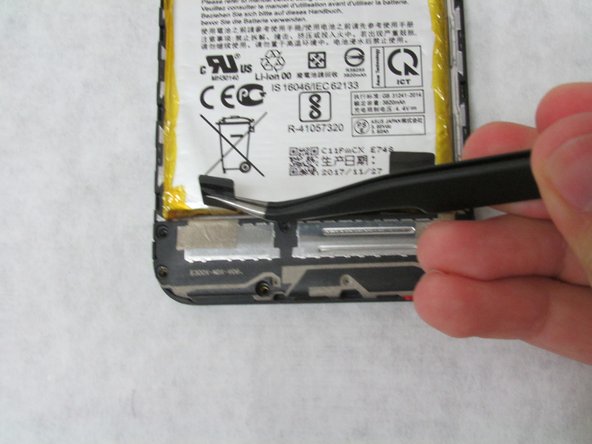
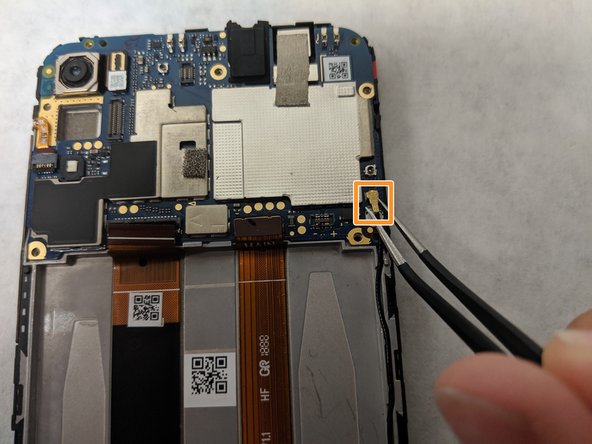
    • Pull the tab that is located to the left of the camera button, adjacent to the volume up button.

    • Pull out the gold headed coaxial cable on the bottom right of the motherboard.

    • Use the screwdriver to take out the one Phillips #00 head 3.175mm screw located directly to the right of the silver plate.

  11. Asus ZenFone 5 Motherboard Replacement: 步骤 11 中的图像 1,3 Asus ZenFone 5 Motherboard Replacement: 步骤 11 中的图像 2,3 Asus ZenFone 5 Motherboard Replacement: 步骤 11 中的图像 3,3
    • Pry off the tab to the right of the camera.

    • Use the spudger to pry off the motherboard around its edges.

    • The motherboard is brittle, so it can break if too much force is used.

结论

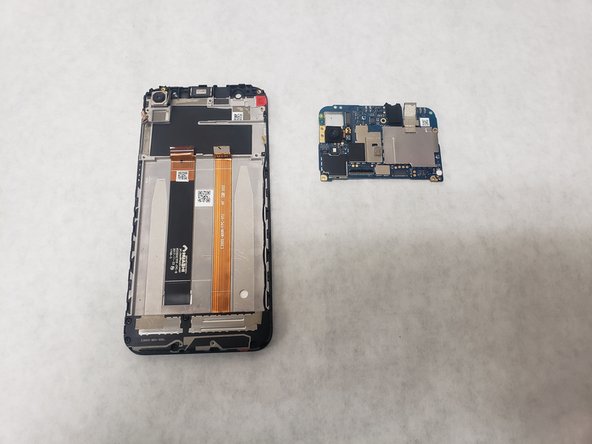
To reassemble your device, follow these instructions in reverse order.

另外一个人完成了本指南。

0条评论

添加评论

浏览统计数据:

过去 24 小时: 0

过去 7 天: 1

过去 30 天: 2

总计 1,663