跳转到主内容

Asus X751MA-DH01TQ Fan Replacement

你所需要的

  1. Asus X751MA-DH01TQ Fan Replacement, Fan: 步骤 1 中的图像 1,2 Asus X751MA-DH01TQ Fan Replacement, Fan: 步骤 1 中的图像 2,2
    • Turn the laptop upside down.

    • Remove all ten screws using a 00 Phillips head screwdriver.

  2. Asus X751MA-DH01TQ Fan Replacement: 步骤 2 中的图像 1,1
    • Use a plastic opening tool to take the keyboard off of the base.

    • Gently take off the keyboard from the base.

  3. Asus X751MA-DH01TQ Fan Replacement: 步骤 3 中的图像 1,2 Asus X751MA-DH01TQ Fan Replacement: 步骤 3 中的图像 2,2
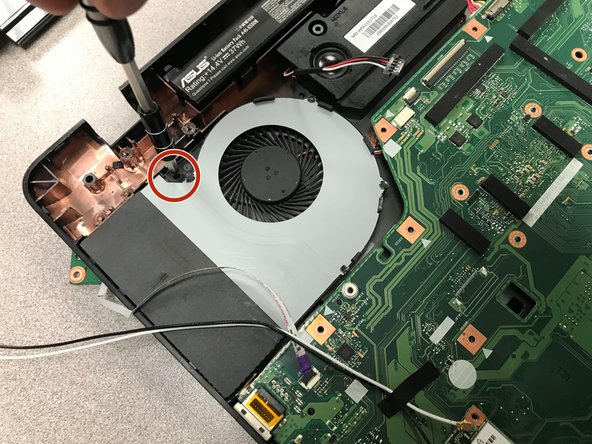
    • Remove the two screws directly above the fan.

  4. Asus X751MA-DH01TQ Fan Replacement: 步骤 4 中的图像 1,2 Asus X751MA-DH01TQ Fan Replacement: 步骤 4 中的图像 2,2
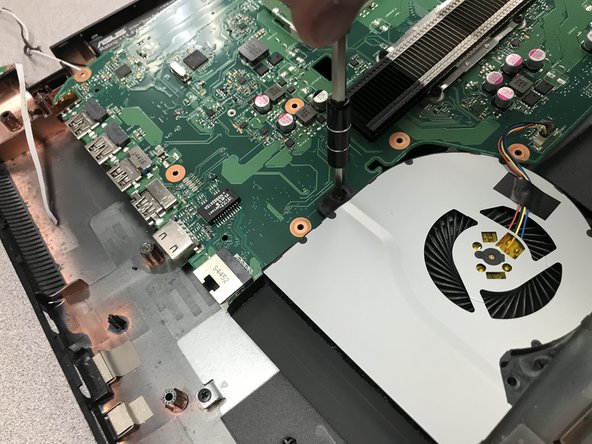
    • Unscrew the 11 screws that hold the motherboard to the base of the computer with a 00 Phillips screwdriver.

  5. Asus X751MA-DH01TQ Fan Replacement: 步骤 5 中的图像 1,2 Asus X751MA-DH01TQ Fan Replacement: 步骤 5 中的图像 2,2
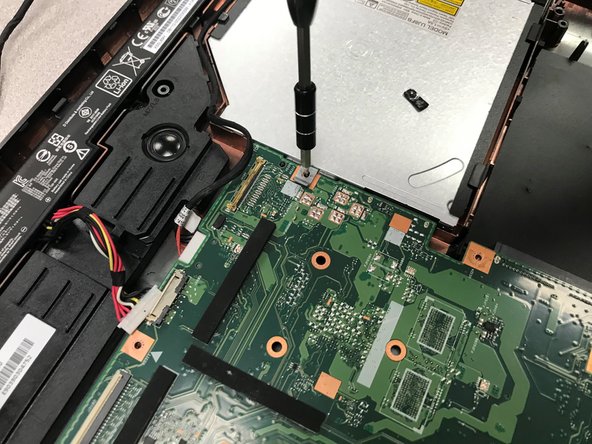
    • Remove the one screw on the right side of the motherboard that keeps the cd tray in place.

  6. Asus X751MA-DH01TQ Fan Replacement: 步骤 6 中的图像 1,2 Asus X751MA-DH01TQ Fan Replacement: 步骤 6 中的图像 2,2
    • Gently take the motherboard off the base and flip it over.

    • Remove the screws securing the fan to the motherboard.

  7. Asus X751MA-DH01TQ Fan Replacement: 步骤 7 中的图像 1,2 Asus X751MA-DH01TQ Fan Replacement: 步骤 7 中的图像 2,2
    • Remove the Phillips #00 screw that holds the fan to the motherboard.

  8. Asus X751MA-DH01TQ Fan Replacement: 步骤 8 中的图像 1,2 Asus X751MA-DH01TQ Fan Replacement: 步骤 8 中的图像 2,2
    • On the bottom of the motherboard, locate the wire plugged in and pull it out to completely detach the fan from the motherboard.

结论

To reassemble your device, follow these instructions in reverse order.

另外一个人完成了本指南。

0条评论

添加评论

浏览统计数据:

过去 24 小时: 0

过去 7 天: 4

过去 30 天: 6

总计 348