跳转到主内容

Asus X550CA RAM Replacement

你所需要的

  1. Asus X550CA RAM Replacement, Turning off your Computer: 步骤 1 中的图像 1,3 Asus X550CA RAM Replacement, Turning off your Computer: 步骤 1 中的图像 2,3 Asus X550CA RAM Replacement, Turning off your Computer: 步骤 1 中的图像 3,3
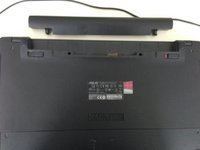
    • Please make sure that your computer is fully Shut Down, so that the lights on the bottom of the computer are all of (Picture 2) and the Power Cord is unplugged.

  2. Asus X550CA RAM Replacement, Unplugging the Battery: 步骤 2 中的图像 1,3 Asus X550CA RAM Replacement, Unplugging the Battery: 步骤 2 中的图像 2,3 Asus X550CA RAM Replacement, Unplugging the Battery: 步骤 2 中的图像 3,3
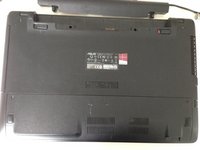
    • Spread the 2 clips on each side of the battery out, the one on the right should lock, and you will need to hold the one on the left while you pull the battery out. See the pictures for more details.

  3. Asus X550CA RAM Replacement, Starting with the Screwdriver: 步骤 3 中的图像 1,1
    • You now need to use a screwdriver. I use the PH00 head of the iFixit 64 Bit driver kit.

    • Shown is bits from the 54 bit driver kit, not sold anymore. you can now get the 64 bit kit only.

  4. Asus X550CA RAM Replacement, Unscrewing the User Accessible Area: 步骤 4 中的图像 1,2 Asus X550CA RAM Replacement, Unscrewing the User Accessible Area: 步骤 4 中的图像 2,2
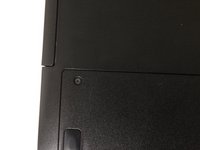
    • There are 2 screws on each side of the bottom of the computer. These are above the bottom 2 feet. They are quite long.

  5. Asus X550CA RAM Replacement, Taking off the Bottom: 步骤 5 中的图像 1,2 Asus X550CA RAM Replacement, Taking off the Bottom: 步骤 5 中的图像 2,2
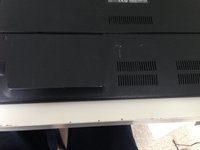
    • The bottom is held on by clips. Pull back and then up to remove the plastic shell.

  6. Asus X550CA RAM Replacement, Taking out the RAM: 步骤 6 中的图像 1,3 Asus X550CA RAM Replacement, Taking out the RAM: 步骤 6 中的图像 2,3 Asus X550CA RAM Replacement, Taking out the RAM: 步骤 6 中的图像 3,3
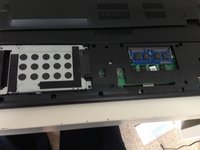
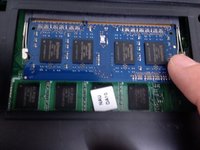
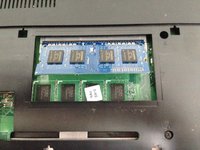
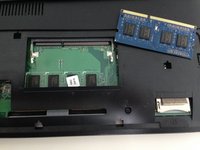
    • To take out the RAM, locate the RAM Stick (SODIMM) towards the right of the computer. Spread the clips on either side of the stick and the RAM stick should pop up. You can then pull out, and replace.

    • To reinstall, insert the new RAM stick at a slight angle (about 45 degrees). Push in and down to seat the RAM Correctly. Then just install the back panel.

结论

To reassemble your device, follow these instructions in reverse order.

5等其他人完成本指南。

Leo Carr

于10/19/15注册

346 声望

撰写一个指南

2条评论

What is maximum memory for an ASUS X550CA?

Ben Bullard - 回复

Mine came standard with 8GB, and I found that one of the sticks was soldered to the motherboard. I think it only takes 8GB sticks, so therefore the maximum memory is 12GB.

Leo Carr -

添加评论

浏览统计数据:

过去 24 小时: 1

过去 7 天: 10

过去 30 天: 33

总计 6,843