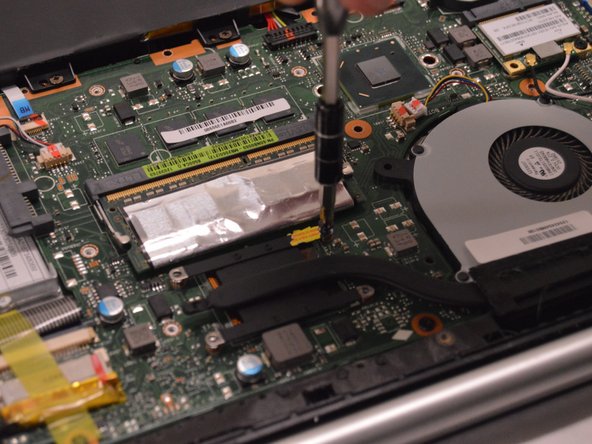
跳转到主内容

Asus Vivobook S500CA Fan Replacement

你所需要的

  1. Asus Vivobook S500CA Fan Replacement, Cooling Fan: 步骤 1 中的图像 1,1
    • Turn the device over so the back plate is facing up.

  2. Asus Vivobook S500CA Fan Replacement: 步骤 2 中的图像 1,1
    • Use a Phillips Head PH1 screwdriver to remove 10 screws around the perimeter of the back plate.

    • It may be helpful to lay out the screws in the orientation in which they are taken out, in order to help remember where they go.

  3. Asus Vivobook S500CA Fan Replacement: 步骤 3 中的图像 1,1
    • Remove the back plate by lifting it straight up.

  4. Asus Vivobook S500CA Fan Replacement: 步骤 4 中的图像 1,2 Asus Vivobook S500CA Fan Replacement: 步骤 4 中的图像 2,2
    • Remove 2 (.5 cm) Phillips Head screws found around the fan and 4 (.3 cm) Phillips Head screws found around the heat sink connector.

  5. Asus Vivobook S500CA Fan Replacement: 步骤 5 中的图像 1,1
    • Unhook the electronic connection located above the fan by pulling the white connector straight out of the brown socket.

    • This photo is for demonstration purposes only. Do not remove by pulling the wires. Instead, remove by pulling on the edges of the white socket.

  6. Asus Vivobook S500CA Fan Replacement: 步骤 6 中的图像 1,1
    • Remove the fan and connected heat sink by lifting straight out of the assembly.

  7. Asus Vivobook S500CA Fan Replacement: 步骤 7 中的图像 1,1
    • Replace fan and follow steps 1-5 in reverse order to complete repair.

结论

To reassemble your device, follow these instructions in reverse order.

另外一个人完成了本指南。

0条评论

添加评论

浏览统计数据:

过去 24 小时: 0

过去 7 天: 0

过去 30 天: 7

总计 1,787