跳转到主内容

Asus V6800V Fan Replacement

你所需要的

  1. Asus V6800V Fan Replacement, Battery: 步骤 1 中的图像 1,2 Asus V6800V Fan Replacement, Battery: 步骤 1 中的图像 2,2
    • Place the computer upside down.

    • Using your thumbs, slide both latches away from each other (towards the outside).

    • Push the battery out with your fingers.

    • The actual battery is not pictured.

  2. Asus V6800V Fan Replacement, Fan: 步骤 2 中的图像 1,2 Asus V6800V Fan Replacement, Fan: 步骤 2 中的图像 2,2
    • Use the Phillips #0 to remove the six screws on the back of the device.

    • Gently open the cover using the tab located by the highlighted box.

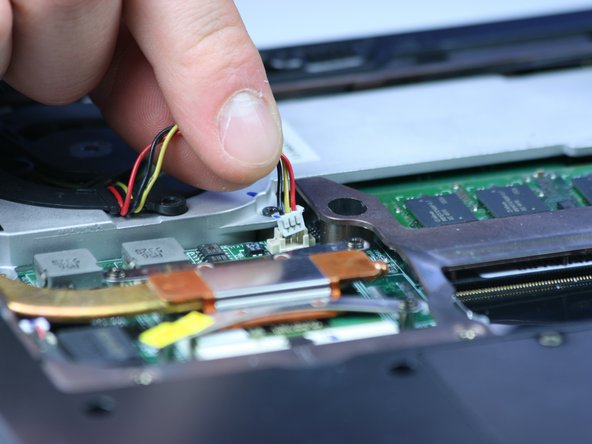
  3. Asus V6800V Fan Replacement: 步骤 3 中的图像 1,2 Asus V6800V Fan Replacement: 步骤 3 中的图像 2,2
    • Unplug the wires by pulling straight up on the white connector and away from the computer.

    • Make sure not to pull on the wires (as shown in the second picture). The white connector should pop off with very little force.

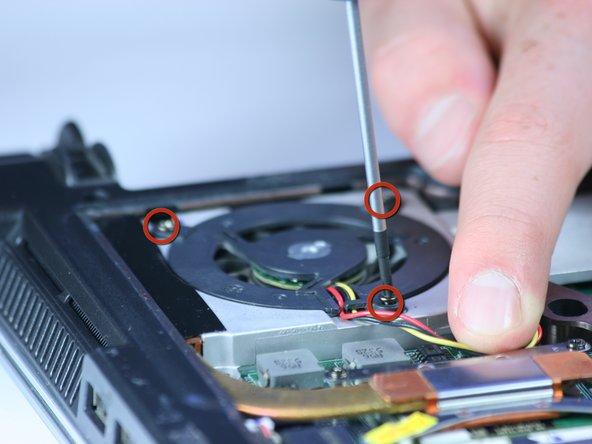
  4. Asus V6800V Fan Replacement: 步骤 4 中的图像 1,2 Asus V6800V Fan Replacement: 步骤 4 中的图像 2,2
    • Use a Phillips #0 to remove the three screws holding the fan in place.

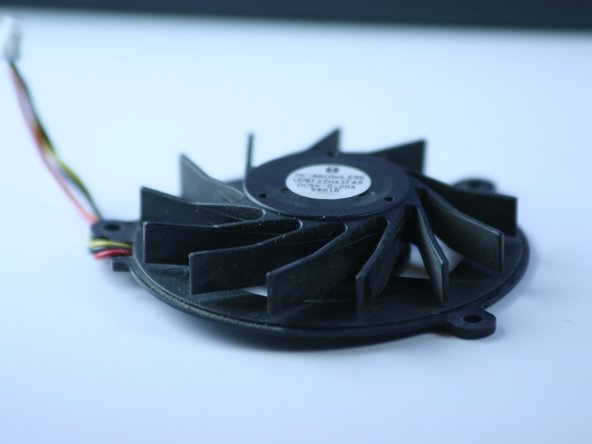
  5. Asus V6800V Fan Replacement: 步骤 5 中的图像 1,2 Asus V6800V Fan Replacement: 步骤 5 中的图像 2,2
    • Remove the fan from the device.

    • The fan should remove easily.

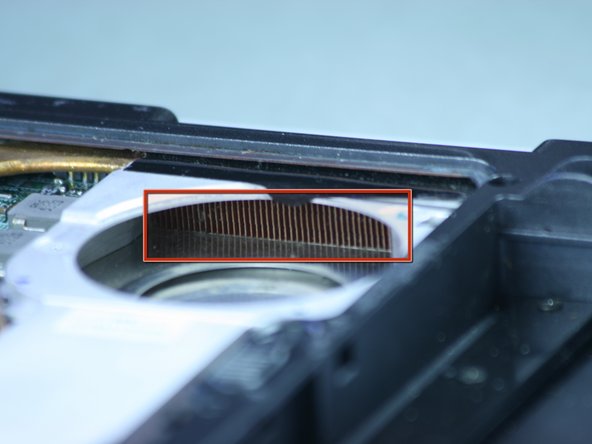
  6. Asus V6800V Fan Replacement: 步骤 6 中的图像 1,2 Asus V6800V Fan Replacement: 步骤 6 中的图像 2,2
    • Use a cotton swab or compressed air to blow air from the inside, out to clear dust from the vent or heat sink.

结论

To reassemble your device, follow these instructions in reverse order.

Jong Park

于06/24/10注册

114 声望

创作了5篇指南

团队

Cal Poly, Team 2-9, Johann Summer 2010 Cal Poly, Team 2-9, Johann Summer 2010 的会员

CPSU-JOHANN-R10S2G9

5 名成员

创作了10篇指南

0条评论

添加评论

浏览统计数据:

过去 24 小时: 0

过去 7 天: 1

过去 30 天: 2

总计 4,949