跳转到主内容

Asus Transformer Pad Infinity Rear/Front Facing Camera Replacement

你所需要的

  1. Asus Transformer Pad Infinity Rear/Front Facing Camera Replacement, Asus Transformer Pad Infinity Teardown: 步骤 1 中的图像 1,1
    • First, turn the power off

  2. Asus Transformer Pad Infinity Rear/Front Facing Camera Replacement: 步骤 2 中的图像 1,3 Asus Transformer Pad Infinity Rear/Front Facing Camera Replacement: 步骤 2 中的图像 2,3 Asus Transformer Pad Infinity Rear/Front Facing Camera Replacement: 步骤 2 中的图像 3,3
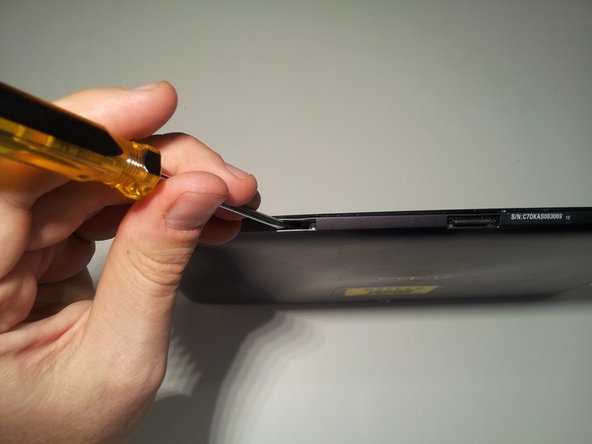
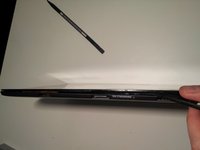
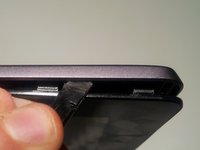
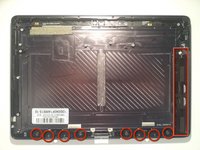
    • Insert a small flat head screwdriver into the 2 docking station guide ports on the bottom of the tablet.

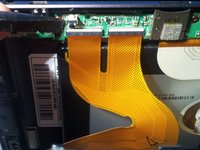
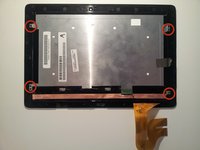
    • Unlock screen casing tabs

    • Push tab with screwdriver to the right until it clicks

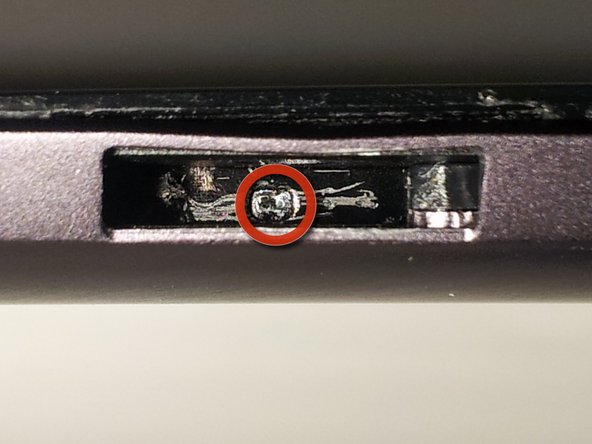
    • You should see a small arrow in the bottom of the port

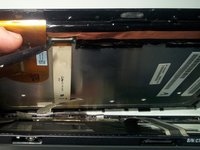
    • Unlock the tabs in both docking station guide ports.

  3. Asus Transformer Pad Infinity Rear/Front Facing Camera Replacement: 步骤 3 中的图像 1,3 Asus Transformer Pad Infinity Rear/Front Facing Camera Replacement: 步骤 3 中的图像 2,3 Asus Transformer Pad Infinity Rear/Front Facing Camera Replacement: 步骤 3 中的图像 3,3
    • Use spudger to push upward on the small plastic tabs on top of the docking station guide ports.

    • Insert the flat side of another spudger to start freeing the bottom of the screen from the case.

  4. Asus Transformer Pad Infinity Rear/Front Facing Camera Replacement: 步骤 4 中的图像 1,3 Asus Transformer Pad Infinity Rear/Front Facing Camera Replacement: 步骤 4 中的图像 2,3 Asus Transformer Pad Infinity Rear/Front Facing Camera Replacement: 步骤 4 中的图像 3,3
    • Use your spudger to open the four plastic tabs located on either side of the tablet.

    • These tabs are very fragile.

    • Remove the screen from the body

  5. Asus Transformer Pad Infinity Rear/Front Facing Camera Replacement: 步骤 5 中的图像 1,2 Asus Transformer Pad Infinity Rear/Front Facing Camera Replacement: 步骤 5 中的图像 2,2
    • There is an internal power switch next to the battery connector, that will kill power to the entire device while you're working on it.

    • Don't forget to switch it back on when you're reassembling!

  6. Asus Transformer Pad Infinity Rear/Front Facing Camera Replacement: 步骤 6 中的图像 1,3 Asus Transformer Pad Infinity Rear/Front Facing Camera Replacement: 步骤 6 中的图像 2,3 Asus Transformer Pad Infinity Rear/Front Facing Camera Replacement: 步骤 6 中的图像 3,3
    • Use your spudger to release the two digitizer ribbon cables from the mainboard.

    • Located on the left side of the tablet between the micro-HDMI and the microSD slot.

    • Use your spudger to release the LCD cable from the back of the LCD.

    • Set aside for later dissection.

  7. Asus Transformer Pad Infinity Rear/Front Facing Camera Replacement: 步骤 7 中的图像 1,3 Asus Transformer Pad Infinity Rear/Front Facing Camera Replacement: 步骤 7 中的图像 2,3 Asus Transformer Pad Infinity Rear/Front Facing Camera Replacement: 步骤 7 中的图像 3,3
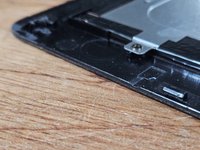
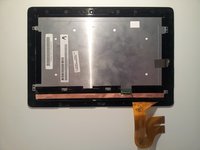
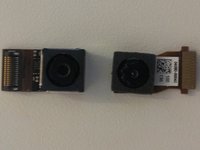
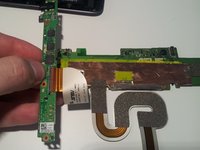
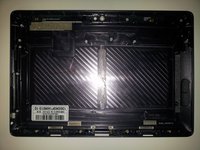
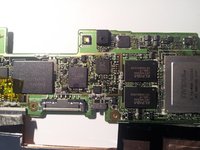
    • To remove the front facing camera (right):

    • Use your spudger to unlock the ribbon cable

    • Slide the camera out

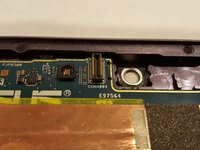
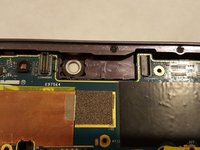
    • To remove the rear facing camera (top):

    • Apply light lifting pressure to unplug it from it's socket

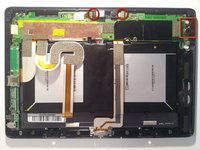
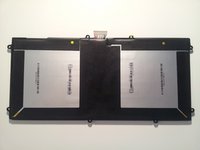
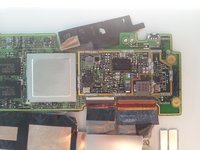
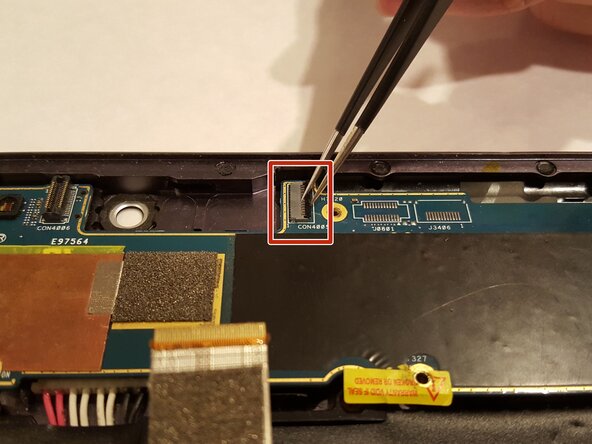
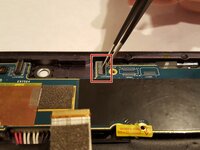
    • Remove the backup battery on the right side:

    • Unplug the cable from the motherboard with your spudger

  8. Asus Transformer Pad Infinity Rear/Front Facing Camera Replacement: 步骤 8 中的图像 1,3 Asus Transformer Pad Infinity Rear/Front Facing Camera Replacement: 步骤 8 中的图像 2,3 Asus Transformer Pad Infinity Rear/Front Facing Camera Replacement: 步骤 8 中的图像 3,3
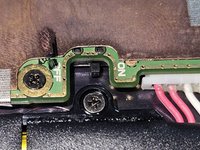
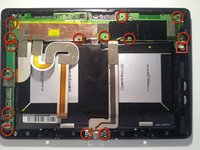
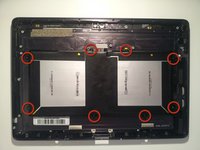
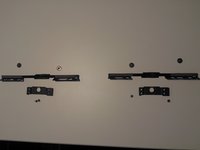
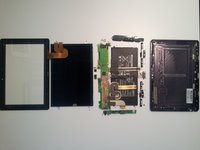
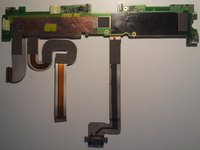
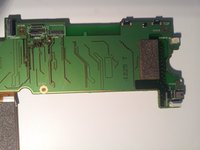
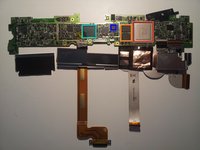
    • Remove the motherboard, daughterboard, and dock connector

    • Unscrew 14 points

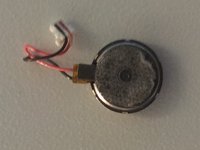
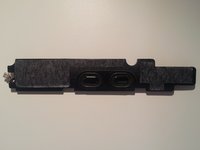
    • Unplug the speaker from the motherboard before removing it

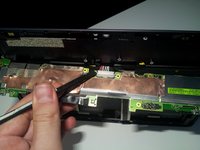
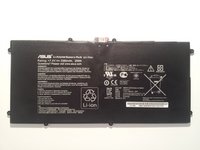
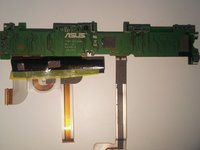
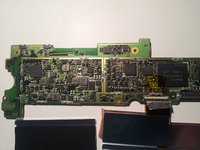
    • Reveal the battery connector:

    • Flip the motherboard from the top edge of the tablet down (towards the battery).

    • Unplug with light pressure from your spudger.

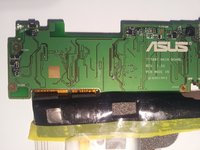
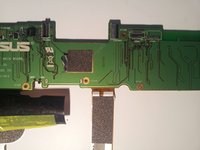
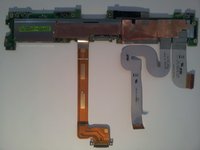
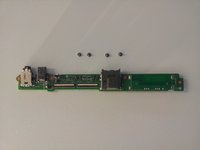
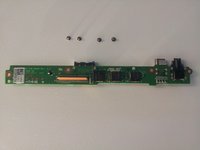
    • Disconnect the motherboard from the daughterboard:

    • Unlock the ribbon cable on the back side of the daughterboard

  9. Asus Transformer Pad Infinity Rear/Front Facing Camera Replacement: 步骤 9 中的图像 1,3 Asus Transformer Pad Infinity Rear/Front Facing Camera Replacement: 步骤 9 中的图像 2,3 Asus Transformer Pad Infinity Rear/Front Facing Camera Replacement: 步骤 9 中的图像 3,3
    • Remove the battery:

    • Remove screws (eight)

    • Use your spudger underneath the battery between the 2 cells to work it free

  10. Asus Transformer Pad Infinity Rear/Front Facing Camera Replacement: 步骤 10 中的图像 1,3 Asus Transformer Pad Infinity Rear/Front Facing Camera Replacement: 步骤 10 中的图像 2,3 Asus Transformer Pad Infinity Rear/Front Facing Camera Replacement: 步骤 10 中的图像 3,3
    • Remove the speaker:

    • Use your spudger underneath, and work it free

    • Remove the bottom screen locking mechanism:

    • Remove screws (eight)

    • Lift pieces out

  11. Asus Transformer Pad Infinity Rear/Front Facing Camera Replacement: 步骤 11 中的图像 1,3 Asus Transformer Pad Infinity Rear/Front Facing Camera Replacement: 步骤 11 中的图像 2,3 Asus Transformer Pad Infinity Rear/Front Facing Camera Replacement: 步骤 11 中的图像 3,3
    • Now that we're left with a boring empty shell, let's return to the LCD assembly that we set aside in Step 5.

    • Remove the 4 screws. Then work your spudger underneath the edges of the LCD to separate it from the Gorilla Glass front. It has a light adhesive around all edges.

  12. Asus Transformer Pad Infinity Rear/Front Facing Camera Replacement: 步骤 12 中的图像 1,2 Asus Transformer Pad Infinity Rear/Front Facing Camera Replacement: 步骤 12 中的图像 2,2
    • With the LCD free, you should now be able to lay it out in a big pile of parts and the teardown is complete. Now let's see what's under all those heatsinks and tape.

  13. Asus Transformer Pad Infinity Rear/Front Facing Camera Replacement: 步骤 13 中的图像 1,2 Asus Transformer Pad Infinity Rear/Front Facing Camera Replacement: 步骤 13 中的图像 2,2
    • The back side of the motherboard

  14. Asus Transformer Pad Infinity Rear/Front Facing Camera Replacement: 步骤 14 中的图像 1,3 Asus Transformer Pad Infinity Rear/Front Facing Camera Replacement: 步骤 14 中的图像 2,3 Asus Transformer Pad Infinity Rear/Front Facing Camera Replacement: 步骤 14 中的图像 3,3
    • Motherboard backside closeups

  15. Asus Transformer Pad Infinity Rear/Front Facing Camera Replacement: 步骤 15 中的图像 1,2 Asus Transformer Pad Infinity Rear/Front Facing Camera Replacement: 步骤 15 中的图像 2,2
    • The front side of the motherboard is where all the action is.

    • Tegra 3 quad core processor T33-P-A3

    • 2x Elpida memory J4216EBBG-GNL-F

    • Realtek? ALCS631

    • Hynix H26M64002BNR e-NAND

  16. Asus Transformer Pad Infinity Rear/Front Facing Camera Replacement: 步骤 16 中的图像 1,3 Asus Transformer Pad Infinity Rear/Front Facing Camera Replacement: 步骤 16 中的图像 2,3 Asus Transformer Pad Infinity Rear/Front Facing Camera Replacement: 步骤 16 中的图像 3,3
    • Front side motherboard closeups

  17. Asus Transformer Pad Infinity Rear/Front Facing Camera Replacement: 步骤 17 中的图像 1,2 Asus Transformer Pad Infinity Rear/Front Facing Camera Replacement: 步骤 17 中的图像 2,2
    • Front and back of the daughterboard.

  18. Asus Transformer Pad Infinity Rear/Front Facing Camera Replacement: 步骤 18 中的图像 1,2 Asus Transformer Pad Infinity Rear/Front Facing Camera Replacement: 步骤 18 中的图像 2,2
    • The back of the LCD.

  19. Asus Transformer Pad Infinity Rear/Front Facing Camera Replacement: 步骤 19 中的图像 1,3 Asus Transformer Pad Infinity Rear/Front Facing Camera Replacement: 步骤 19 中的图像 2,3 Asus Transformer Pad Infinity Rear/Front Facing Camera Replacement: 步骤 19 中的图像 3,3
    • Close-ups.

    • That's all I've got. I apologize for any blurry pics as all I had on hand was my cell phone ( <3 Samsung Galaxy Note.) I hope your teardowns are far less destructive than mine was. Good Luck.

    • ...and yes, it still works after reassembly. Thanks for asking.

  20. Asus Transformer Pad Infinity Rear/Front Facing Camera Replacement, Rear/Front Facing Camera: 步骤 20 中的图像 1,1
    • Disconnect the camera connectors from the board.

  21. Asus Transformer Pad Infinity Rear/Front Facing Camera Replacement: 步骤 21 中的图像 1,3 Asus Transformer Pad Infinity Rear/Front Facing Camera Replacement: 步骤 21 中的图像 2,3 Asus Transformer Pad Infinity Rear/Front Facing Camera Replacement: 步骤 21 中的图像 3,3
    • Flip the pieces that secure the ribbons to the motherboard up. This is for the front facing camera.

    • Before removing the ribbon connectors, check for a release mechanism. Also make sure it is not a ZIF connector. Doing so can help prevent permanet damage.

    • Take out the ribbon connected to the motherboard. Pull the ribbon cable straight out of the soket to disconnect them.

    • Only follow what is needed for the camera you are replacing. If both cameras need replacement, do both steps. Otherwise, follow the one designated for the camera you need to replace.

    • The first photo shows the overall image. The second photo shows the step for the front-facing camera. The third photo shows the step for the rear camera.

  22. Asus Transformer Pad Infinity Rear/Front Facing Camera Replacement: 步骤 22 中的图像 1,1
    • Take the both cameras out of tablet.

结论

To reassemble your device, follow these instructions in reverse order. Take your e-waste to an R2 or e-Stewards certified recycler.

Allison Poh

于10/20/15注册

549 声望

创作了5篇指南

团队

UMass Dartmouth, Team 5-1, Gulbrandsen Fall 2015 UMass Dartmouth, Team 5-1, Gulbrandsen Fall 2015 的会员

UMASSD-GULBRANDSEN-F15S5G1

3 名成员

创作了10篇指南

0指南评论

添加评论

浏览统计数据:

过去 24 小时: 1

过去 7 天: 2

过去 30 天: 14

总计 494