跳转到主内容

Asus ROG G751JL-DS71 Left and Right Track Pad Buttons Replacement

你所需要的

  1. Asus ROG G751JL-DS71 Left and Right Track Pad Buttons Replacement, Left and Right Track Pad Buttons: 步骤 1 中的图像 1,2 Asus ROG G751JL-DS71 Left and Right Track Pad Buttons Replacement, Left and Right Track Pad Buttons: 步骤 1 中的图像 2,2
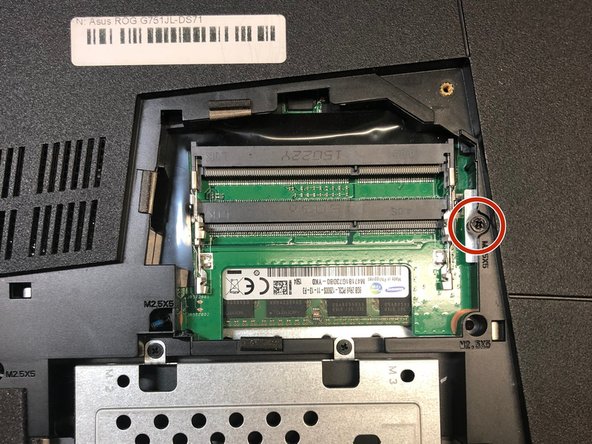
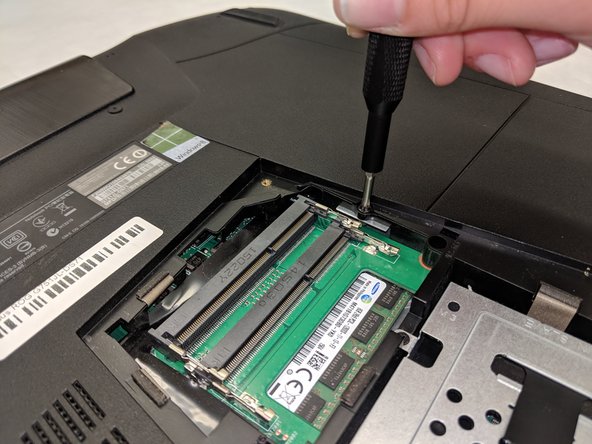
    • Lift the rubber cover found on the bottom of the laptop.

    • Remove the 5.2 mm screw with a Phillips 1 Screwdriver.

  2. Asus ROG G751JL-DS71 Left and Right Track Pad Buttons Replacement: 步骤 2 中的图像 1,3 Asus ROG G751JL-DS71 Left and Right Track Pad Buttons Replacement: 步骤 2 中的图像 2,3 Asus ROG G751JL-DS71 Left and Right Track Pad Buttons Replacement: 步骤 2 中的图像 3,3
    • Use the standard spudger to remove the back center panel.

  3. Asus ROG G751JL-DS71 Left and Right Track Pad Buttons Replacement: 步骤 3 中的图像 1,3 Asus ROG G751JL-DS71 Left and Right Track Pad Buttons Replacement: 步骤 3 中的图像 2,3 Asus ROG G751JL-DS71 Left and Right Track Pad Buttons Replacement: 步骤 3 中的图像 3,3
    • Use a Phillips 1 Screwdriver to remove the 5 mm screw that is located underneath the back panel.

  4. Asus ROG G751JL-DS71 Left and Right Track Pad Buttons Replacement: 步骤 4 中的图像 1,2 Asus ROG G751JL-DS71 Left and Right Track Pad Buttons Replacement: 步骤 4 中的图像 2,2
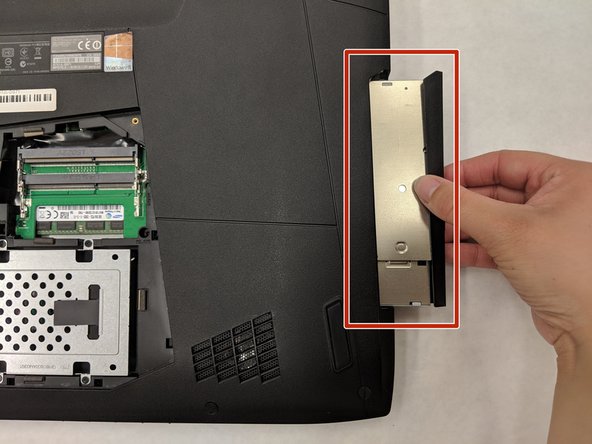
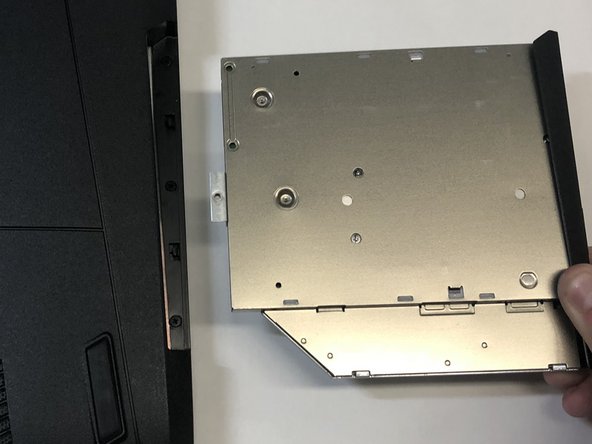
    • Pull out the optical drive found on the side of the laptop.

  5. Asus ROG G751JL-DS71 Left and Right Track Pad Buttons Replacement: 步骤 5 中的图像 1,3 Asus ROG G751JL-DS71 Left and Right Track Pad Buttons Replacement: 步骤 5 中的图像 2,3 Asus ROG G751JL-DS71 Left and Right Track Pad Buttons Replacement: 步骤 5 中的图像 3,3
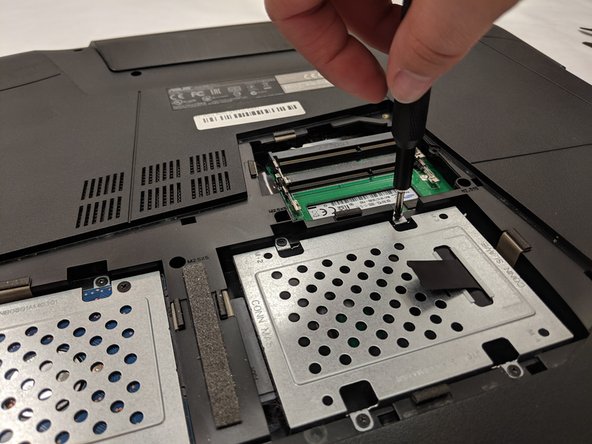
    • Remove the screws holding the hard drives in place using a Phillips 1 screwdriver.

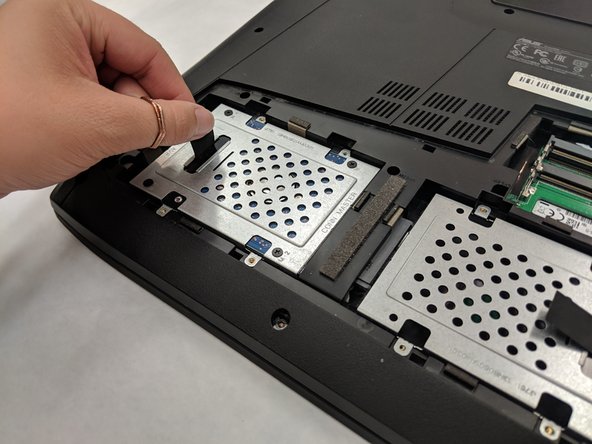
    • Using the small flaps, remove the hard drives by hand.

  6. Asus ROG G751JL-DS71 Left and Right Track Pad Buttons Replacement: 步骤 6 中的图像 1,2 Asus ROG G751JL-DS71 Left and Right Track Pad Buttons Replacement: 步骤 6 中的图像 2,2
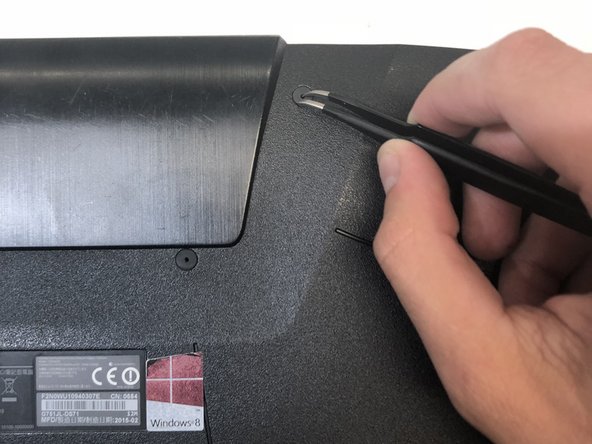
    • Use a pair of tweezers to remove the top four rubber stoppers found on the bottom of the laptop.

  7. Asus ROG G751JL-DS71 Left and Right Track Pad Buttons Replacement: 步骤 7 中的图像 1,2 Asus ROG G751JL-DS71 Left and Right Track Pad Buttons Replacement: 步骤 7 中的图像 2,2
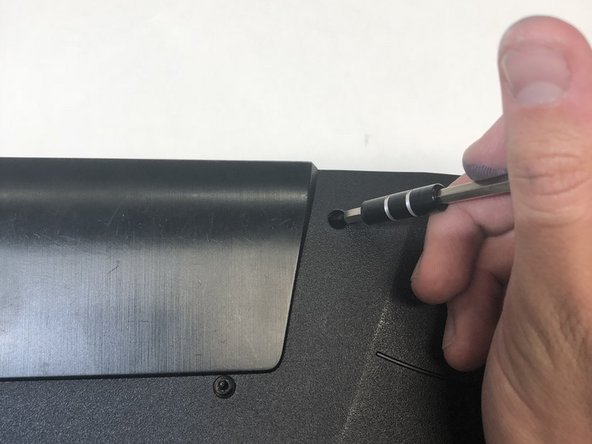
    • Use a Phillips 1 Screwdriver to remove the top four 8.5 mm screws.

  8. Asus ROG G751JL-DS71 Left and Right Track Pad Buttons Replacement: 步骤 8 中的图像 1,3 Asus ROG G751JL-DS71 Left and Right Track Pad Buttons Replacement: 步骤 8 中的图像 2,3 Asus ROG G751JL-DS71 Left and Right Track Pad Buttons Replacement: 步骤 8 中的图像 3,3
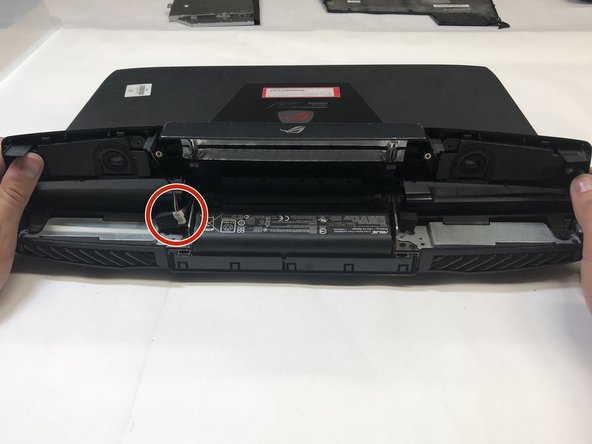
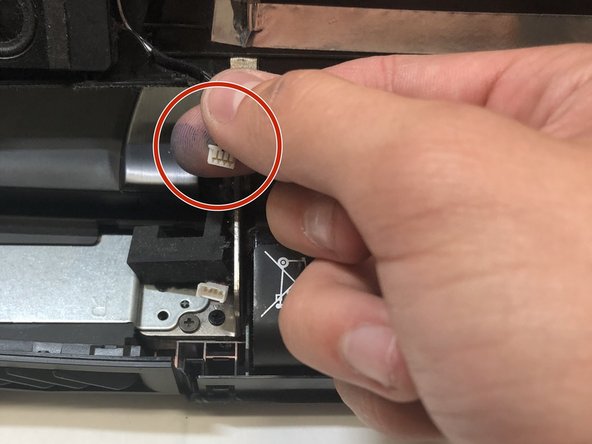
    • Use a metal spudger to carefully pry the top back panel off.

    • While removing the top back panel, be careful not to break the four pin connector located underneath.

    • Disconnect the four-pin connector and remove the top back panel from the computer.

  9. Asus ROG G751JL-DS71 Left and Right Track Pad Buttons Replacement: 步骤 9 中的图像 1,1
    • Use a Phillips 1 Screwdriver to remove the four 6.8 mm screws underneath the back panel.

  10. Asus ROG G751JL-DS71 Left and Right Track Pad Buttons Replacement: 步骤 10 中的图像 1,1
    • Use a Phillips 1 Screwdriver to remove the ten 5.2 mm screws holding the main panel in place.

  11. Asus ROG G751JL-DS71 Left and Right Track Pad Buttons Replacement: 步骤 11 中的图像 1,3 Asus ROG G751JL-DS71 Left and Right Track Pad Buttons Replacement: 步骤 11 中的图像 2,3 Asus ROG G751JL-DS71 Left and Right Track Pad Buttons Replacement: 步骤 11 中的图像 3,3
    • Use a metal spudger to pry the keyboard from the base of the laptop.

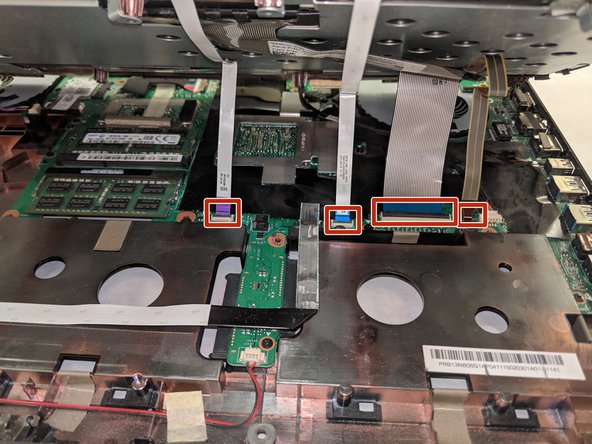
    • Lift the keyboard carefully so as to not tear or break the four ribbon connectors underneath the keyboard.

  12. Asus ROG G751JL-DS71 Left and Right Track Pad Buttons Replacement: 步骤 12 中的图像 1,2 Asus ROG G751JL-DS71 Left and Right Track Pad Buttons Replacement: 步骤 12 中的图像 2,2
    • Use a pair of tweezers to undo each of the four ribbon connectors.

    • The keyboard is now completely disconnected from the laptop and you can remove it.

  13. Asus ROG G751JL-DS71 Left and Right Track Pad Buttons Replacement: 步骤 13 中的图像 1,2 Asus ROG G751JL-DS71 Left and Right Track Pad Buttons Replacement: 步骤 13 中的图像 2,2
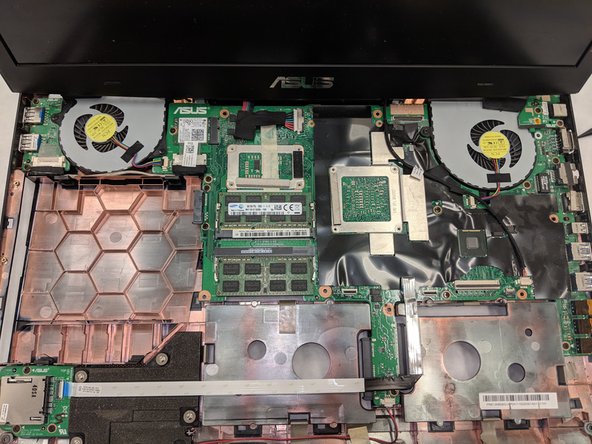
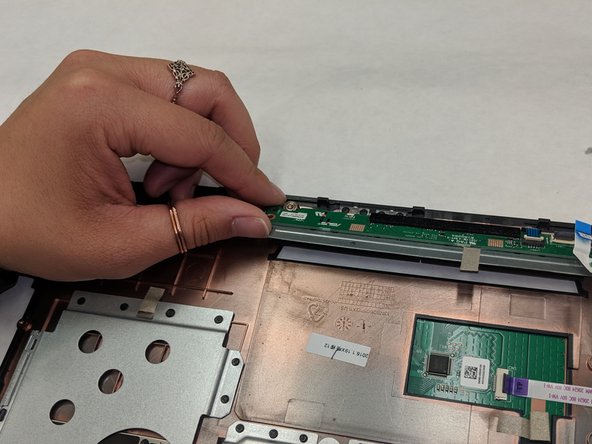
    • Use a pair of tweezers to undo each of the two ribbon connectors.

    • Use a Phillips 1 Screwdriver to remove the four 6.8 mm screws underneath the back panel.

    • The Left and right button is now completely disconnected from the laptop and you can remove it.

结论

To reassemble your device, follow these instructions in reverse order.

3等其他人完成本指南。

团队

IUPUI, Team S8-G8, Wilson Spring 2019 IUPUI, Team S8-G8, Wilson Spring 2019 的会员

IUPUI-WILSON-S19S8G8

4 名成员

创作了3篇指南

0条评论

添加评论

浏览统计数据:

过去 24 小时: 0

过去 7 天: 1

过去 30 天: 8

总计 1,097