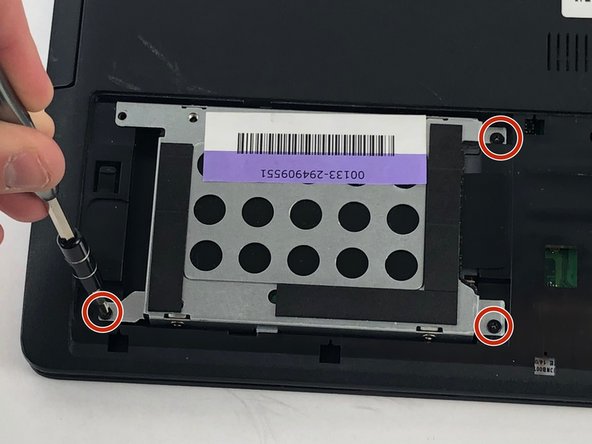
跳转到主内容

Asus R510LA-RS71 Hard Drive Replacement

你所需要的

  1. Asus R510LA-RS71 Hard Drive Replacement, Hard Drive: 步骤 1 中的图像 1,2 Asus R510LA-RS71 Hard Drive Replacement, Hard Drive: 步骤 1 中的图像 2,2
    • Remove the bottom left and right 12.7mm screws using a JIS 00 screwdriver.

  2. Asus R510LA-RS71 Hard Drive Replacement: 步骤 2 中的图像 1,1
    • Slide back and remove the protective plating on the back of the laptop.

  3. Asus R510LA-RS71 Hard Drive Replacement: 步骤 3 中的图像 1,1
    • Again with the JIS 00, unscrew the three 5.7mm screws holding the hard drive in place. These can be found on small brackets on the four corners of the drive.

  4. Asus R510LA-RS71 Hard Drive Replacement: 步骤 4 中的图像 1,3 Asus R510LA-RS71 Hard Drive Replacement: 步骤 4 中的图像 2,3 Asus R510LA-RS71 Hard Drive Replacement: 步骤 4 中的图像 3,3
    • Slide the hard drive to the left, then remove it by lifting it from the compartment it is resting in.

结论

To reassemble your device, follow these instructions in reverse order.

团队

USF Tampa, Team S1-G6, Leahy Spring 2018 USF Tampa, Team S1-G6, Leahy Spring 2018 的会员

USFT-LEAHY-S18S1G6

4 名成员

创作了5篇指南

0条评论

添加评论

浏览统计数据:

过去 24 小时: 0

过去 7 天: 3

过去 30 天: 4

总计 467