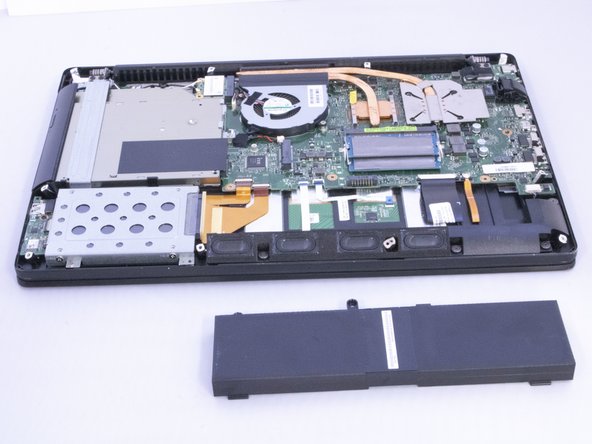
跳转到主内容

Asus Q550LF-BBI7T07 Motherboard Replacement

你所需要的

  1. Asus Q550LF-BBI7T07 Motherboard Replacement, Battery: 步骤 1 中的图像 1,2 Asus Q550LF-BBI7T07 Motherboard Replacement, Battery: 步骤 1 中的图像 2,2
    • Use a T4 Torx screwdriver head to remove the ten 4mm Torx head screws on the bottom of the laptop.

  2. Asus Q550LF-BBI7T07 Motherboard Replacement: 步骤 2 中的图像 1,2 Asus Q550LF-BBI7T07 Motherboard Replacement: 步骤 2 中的图像 2,2
    • Use an opening tool to pry open the rear cover. Lift the cover off and away from the board.

  3. Asus Q550LF-BBI7T07 Motherboard Replacement: 步骤 3 中的图像 1,2 Asus Q550LF-BBI7T07 Motherboard Replacement: 步骤 3 中的图像 2,2
    • Use a Phillips #0 screwdriver head to remove the three black 7mm Phillips head screws that hold the battery in place.

  4. Asus Q550LF-BBI7T07 Motherboard Replacement: 步骤 4 中的图像 1,2 Asus Q550LF-BBI7T07 Motherboard Replacement: 步骤 4 中的图像 2,2
    • Once the screws have been removed, gently lift the battery out.

  5. Asus Q550LF-BBI7T07 Motherboard Replacement, Hard Drive: 步骤 5 中的图像 1,2 Asus Q550LF-BBI7T07 Motherboard Replacement, Hard Drive: 步骤 5 中的图像 2,2
    • Use the Phillips #0 Screwdriver to unscrew the four silver 5mm screws.

  6. Asus Q550LF-BBI7T07 Motherboard Replacement: 步骤 6 中的图像 1,2 Asus Q550LF-BBI7T07 Motherboard Replacement: 步骤 6 中的图像 2,2
    • Gently disconnect the Hard Drive from the connector cable. Lift it out and remove it.

  7. Asus Q550LF-BBI7T07 Motherboard Replacement, Disc Drive: 步骤 7 中的图像 1,2 Asus Q550LF-BBI7T07 Motherboard Replacement, Disc Drive: 步骤 7 中的图像 2,2
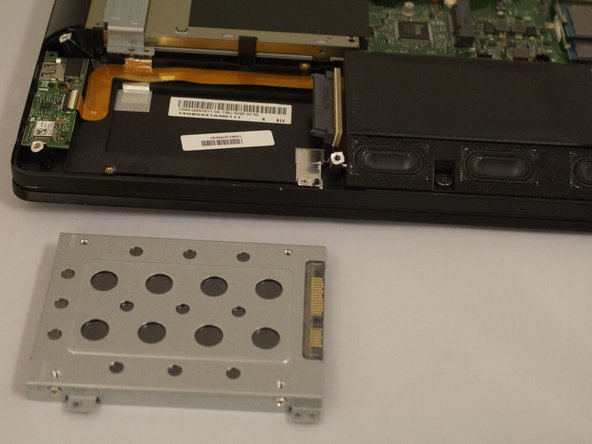
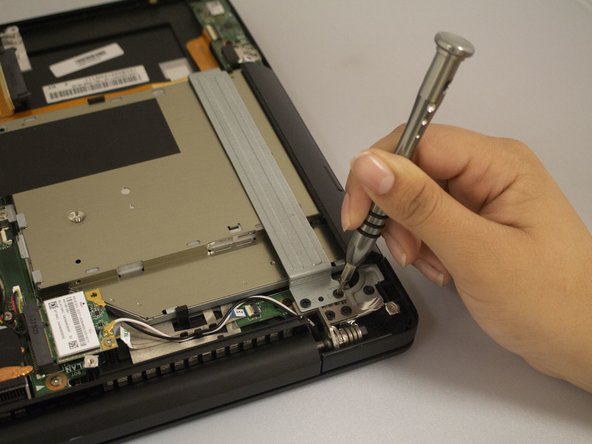
    • Use the Phillips #0 screwdriver to remove the two 7mm Phillips head screws from the metal disc drive holder.

  8. Asus Q550LF-BBI7T07 Motherboard Replacement: 步骤 8 中的图像 1,1
    • Lift the metal disc drive holder off of the disc drive to remove it.

  9. Asus Q550LF-BBI7T07 Motherboard Replacement: 步骤 9 中的图像 1,2 Asus Q550LF-BBI7T07 Motherboard Replacement: 步骤 9 中的图像 2,2
    • Use the Phillips #0 screwdriver to unscrew the one silver 5mm Phillips head screw that connects the disc drive to the motherboard.

  10. Asus Q550LF-BBI7T07 Motherboard Replacement: 步骤 10 中的图像 1,2 Asus Q550LF-BBI7T07 Motherboard Replacement: 步骤 10 中的图像 2,2
    • Slowly slide out the disc drive, keeping it level, to remove it.

  11. Asus Q550LF-BBI7T07 Motherboard Replacement, RAM: 步骤 11 中的图像 1,3 Asus Q550LF-BBI7T07 Motherboard Replacement, RAM: 步骤 11 中的图像 2,3 Asus Q550LF-BBI7T07 Motherboard Replacement, RAM: 步骤 11 中的图像 3,3
    • Push both metal tabs away from each other on each side of the RAM farthest from battery so that the RAM will pop up.

  12. Asus Q550LF-BBI7T07 Motherboard Replacement: 步骤 12 中的图像 1,1
    • Pull out first RAM chip.

  13. Asus Q550LF-BBI7T07 Motherboard Replacement: 步骤 13 中的图像 1,1
    • Push both metal tabs away from each other on each side of the RAM closest to the battery so that the second RAM will pop up.

  14. Asus Q550LF-BBI7T07 Motherboard Replacement: 步骤 14 中的图像 1,2 Asus Q550LF-BBI7T07 Motherboard Replacement: 步骤 14 中的图像 2,2
    • Pull out second RAM chip.

  15. Asus Q550LF-BBI7T07 Motherboard Replacement, Motherboard: 步骤 15 中的图像 1,3 Asus Q550LF-BBI7T07 Motherboard Replacement, Motherboard: 步骤 15 中的图像 2,3 Asus Q550LF-BBI7T07 Motherboard Replacement, Motherboard: 步骤 15 中的图像 3,3
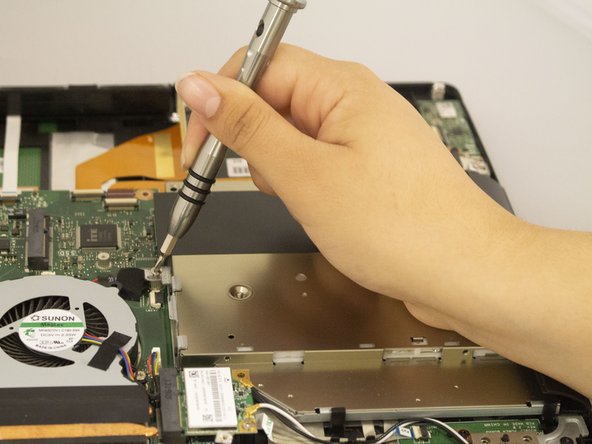
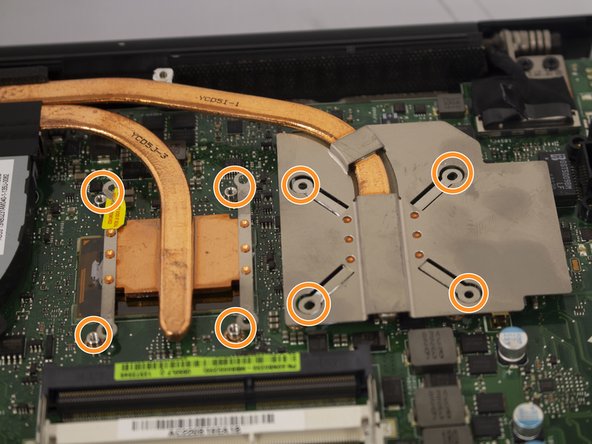
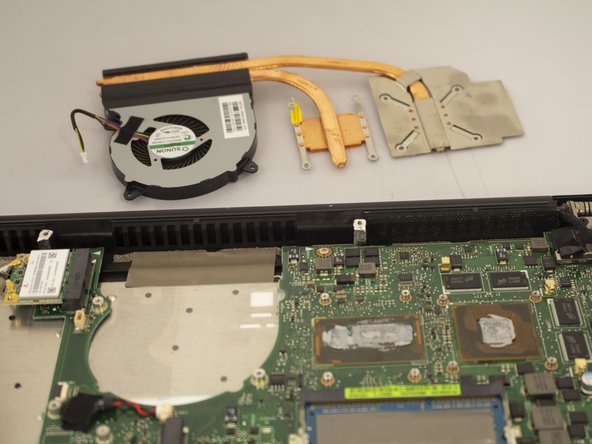
    • Remove the ten screws surrounding the fan and cooling assembly using a Phillips #0 screwdriver.

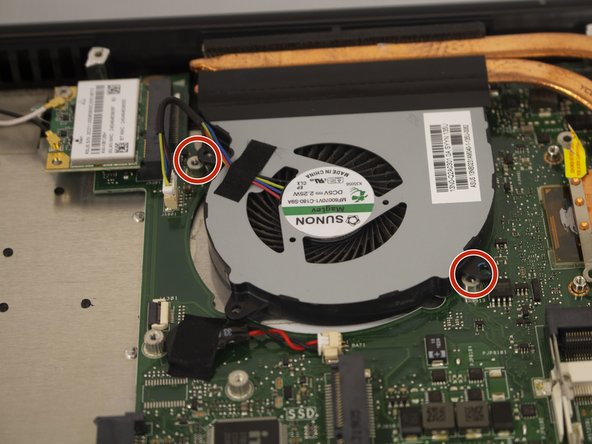
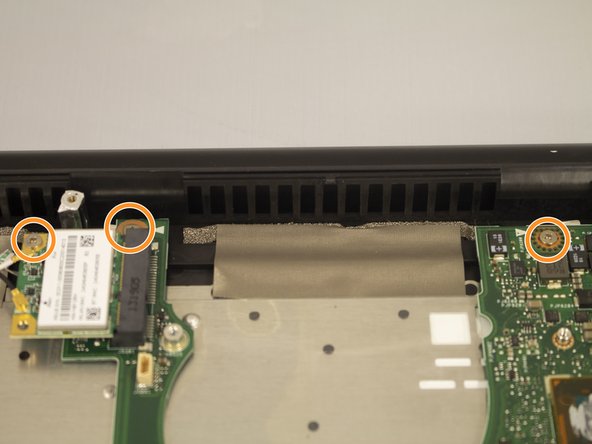
    • Remove the two silver 5 mm Phillips head screws that hold the fan in place.

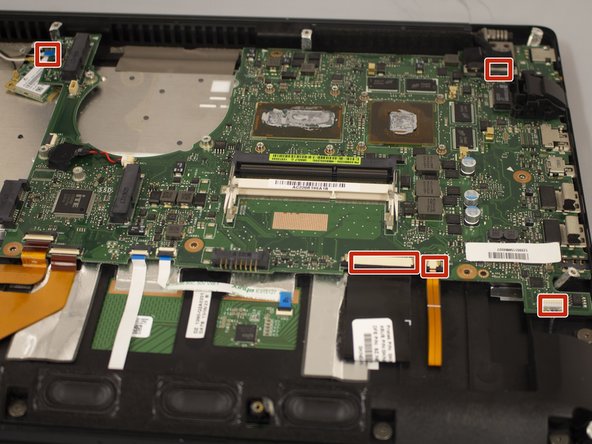
    • Remove the eight black 4 mm Phillips head screws that hold the fan in place.

  16. Asus Q550LF-BBI7T07 Motherboard Replacement: 步骤 16 中的图像 1,2 Asus Q550LF-BBI7T07 Motherboard Replacement: 步骤 16 中的图像 2,2
    • Disconnect the multi-colored cable that attaches the fan to the motherboard.

    • Pick the fan up to remove it from the motherboard.

  17. Asus Q550LF-BBI7T07 Motherboard Replacement: 步骤 17 中的图像 1,3 Asus Q550LF-BBI7T07 Motherboard Replacement: 步骤 17 中的图像 2,3 Asus Q550LF-BBI7T07 Motherboard Replacement: 步骤 17 中的图像 3,3
    • Use the Phillips #0 Screwdriver to remove the four screws on the edge of the motherboard;

    • Remove the one black 3 mm screw.

    • Remove the three silver 5 mm screws.

  18. Asus Q550LF-BBI7T07 Motherboard Replacement: 步骤 18 中的图像 1,1
    • Use the Phillips #0 Screwdriver to remove the remaining four black 7 mm screws on the edge of the motherboard.

  19. Asus Q550LF-BBI7T07 Motherboard Replacement: 步骤 19 中的图像 1,2 Asus Q550LF-BBI7T07 Motherboard Replacement: 步骤 19 中的图像 2,2
    • Disconnect the five cables that are attached to the motherboard by gently pulling them.

    • Disconnect the four remaining cables attached to the motherboard by lifting the tabs and gently pulling them out.

  20. Asus Q550LF-BBI7T07 Motherboard Replacement: 步骤 20 中的图像 1,2 Asus Q550LF-BBI7T07 Motherboard Replacement: 步骤 20 中的图像 2,2
    • Use the metal spudger to pry and lift the silver hinge that is connected to the motherboard to release it.

    • Pull the motherboard out by hand in a counterclockwise motion to remove it.

结论

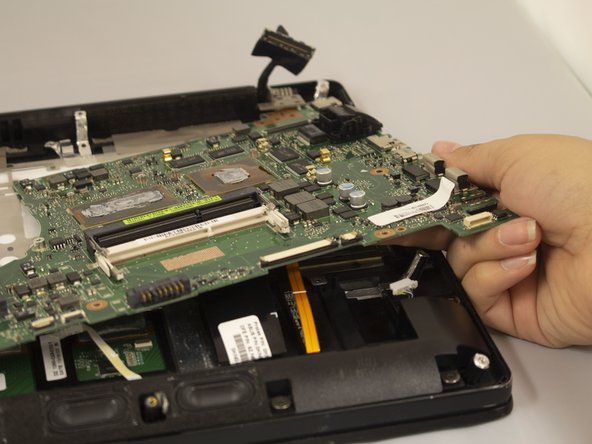
To reassemble your device, follow these instructions in reverse order.

另外一个人完成了本指南。

0条评论

添加评论

浏览统计数据:

过去 24 小时: 0

过去 7 天: 3

过去 30 天: 13

总计 1,434