简介
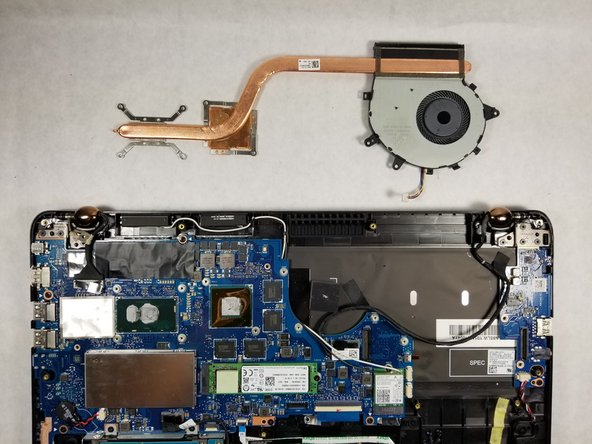
This guide will go over the process of removing and replacing the CPU fan and heat sink assembly.
你所需要的
-
-
Use a T5 screwdriver to remove all 10 screws that secure the bottom cover.
-
Pull off the back cover of the laptop.
-
-
-
Wedge an opening tool under the battery's bundled cable connector, and gently pry the connector up and to disconnect the battery.
Step 2 I did not realize that the pictures to the right were enlarged for easier understanding of the step. Great walk through even a 66 year old man could understand and do it. Got the I Fix It tools which made opening the case and working with the tiny screws a breeze.
-
-
-
-
Lift up the black tab next to the silver ribbon cable.
-
Pull lightly on the blue tabs until the silver cable is free.
Before doing anything here I would highly recommend disconnecting the buttery. I didn't do it myself at the beginning and when removing this ribbon cable I caused sparks going off the right connector.
Alex Vasko - 回复
Great suggestion, Alex! This guide should now reflect a safer and more accurate procedure. Thanks for the heads-up.
Richard -
To clarify: you need to flip up the black plastic tab of the recepticle, not the cable. Then don't pull the blue tab up, you need to angle it up just a little bit, about 15 degrees, then slide the cable out.
-
-
-
Using the iFixit opening tool, gently pry the CPU fan connector out of the socket.
-


To reassemble your device, follow these instructions in reverse order.
To reassemble your device, follow these instructions in reverse order.
4等其他人完成本指南。
团队

UMass Dartmouth, Team S66-G6, Rockett Fall 2017 UMass Dartmouth, Team S66-G6, Rockett Fall 2017 的会员
UMASSD-ROCKETT-F17S66G6
3 名成员
创作了5篇指南