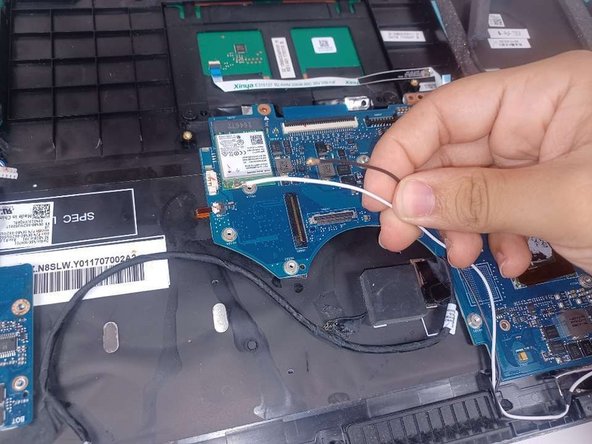
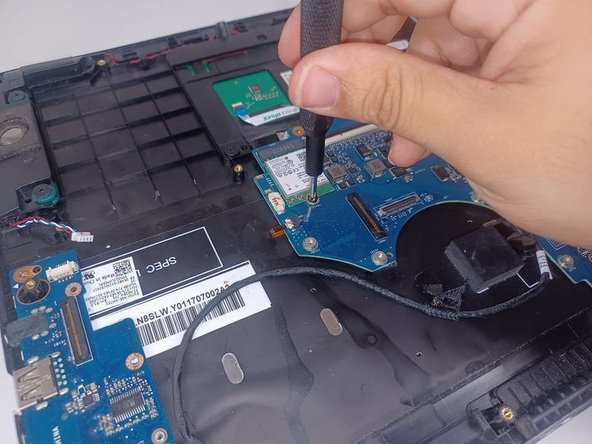
跳转到主内容

Asus Q524U Wi-Fi Card Replacement

你所需要的

  1. Asus Q524U Wi-Fi Card Replacement, Back Panel: 步骤 1 中的图像 1,2 Asus Q524U Wi-Fi Card Replacement, Back Panel: 步骤 1 中的图像 2,2
    • Remove ten 3 mm screws using a Phillips #0 screwdriver.

  2. Asus Q524U Wi-Fi Card Replacement: 步骤 2 中的图像 1,1
    • Lift up the back panel and set it to the side.

  3. Asus Q524U Wi-Fi Card Replacement, Battery: 步骤 3 中的图像 1,2 Asus Q524U Wi-Fi Card Replacement, Battery: 步骤 3 中的图像 2,2
    • Using your fingers, grip onto both sides of the wire harness and push it upwards.

  4. Asus Q524U Wi-Fi Card Replacement: 步骤 4 中的图像 1,2 Asus Q524U Wi-Fi Card Replacement: 步骤 4 中的图像 2,2
    • Remove the five 3 mm screws holding the battery in place using a Phillips #0 screwdriver.

  5. Asus Q524U Wi-Fi Card Replacement: 步骤 5 中的图像 1,3 Asus Q524U Wi-Fi Card Replacement: 步骤 5 中的图像 2,3 Asus Q524U Wi-Fi Card Replacement: 步骤 5 中的图像 3,3
    • Tilt the small black tab up which will allow the blue tape to be slid out.

  6. Asus Q524U Wi-Fi Card Replacement: 步骤 6 中的图像 1,1
    • Simply lift the battery up and out of its holding area.

  7. Asus Q524U Wi-Fi Card Replacement, Wi-Fi Card: 步骤 7 中的图像 1,2 Asus Q524U Wi-Fi Card Replacement, Wi-Fi Card: 步骤 7 中的图像 2,2
    • Disconnect the black and white wires by pulling them up.

  8. Asus Q524U Wi-Fi Card Replacement: 步骤 8 中的图像 1,2 Asus Q524U Wi-Fi Card Replacement: 步骤 8 中的图像 2,2
    • Unscrew the single 3 mm screw using a Phillips #0 screwdriver.

  9. Asus Q524U Wi-Fi Card Replacement: 步骤 9 中的图像 1,2 Asus Q524U Wi-Fi Card Replacement: 步骤 9 中的图像 2,2
    • Slide the Wi-Fi card out of its slot.

结论

To reassemble your device, follow these instructions in reverse order.

0条评论

添加评论

浏览统计数据:

过去 24 小时: 0

过去 7 天: 3

过去 30 天: 8

总计 52