简介
If you're having trouble with the Motherboard of your Asus laptop (model Q504UA-BHI5T13) this is the guide for you. The motherboard is used for distributing power throughout the computer, maintaining the memory and connecting to other CPU's. A faulty motherboard could cause problems to any of these computer functions. Before disassembling the computer ensure that you have the correct replacement motherboard (this can be found by consulting the laptop’s user manual or contacting the manufacturer directly). When finished with the replacement instructions take the previous motherboard to an e-recycling facility for the safest disposal method.
Be sure that there is no external power cord connected and that the laptop is fully powered off and shut down.
你所需要的
-
-
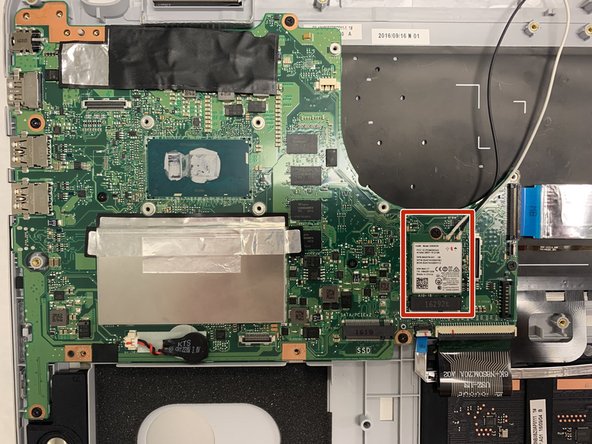
Once the back cover is removed, have the laptop facing upside down with the hinges facing toward you.
-
-
-
-
Once the back cover is removed, have the laptop facing upside down with the hinges facing nearest to you.
-
-
-
Once the back cover is removed, have the laptop facing upside down with the hinges facing toward you.
-
-
-
Use the Phillips #0 screwdriver to remove the eight 4mm screws around the hard drive casing (located next to the Right [R] speaker).
-
Start off with the four black outer screws so that the casing can be released from the laptop unit.
-
The next sequence of screws to remove are the four silver screws.
-


To reassemble your device, follow these instructions in reverse order.
To reassemble your device, follow these instructions in reverse order.
团队

IUPUI, Team S1-G2, Henning Fall 2019 IUPUI, Team S1-G2, Henning Fall 2019 的会员
IUPUI-HENNING-F19S1G2
3 名成员
创作了3篇指南
一条评论
Is there a replaceable ram stick on the other side of the motherboard? It looks like there is only one slot on the top side.