跳转到主内容

Asus K55N-DS81 Hard Drive Replacement

你所需要的

  1. Asus K55N-DS81 Hard Drive Replacement, Battery: 步骤 1 中的图像 1,1
    • Flip the laptop over, such that the bottom of the laptop is facing upwards.

    • Ensure that the laptop is powered off prior to following this guide.

  2. Asus K55N-DS81 Hard Drive Replacement: 步骤 2 中的图像 1,2 Asus K55N-DS81 Hard Drive Replacement: 步骤 2 中的图像 2,2
    • Pull the latch to the right of the battery to the right.

  3. Asus K55N-DS81 Hard Drive Replacement: 步骤 3 中的图像 1,2 Asus K55N-DS81 Hard Drive Replacement: 步骤 3 中的图像 2,2
    • Pull the latch to the left of the battery to the left. Hold the latch open with a finger to prevent it from closing.

  4. Asus K55N-DS81 Hard Drive Replacement: 步骤 4 中的图像 1,2 Asus K55N-DS81 Hard Drive Replacement: 步骤 4 中的图像 2,2
    • While holding the second latch from the previous step, use another hand to reach underneath the battery.

    • Pull the battery upwards and away from the laptop to remove it.

  5. Asus K55N-DS81 Hard Drive Replacement, Rear Panel: 步骤 5 中的图像 1,2 Asus K55N-DS81 Hard Drive Replacement, Rear Panel: 步骤 5 中的图像 2,2
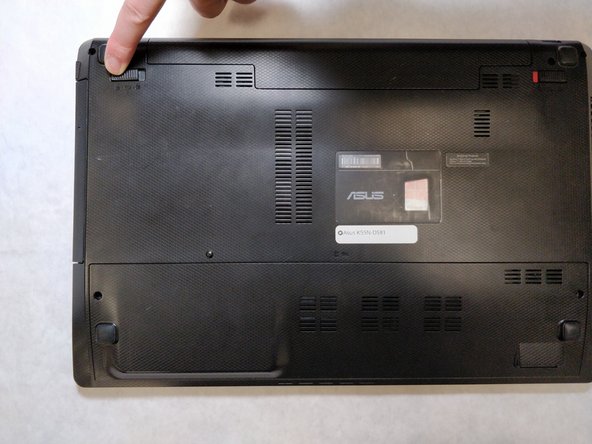
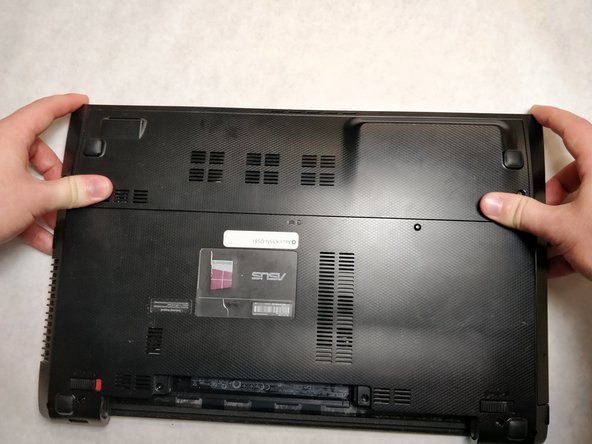
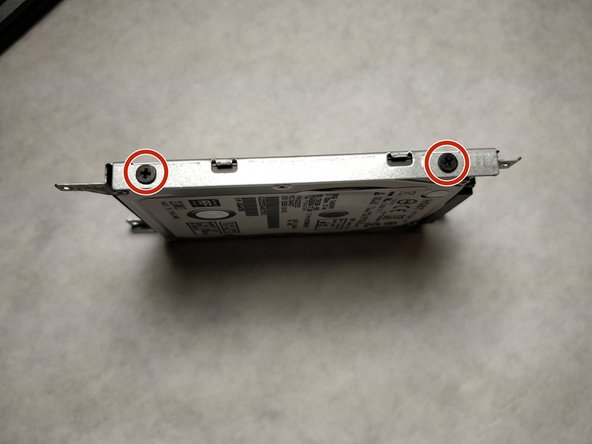
    • Using a JIS #00 screwdriver, unscrew the two 5 mm screws on either side of the laptop panel.

  6. Asus K55N-DS81 Hard Drive Replacement: 步骤 6 中的图像 1,3 Asus K55N-DS81 Hard Drive Replacement: 步骤 6 中的图像 2,3 Asus K55N-DS81 Hard Drive Replacement: 步骤 6 中的图像 3,3
    • Remove the panel by pushing away from the laptop until the panel is free of the laptop.

    • Lift to remove the panel.

  7. Asus K55N-DS81 Hard Drive Replacement, Hard Drive: 步骤 7 中的图像 1,1
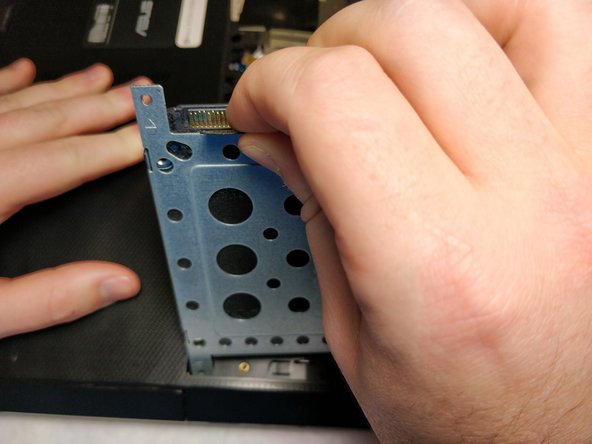
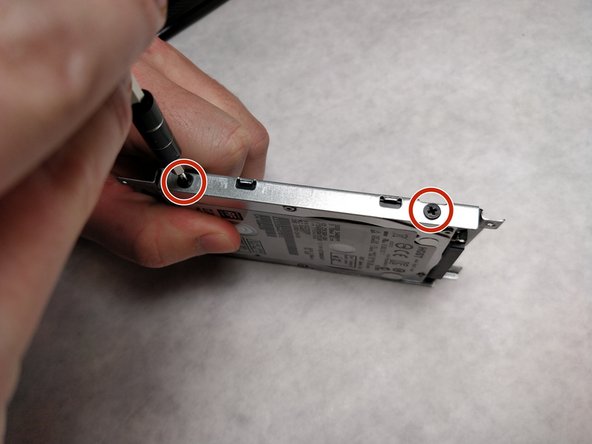
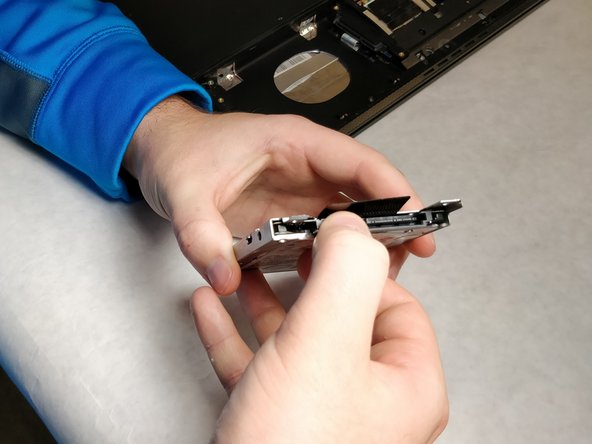
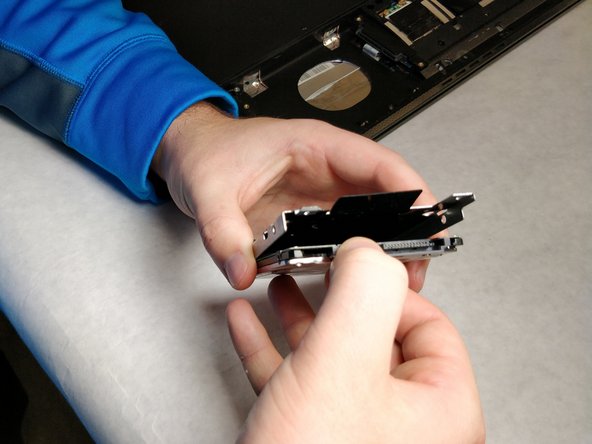
    • Using a JIS #00 screwdriver, unscrew the four 5 mm screws fastening the hard drive enclosure to the laptop.

  8. Asus K55N-DS81 Hard Drive Replacement: 步骤 8 中的图像 1,3 Asus K55N-DS81 Hard Drive Replacement: 步骤 8 中的图像 2,3 Asus K55N-DS81 Hard Drive Replacement: 步骤 8 中的图像 3,3
    • Grab the plastic tab located on the hard drive enclosure.

    • Pull the tab towards yourself, the hard drive will slide towards you as it disconnects from the motherboard.

    • Lift the enclosure by the tab to remove the enclosure from the laptop.

  9. Asus K55N-DS81 Hard Drive Replacement: 步骤 9 中的图像 1,2 Asus K55N-DS81 Hard Drive Replacement: 步骤 9 中的图像 2,2
    • Using a JIS #00 screwdriver, unscrew the four 3 mm screws securing the hard drive to the enclosure.

    • Do not forget to flip the enclosure over and unscrew the screws on the other side.

  10. Asus K55N-DS81 Hard Drive Replacement: 步骤 10 中的图像 1,2 Asus K55N-DS81 Hard Drive Replacement: 步骤 10 中的图像 2,2
    • Grab the hard drive and pull it away from the enclosure to remove it.

结论

To reassemble your device, follow these instructions in reverse order.

另外一个人完成了本指南。

Elliott Beckner

于11/05/18注册

543 声望

创作了4篇指南

团队

IUPUI, Team S2-G1, Baechle Fall 2018 IUPUI, Team S2-G1, Baechle Fall 2018 的会员

IUPUI-BAECHLE-F18S2G1

4 名成员

创作了5篇指南

0条评论

添加评论

浏览统计数据:

过去 24 小时: 1

过去 7 天: 1

过去 30 天: 9

总计 430