跳转到主内容

当前版本的文档还未经巡查,您可以查看最新的已查核版本

你所需要的

  1. 这个步骤还没有翻译 帮忙翻译一下

    : 步骤 1 中的图像 1,1
    • Remove any power cords and turn the laptop off. Attempting to replace part of the laptop while power is running through it may cause electrocution or damage to the device.

    • Flip laptop face down and rotate so the battery is facing toward you.

    • The battery is not shown in this picture.

    • To remove the battery, place one finger on each of the two black slide tabs. Push each tab toward the center of the laptop to release the lock.

    • Slide the battery toward you and lift it out of the laptop.

  2. 这个步骤还没有翻译 帮忙翻译一下

    : 步骤 2 中的图像 1,2 : 步骤 2 中的图像 2,2
    • Lay the laptop right side up.

    • Rotate laptop 90 degrees towards you, so the empty battery compartment is visible.

  3. 这个步骤还没有翻译 帮忙翻译一下

    : 步骤 3 中的图像 1,2 : 步骤 3 中的图像 2,2
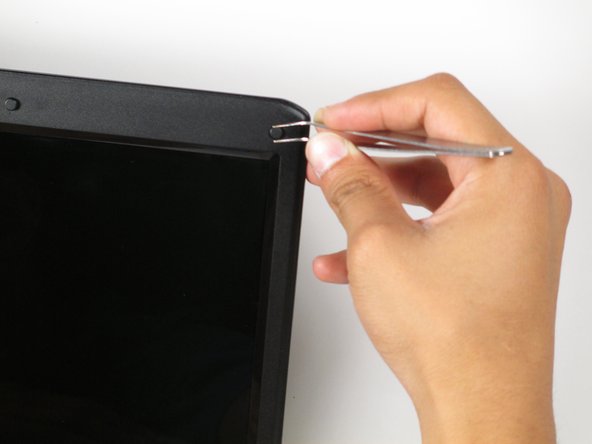
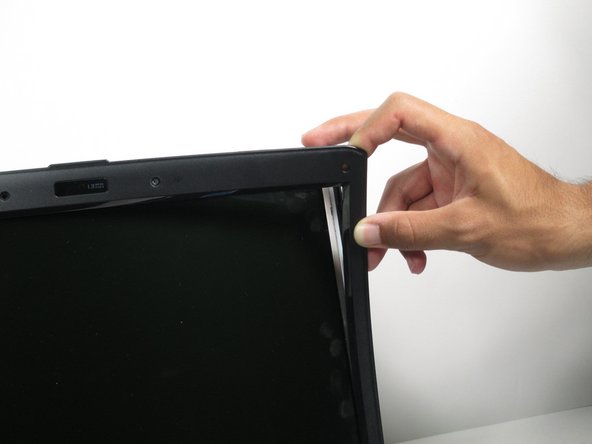
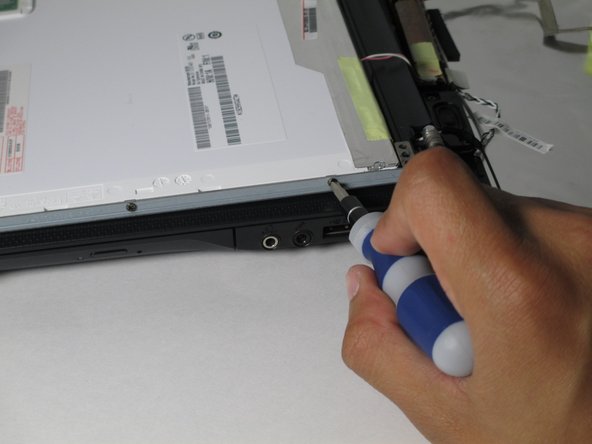
    • Insert a finger nail, or the flat end of the spudger, into the slot between the laptop base and the hinge guard on the right side. Gently pull the guard towards you until the guard pops off.

    • Repeat this process for the other guard.

  4. 这个步骤还没有翻译 帮忙翻译一下

    : 步骤 4 中的图像 1,2 : 步骤 4 中的图像 2,2
    • Once the hinge guards are removed, lay the laptop flat on its bottom. Then, lift open the laptop screen as if you were about to use it.

    • With a pair of tweezers, peel off the six rubber cushions from the bezel located around the perimeter of the screen.

  5. 这个步骤还没有翻译 帮忙翻译一下

    : 步骤 5 中的图像 1,2 : 步骤 5 中的图像 2,2
    • Remove the six 2.0 mm Phillips #1 screws from the perimeter of the bezel.

  6. 这个步骤还没有翻译 帮忙翻译一下

    : 步骤 6 中的图像 1,2 : 步骤 6 中的图像 2,2
    • Insert a finger nail, or the flat end of a spudger, into the slit between the bezel and the back cover of the laptop.

    • Gently pry the bezel towards you to remove it from the back panel of the laptop.

    • Hearing a cracking noise is normal. The bezel is not damaged in this process.

    • Continue to pry around the perimeter of the laptop until the entire bezel has been removed.

  7. 这个步骤还没有翻译 帮忙翻译一下

    : 步骤 7 中的图像 1,3 : 步骤 7 中的图像 2,3 : 步骤 7 中的图像 3,3
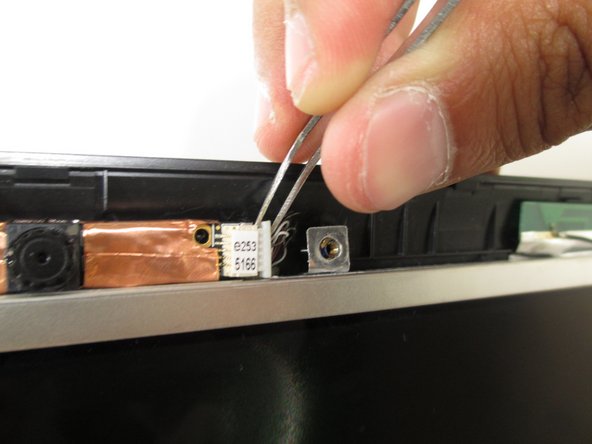
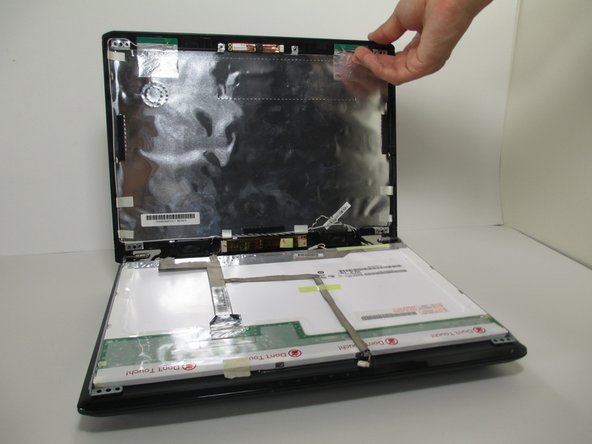
    • The screen is attached to the webcam at the top and the inverter at the bottom. Disconnecting the screen from these two components will give some slack when removing the screen.

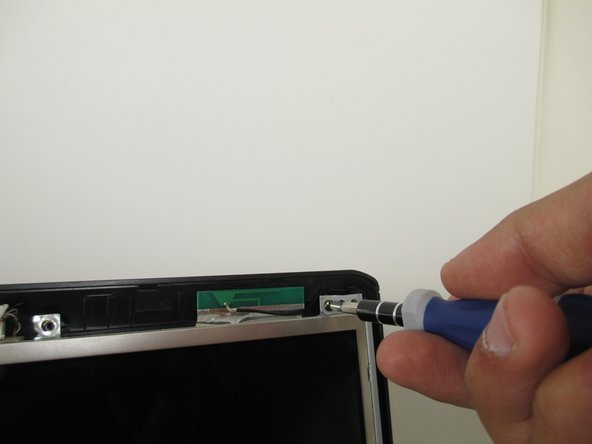
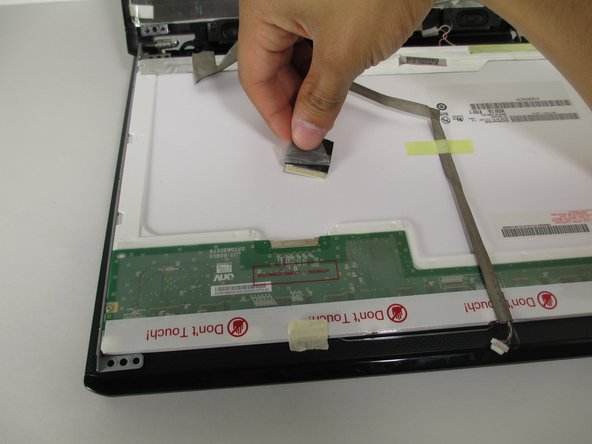
    • With a pair of tweezers, grab on to the white connector at the bottom of the screen. Gently, but firmly, pull the connector to the right to to remove it.

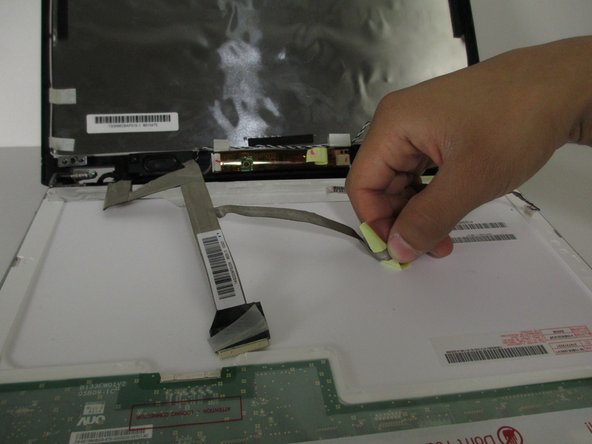
    • Repeat this process with the white connector attached to the webcam above the screen.

  8. 这个步骤还没有翻译 帮忙翻译一下

    : 步骤 8 中的图像 1,2 : 步骤 8 中的图像 2,2
    • Remove the four 2.0 mm Phillips #1 screws at each corner of the laptop screen.

    • When reassembling the screen, make sure the 2.0 mm screws go into the holes closest to the center of the laptop.

  9. 这个步骤还没有翻译 帮忙翻译一下

    : 步骤 9 中的图像 1,2 : 步骤 9 中的图像 2,2
    • Close the laptop.

    • Open the laptop again. With the screws removed, the screen should remain flat against the keyboard.

  10. 这个步骤还没有翻译 帮忙翻译一下

    : 步骤 10 中的图像 1,2 : 步骤 10 中的图像 2,2
    • Partially remove the adhesive securing the black tap to the screen so that the adhesive is only attached to the black tab.

    • Pull the black tab gently, towards the back of the laptop to remove it from the screen.

  11. 这个步骤还没有翻译 帮忙翻译一下

    : 步骤 11 中的图像 1,2 : 步骤 11 中的图像 2,2
    • Remove the remaining adhesive by gently lifting up on the yellow pieces of tape.

    • Rest these wires on the back panel to prevent them from getting damaged.

  12. 这个步骤还没有翻译 帮忙翻译一下

    : 步骤 12 中的图像 1,2 : 步骤 12 中的图像 2,2
    • Remove the six 2.0 mm Phillips #1 screws securing the hinges to the screen. There are three screws on each side of the laptop.

  13. 这个步骤还没有翻译 帮忙翻译一下

    : 步骤 13 中的图像 1,1
    • Simply lift the screen from back of the laptop to remove it

终点

另外一个人完成了本指南。

Jonathan

于04/24/14注册

1,174 声望

创作了11篇指南

团队

Cal Poly, Team 10-56, Amido Spring 2014 Cal Poly, Team 10-56, Amido Spring 2014 的会员

CPSU-AMIDO-S14S10G56

4 名成员

创作了12篇指南

0条评论

添加评论

浏览统计数据:

过去 24 小时: 1

过去 7 天: 6

过去 30 天: 8

总计 618