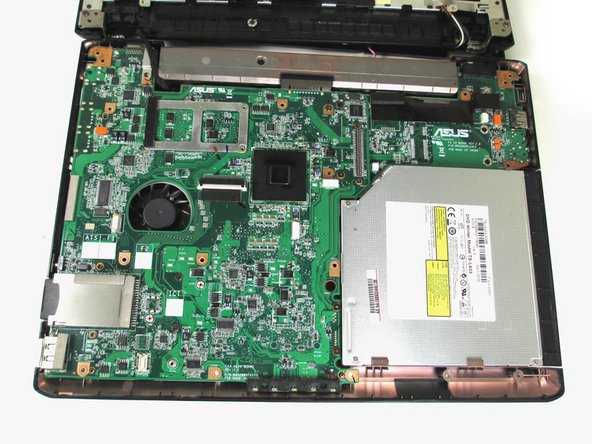
跳转到主内容

Asus F6A-X2 Base Replacement

仅作为前提条件
本指南仅用作其他指南的先决条件。不能单独食用。

你所需要的

  1. Asus F6A-X2 Base Replacement, Base: 步骤 1 中的图像 1,2 Asus F6A-X2 Base Replacement, Base: 步骤 1 中的图像 2,2
    • Remove the following four screws that hold the base to the motherboard:

    • One 1.5 mm Phillips #1 screw located near the center of the laptop.

    • One 1.5 mm Phillips #1 screw located at the top, center, next to the metal guard.

    • This screw is concealed by a black wire running across the top of the laptop. You will have to move the wire to the right in order to remove the screw.

    • Two 1.5 mm Phillips #1 screws located next to the fan.

  2. Asus F6A-X2 Base Replacement: 步骤 2 中的图像 1,1
    • Next, remove the white and black cables located on the graphics card with a pair of tweezers. Grab onto the gold node on each wire and gently pull up, and the node will pop out of its socket.

    • This will give slack when disassembling the base from the motherboard.

    • Remember that the black wire goes to 1 and the white wire goes to 2 on the graphics card.

    • There is a hole on the motherboard the black and white wire will need to pass through when reassembling your laptop.

  3. Asus F6A-X2 Base Replacement: 步骤 3 中的图像 1,2 Asus F6A-X2 Base Replacement: 步骤 3 中的图像 2,2
    • Remove the eleven 1.5 mm Phillips #1 screws around the perimeter of the laptop.

    • There are two screws inside the big circles in the top corners of the laptop.

  4. Asus F6A-X2 Base Replacement: 步骤 4 中的图像 1,2 Asus F6A-X2 Base Replacement: 步骤 4 中的图像 2,2
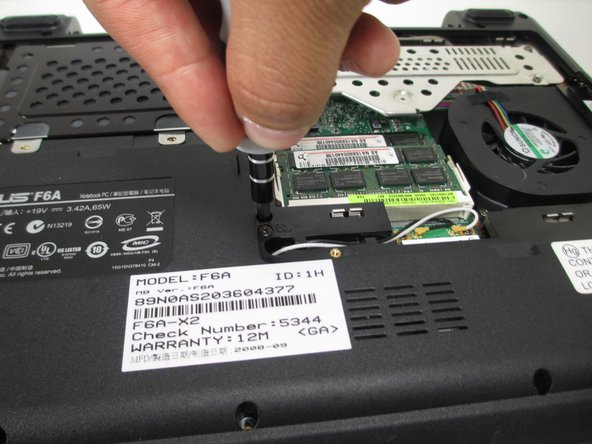
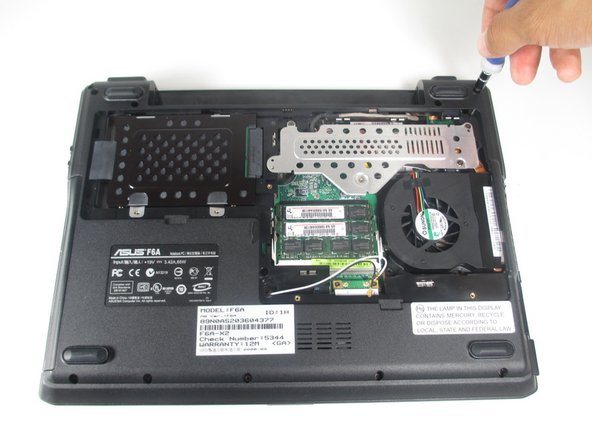
    • Flip the laptop right side up and open to reveal the keyboard.

    • In this step you will be removing the keyboard. Be gentle when removing it as the keyboard is connected to the laptop by a thin black ribbon. Yanking the keyboard out too quickly can damage the ribbon.

    • Insert a finger or the flat end of a spudger into the top left edge of the keyboard, underneath the 'Esc' and the 'F1-F2' keys.

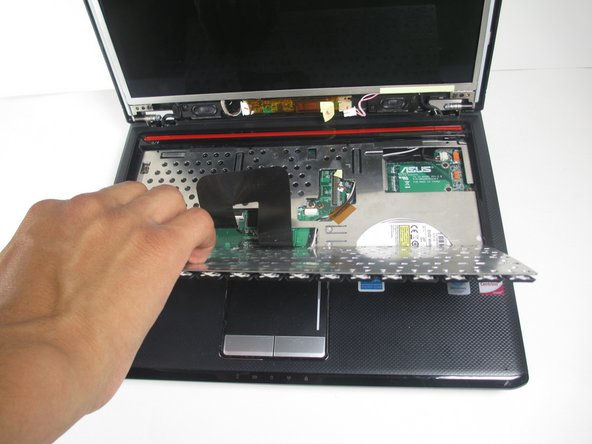
    • Gently pull the keyboard towards you and lay it flat. It will make a slight popping noise as it disconnects from the laptop.

  5. Asus F6A-X2 Base Replacement: 步骤 5 中的图像 1,1
    • To remove the keyboard completely, you will need to detach the ribbon from the laptop.

    • With a pair of tweezers, gently pull on each side of the white tab until it is freed from the computer.

    • Once the ribbon has been freed, put the keyboard aside in a safe place to avoid damaging it.

  6. Asus F6A-X2 Base Replacement: 步骤 6 中的图像 1,2 Asus F6A-X2 Base Replacement: 步骤 6 中的图像 2,2
    • Remove the three 1.5 mm Phillips #1 screws from the metal guard of the laptop.

    • When reassembling, remember the screw on the extreme right of the laptop is longer than the other two.

  7. Asus F6A-X2 Base Replacement: 步骤 7 中的图像 1,2 Asus F6A-X2 Base Replacement: 步骤 7 中的图像 2,2
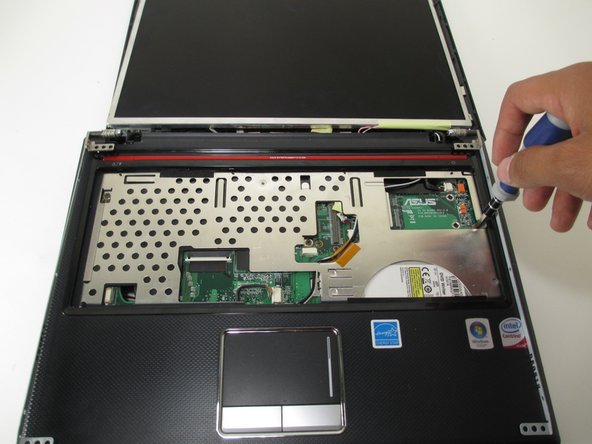
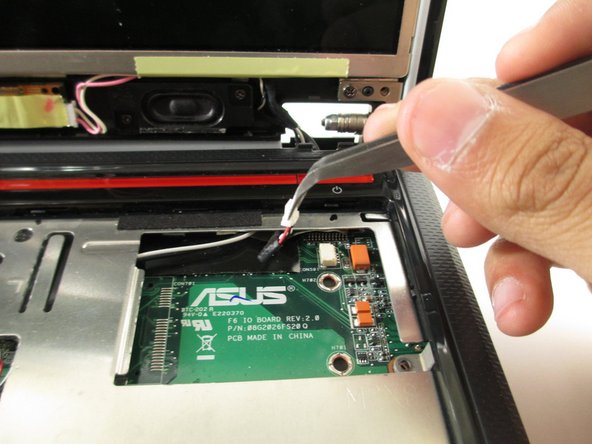
    • With a pair of tweezers, remove the three white connectors attached to the motherboard. This will give slack when disassembling the base.

    • The connectors at the top right and middle of the laptop will need to be pulled to the left.

    • The connector in between the two will need to be pulled towards the back of the laptop.

  8. Asus F6A-X2 Base Replacement: 步骤 8 中的图像 1,2 Asus F6A-X2 Base Replacement: 步骤 8 中的图像 2,2
    • Insert the flat end of a spudger into the thin crack running along the side of the laptop. Gently pry open along the perimeter of the laptop to remove the base.

    • After completely prying the two bases from each other, set the top base flat against the back panel, revealing the circuit board.

结论

To reassemble your device, follow these instructions in reverse order.

Jonathan

于04/24/14注册

1,174 声望

创作了11篇指南

团队

Cal Poly, Team 10-56, Amido Spring 2014 Cal Poly, Team 10-56, Amido Spring 2014 的会员

CPSU-AMIDO-S14S10G56

4 名成员

创作了12篇指南

0条评论

添加评论

浏览统计数据:

过去 24 小时: 0

过去 7 天: 0

过去 30 天: 0

总计 64