简介
This guide will show you how to remove and replace the CPU fan on your ASUS F555-AB31 laptop. The fan is located behind the Motherboard so nearly full disassembly of the device is required to access it.
你所需要的
-
-
-
Fold the faceplate upwards towards the screen to fully expose the inside of the laptop.
-
Both the battery and the hard drive adapter PCB will need to be moved in order to lift and access the backside of the motherboard.
-
Unscrew the eight Phillips #0 screws on from the battery, and four Phillips #0 screws from the hard drive adapter PCB.
-
-
-
Remove the seven 4mm Phillips #0 screws holding the motherboard down to the laptop chassis.
-
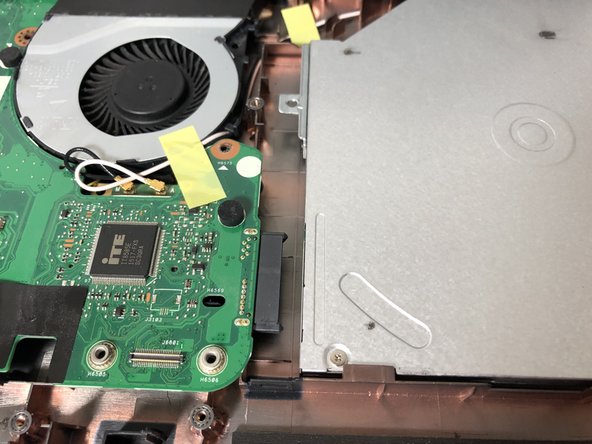
Lift the motherboard upwards, folding it towards the laptop screen.
-
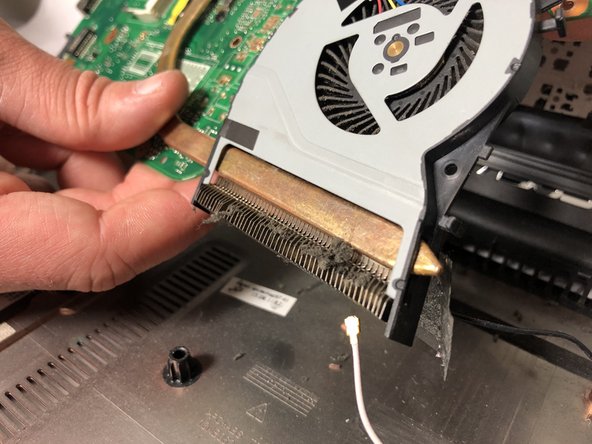
Disconnect the 4-pin PWM cable attaching the fan to the back of the motherboard. The fan can now be removed by simply sliding the fan off the copper heat pipe.
-


To reassemble your device, follow these instructions in reverse order.
To reassemble your device, follow these instructions in reverse order.
另外一个人完成了本指南。

团队

Oregon Institute of Technology, Team S1-G1, Lancaster Spring 2019 Oregon Institute of Technology, Team S1-G1, Lancaster Spring 2019 的会员
OIT-LANCASTER-S19S1G1
4 名成员
创作了6篇指南