跳转到主内容

当前版本的文档还未经巡查,您可以查看最新的已查核版本

你所需要的

  1. 这个步骤还没有翻译 帮忙翻译一下

    : 步骤 1 中的图像 1,2 : 步骤 1 中的图像 2,2
    • Power the laptop off and make sure the charger is unplugged before starting.

    • Remove the eight 8.0mm Phillips #0 screws on the bottom of the laptop.

    • Remove the three 6.0mm Phillips #0 screws.

  2. 这个步骤还没有翻译 帮忙翻译一下

    : 步骤 2 中的图像 1,3 : 步骤 2 中的图像 2,3 : 步骤 2 中的图像 3,3
    • Open the laptop.

    • Using an iFixit opening tool, pry along the edges of the keyboard.

    • Lift the keyboard and slide it gently towards you.

    • Do not completely remove the keyboard. It is still connected to the back panel by a pair of ribbon cables.

  3. 这个步骤还没有翻译 帮忙翻译一下

    : 步骤 3 中的图像 1,3 : 步骤 3 中的图像 2,3 : 步骤 3 中的图像 3,3
    • Disconnect the two ZIF connectors by prying up the locking bar with a spudger and removing the ribbon cable.

  4. 这个步骤还没有翻译 帮忙翻译一下

    : 步骤 4 中的图像 1,1
    • Remove the keyboard from the laptop.

  5. 这个步骤还没有翻译 帮忙翻译一下

    : 步骤 5 中的图像 1,2 : 步骤 5 中的图像 2,2
    • Remove the six 5.6mm Phillips #0 screws around the battery.

  6. 这个步骤还没有翻译 帮忙翻译一下

    : 步骤 6 中的图像 1,2 : 步骤 6 中的图像 2,2
    • Using your thumb and index finger, pinch the multi-color cable and disconnect it from the motherboard.

  7. 这个步骤还没有翻译 帮忙翻译一下

    : 步骤 7 中的图像 1,1
    • Lift the battery out of the laptop.

  8. 这个步骤还没有翻译 帮忙翻译一下

    : 步骤 8 中的图像 1,2 : 步骤 8 中的图像 2,2
    • Unplug the black and white cable from the motherboard.

    • These two wires connect to the antenna within the display assembly. The white cable is longer and connects to the bottom import.

  9. 这个步骤还没有翻译 帮忙翻译一下

    : 步骤 9 中的图像 1,1
    • Peel back the tape covering the display cable.

    • Ease the cable towards the screen and out from the connector.

  10. 这个步骤还没有翻译 帮忙翻译一下

    : 步骤 10 中的图像 1,1
    • Use a Phillips #0 driver to remove the six 5mm screws on the top right and left display hinges.

  11. 这个步骤还没有翻译 帮忙翻译一下

    : 步骤 11 中的图像 1,1
    • Gently lift the display assembly up and away from the laptop.

  12. 这个步骤还没有翻译 帮忙翻译一下

    : 步骤 12 中的图像 1,3 : 步骤 12 中的图像 2,3 : 步骤 12 中的图像 3,3
    • Use the spudger to pop the black and white coaxial WiFi cables up from the WiFi card.

  13. 这个步骤还没有翻译 帮忙翻译一下

    : 步骤 13 中的图像 1,2 : 步骤 13 中的图像 2,2
    • Remove the one 3.6mm Phillips #0 screw from the WiFi card.

    • Pull and lift the WiFi card away from the motherboard.

  14. 这个步骤还没有翻译 帮忙翻译一下

    : 步骤 14 中的图像 1,3 : 步骤 14 中的图像 2,3 : 步骤 14 中的图像 3,3
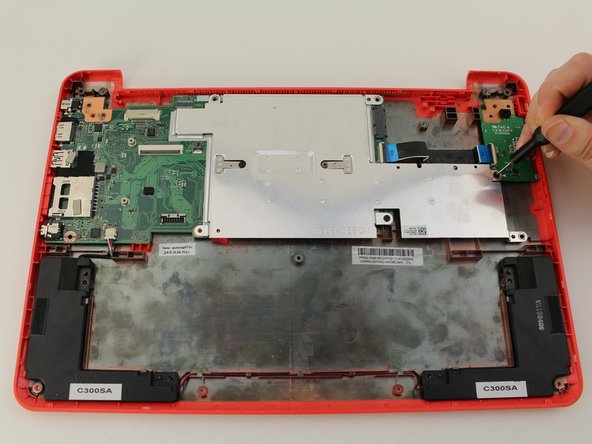
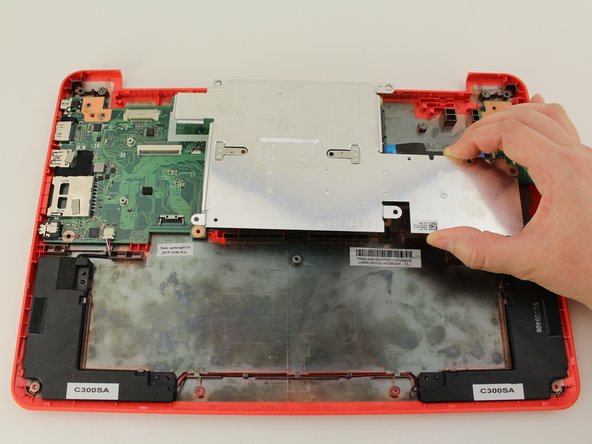
    • Using your Phillips #0 screwdriver, unscrew three, 3.6mm screws from the silver heatsink.

    • Remove the heatsink from the motherboard.

  15. 这个步骤还没有翻译 帮忙翻译一下

    : 步骤 15 中的图像 1,2 : 步骤 15 中的图像 2,2
    • Remove the black tape from the motherboard covering the 4.2mm silver flat screw.

    • Using a Phillips #0 screwdriver, remove the 4.4mm screw on the right and the 4.2mm silver flat screw on the left from the motherboard.

    • This is a used device so the screws may be different than the original Chromebook.

  16. 这个步骤还没有翻译 帮忙翻译一下

    : 步骤 16 中的图像 1,3 : 步骤 16 中的图像 2,3 : 步骤 16 中的图像 3,3
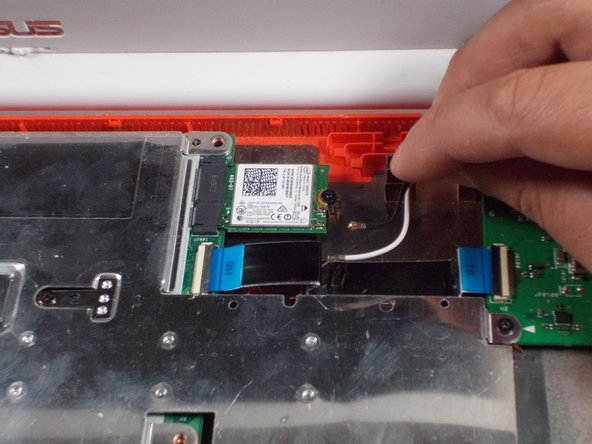
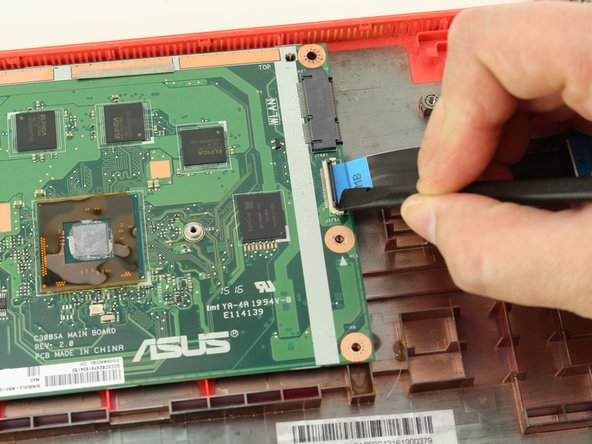
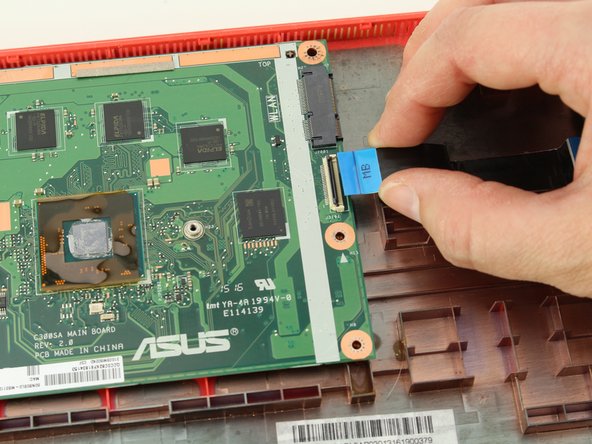
    • Using the black nylon spudger, unlock the black bar on the ZIF connector attached to the mid-right of the motherboard.

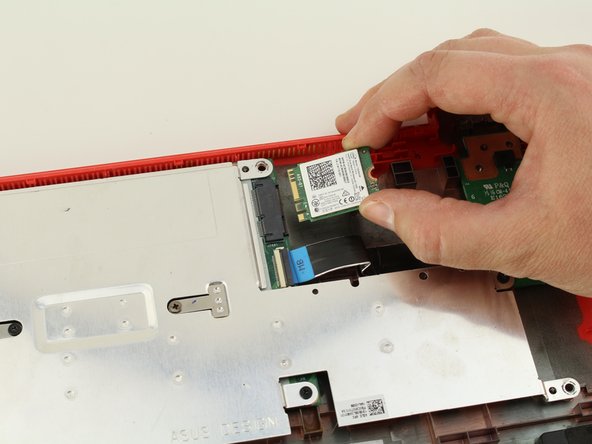
    • Remove the ribbon cable that attaches the motherboard to the daughterboard.

  17. 这个步骤还没有翻译 帮忙翻译一下

    : 步骤 17 中的图像 1,2 : 步骤 17 中的图像 2,2
    • Using the black nylon spudger, carefully slide the speaker cable connector out from its attachment on the motherboard.

  18. 这个步骤还没有翻译 帮忙翻译一下

    : 步骤 18 中的图像 1,1
    • Wiggle and pull the motherboard out from the bottom case.

终点

Sarah Westberg

于03/11/19注册

23,213 声望

创作了70篇指南

团队

iFixit iFixit 的会员

Staff

135 名成员

创作了17,198篇指南

0条评论

添加评论

浏览统计数据:

过去 24 小时: 2

过去 7 天: 9

过去 30 天: 12

总计 368