简介
Anytime you use the Arduino Leonardo as a keyboard or mouse, you risk losing the capability to upload code to the Leonardo through the USB port. From our experience, without proper programming procedures, the Leonardo essentially takes over USB communication. This guide demonstrates how to repair this issue so that your Arduino Leonardo can be used in other projects.
你所需要的
-
-
Make your way to the Arduino downloads page at https://www.arduino.cc/en/Main/Software.
-
Download the Arduino IDE that matches your operating system.
-
Follow the installation process for the application and run it.
-
-
-
Select the proper port that your Arduino Uno is connected to by selecting: Tools->Port, and then the COM port labeled with "Arduino/Genuino Uno".
-
To upload the ArduinoISP source code to the Arduino Uno, click on the circle with an arrow in the top left corner of the Arduino IDE.
-
As soon as the code is done uploading, unplug the USB cable from your computer.
-
-
-
-
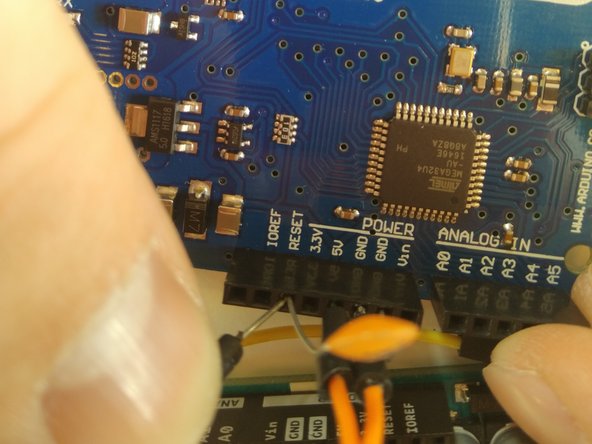
On the back of the Leonardo board, there is a set of six pins.
-
Take the wire connected to pin 11 on the Uno and plug it into the middle pin of the pins furthest to the back of the board.
-
Take the wire connected to pin 12 on the Uno and plug it into the first pin on the set of three pins going toward the board (the pin closest to the Leonardo label).
-
Finally, take the wire connected to pin 13 on the Uno and plug it into the middle pin of the inner row of three pins.
-
-
-
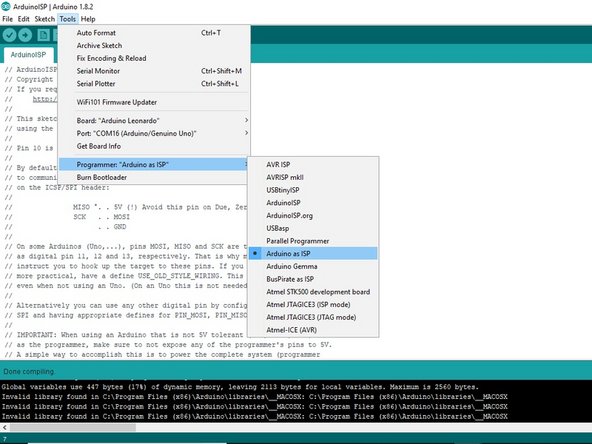
To upload the bootloader to the Arduino Leonardo, select the Arduino Leonardo board from Tools->Board->Arduino Leonardo.
-
Next, choose the Arduino as ISP programmer from Tools->Programmer->Arduino as ISP.
-
Ensure the Arduino Uno is plugged into your computer and that the proper COM port is selected in the Arduino IDE.
-
Finally, upload the bootloader to the Arduino Leonardo by selecting Tools->Burn Bootloader.
-


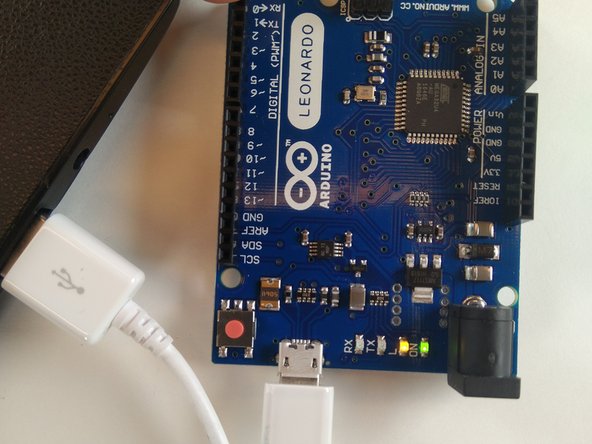
Now, your Arduino Leonardo should be able to receive code from your computer over USB again.
Now, your Arduino Leonardo should be able to receive code from your computer over USB again.
10等其他人完成本指南。

团队

University of Advancing Technology, Team S1-G4, Beam Summer 2019 University of Advancing Technology, Team S1-G4, Beam Summer 2019 的会员
UAT-BEAM-SU19S1G4
3 名成员
创作了1篇指南
7条评论
Can i use arduino nano instead of arduino uno ?
You can use the nano but you have to know which "pins" to use. This great tutorial is specific for the Uno.
Allen -
Thank you! Everything works. Keep up the good work!
Hey, nice tutorial, but I am having a problem when it comes to running the "Burn Bootloader". I am getting the following output message:
avrdude: Yikes! Invalid device signature.
Double check connections and try again, or use -F to override
this check.
Error while burning bootloader.
Any help is appreciated.
When I do a Leonardo I use an Uno as the ICSP programmer and not try to program a Leonardo by USB. I never got it to work that way, so I use the ICSP workaround. I have an UNO wired up so I just plug this female 6 pin plug on the target and program away. It'll nuke the bootloader but you can put it back if you want.
Thank you so much!!! this worked perfectly!!!