跳转到主内容

Apple Powerbook 520 Floppy Drive Replacement

你所需要的

  1. Apple Powerbook 520 Floppy Drive Replacement, Floppy Drive: 步骤 1 中的图像 1,1
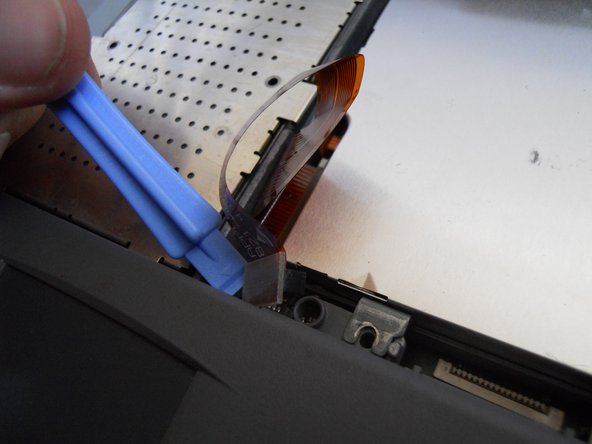
    • With the Generally Disassembly completed, you may proceed to floppy drive installation.

  2. Apple Powerbook 520 Floppy Drive Replacement: 步骤 2 中的图像 1,1
    • Remove the plastic panel at the bottom of the display.

  3. Apple Powerbook 520 Floppy Drive Replacement: 步骤 3 中的图像 1,1
    • Reverse the computer to access the peripheral panel in the back.

    • Remove the two T8 Torx screws on either side of the bar code panel.

  4. Apple Powerbook 520 Floppy Drive Replacement: 步骤 4 中的图像 1,1
    • Reverse the computer to have the monitor and mousepad facing you.

    • Remove the plastic panel underneath the display.

  5. Apple Powerbook 520 Floppy Drive Replacement: 步骤 5 中的图像 1,1
    • Remove the three T8 Torx screws securing the floppy drive to the frame.

  6. Apple Powerbook 520 Floppy Drive Replacement: 步骤 6 中的图像 1,1
    • Using a spudger, lift the plastic tabs on the floppy drive securing the ribbon cable to the ribbon port.

  7. Apple Powerbook 520 Floppy Drive Replacement: 步骤 7 中的图像 1,1
    • Lift the defective floppy drive from the body of the computer.

  8. Apple Powerbook 520 Floppy Drive Replacement: 步骤 8 中的图像 1,1
    • Replace the defective drive with a new drive.

    • Follow these instructions in reverse order to reassemble the device.

结论

To reassemble your device, follow these instructions in reverse order.

2等其他人完成本指南。

Kevin Peters

于04/19/11注册

130 声望

撰写一个指南

团队

Cal Poly, Team 20-66, Walters Spring 2011 Cal Poly, Team 20-66, Walters Spring 2011 的会员

CPSU-WALTERS-S11S20G66

4 名成员

创作了3篇指南

一条评论

Does anyone know where I can actually find another FDD for this PowerBook? Because I think i broke mine ((

Ali Sadykov - 回复

添加评论

浏览统计数据:

过去 24 小时: 0

过去 7 天: 2

过去 30 天: 6

总计 2,704