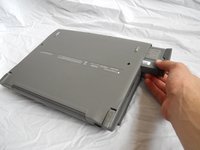
跳转到主内容

Apple PowerBook 520 Memory (RAM) Replacement

你所需要的

  1. Apple PowerBook 520 Memory (RAM) Replacement, Apple Powerbook 520/540 General Disassembly: 步骤 1 中的图像 1,2 Apple PowerBook 520 Memory (RAM) Replacement, Apple Powerbook 520/540 General Disassembly: 步骤 1 中的图像 2,2
    • Turn computer over.

    • Remove battery expansion cover and battery.

  2. Apple PowerBook 520 Memory (RAM) Replacement: 步骤 2 中的图像 1,1
    • With monitor hinge at the bottom, remove the two top center screws.

  3. Apple PowerBook 520 Memory (RAM) Replacement: 步骤 3 中的图像 1,1
    • Remove top left and top right screws.

  4. Apple PowerBook 520 Memory (RAM) Replacement: 步骤 4 中的图像 1,1
    • Remove middle left and middle right screws.

  5. Apple PowerBook 520 Memory (RAM) Replacement: 步骤 5 中的图像 1,1
    • Open computer kickstands.

    • Remove screws underneath each kickstand.

  6. Apple PowerBook 520 Memory (RAM) Replacement: 步骤 6 中的图像 1,1
    • Lift keyboard from bottom and take out of shell.

  7. Apple PowerBook 520 Memory (RAM) Replacement: 步骤 7 中的图像 1,3 Apple PowerBook 520 Memory (RAM) Replacement: 步骤 7 中的图像 2,3 Apple PowerBook 520 Memory (RAM) Replacement: 步骤 7 中的图像 3,3
    • Lift the white ribbon clamps securing the keyboard ribbon cables to the motherboard. You can do this using a plastic opening tool.

    • Removing both ribbon cables from the motherboard will leave the clamps like so.

    • From here you can access the logic board, hard drive, and floppy drive.

  8. Apple PowerBook 520 Memory (RAM) Replacement, Memory (RAM): 步骤 8 中的图像 1,1
    • Remove the plastic panel on the bottom of the LCD Screen.

  9. Apple PowerBook 520 Memory (RAM) Replacement: 步骤 9 中的图像 1,1
    • Open panel on back of the device. Remove 2 T8 torque screws.

  10. Apple PowerBook 520 Memory (RAM) Replacement: 步骤 10 中的图像 1,1
    • Remove the plastic panel underneath the LCD Screen.

  11. Apple PowerBook 520 Memory (RAM) Replacement: 步骤 11 中的图像 1,1
    • Remove the 2 T8 Torx Screws securing the logic board protection plate from the midsection of the logic board protection plate. Remove the T8 Torx Screw from the back of the plate, underneath the hinge.

  12. Apple PowerBook 520 Memory (RAM) Replacement: 步骤 12 中的图像 1,1
    • Remove the logic board protection plate.

  13. Apple PowerBook 520 Memory (RAM) Replacement: 步骤 13 中的图像 1,1
    • Using a plastic spudger, gently pry up the uppermost board fixture. This is the Memory (RAM).

  14. Apple PowerBook 520 Memory (RAM) Replacement: 步骤 14 中的图像 1,1
    • Once the old Memory board is removed, replace it with the new Memory board.

结论

To reassemble your device, follow these instructions in reverse order.

2等其他人完成本指南。

Tyler

于04/10/11注册

142 声望

创作了2篇指南

团队

Cal Poly, Team 20-66, Walters Spring 2011 Cal Poly, Team 20-66, Walters Spring 2011 的会员

CPSU-WALTERS-S11S20G66

4 名成员

创作了3篇指南

0条评论

添加评论

浏览统计数据:

过去 24 小时: 1

过去 7 天: 2

过去 30 天: 15

总计 3,303