跳转到主内容

Aorus x7 v2 Fan Assembly Replacement

你所需要的

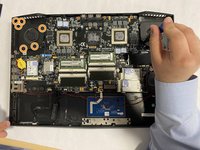
  1. Aorus x7 v2 Fan Assembly Replacement, Fan Assembly: 步骤 1 中的图像 1,3 Aorus x7 v2 Fan Assembly Replacement, Fan Assembly: 步骤 1 中的图像 2,3 Aorus x7 v2 Fan Assembly Replacement, Fan Assembly: 步骤 1 中的图像 3,3
    • Flip the laptop over.

    • Unscrew the 12 screws holding on the bottom cover.

    • Take off the bottom cover.

    • Remove the 12 screws from the heat sink.

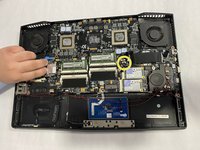
  2. Aorus x7 v2 Fan Assembly Replacement: 步骤 2 中的图像 1,3 Aorus x7 v2 Fan Assembly Replacement: 步骤 2 中的图像 2,3 Aorus x7 v2 Fan Assembly Replacement: 步骤 2 中的图像 3,3
    • Remove the heat sinks one by one.

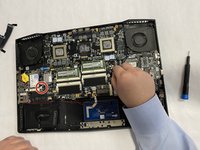
  3. Aorus x7 v2 Fan Assembly Replacement: 步骤 3 中的图像 1,3 Aorus x7 v2 Fan Assembly Replacement: 步骤 3 中的图像 2,3 Aorus x7 v2 Fan Assembly Replacement: 步骤 3 中的图像 3,3
    • Unscrew the six screws from the right fan.

    • Unscrew the six screws from the left fan.

    • Locate the connection plug for the fan to the motherboard and disconnect the left fan connector.

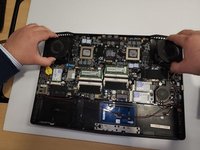
  4. Aorus x7 v2 Fan Assembly Replacement: 步骤 4 中的图像 1,3 Aorus x7 v2 Fan Assembly Replacement: 步骤 4 中的图像 2,3 Aorus x7 v2 Fan Assembly Replacement: 步骤 4 中的图像 3,3
    • Disconnect the right fan connector.

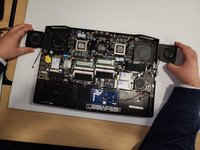
    • Carefully lift up the left and right fans.

    • Set the fans to the side before installing new fans.

结论

To reassemble your device, follow these instructions in reverse order using new left and right fans.

另外一个人完成了本指南。

团队

Gateway, Team 1-4, Pee Fall 2022 Gateway, Team 1-4, Pee Fall 2022 的会员

GCC-PEE-F22S1G4

3 名成员

创作了6篇指南

0条评论

添加评论

浏览统计数据:

过去 24 小时: 0

过去 7 天: 9

过去 30 天: 32

总计 424