当前版本的文档还未经巡查,您可以查看最新的已查核版本。
你所需要的
-
-
这个步骤还没有翻译 帮忙翻译一下
-
Using the wire stripper, strip the ends of each wire approximately 1-2 cm to reveal enough wire to twist back together with new motor's wires.
-
Next, using the wire cutter, cut the {Positive & Negative} wires that are heading from the Coil Assembly to the Attached power cord. Cut approximately half way between the two ends of both wires.
-
After you cut the old Coil Assembly's wires, remove it completely, and replace it with new one.
-
-
这个步骤还没有翻译 帮忙翻译一下
-
Twist the red wire that is coming from the Coil Assembly with the white one, and the black wire with the black one.
-
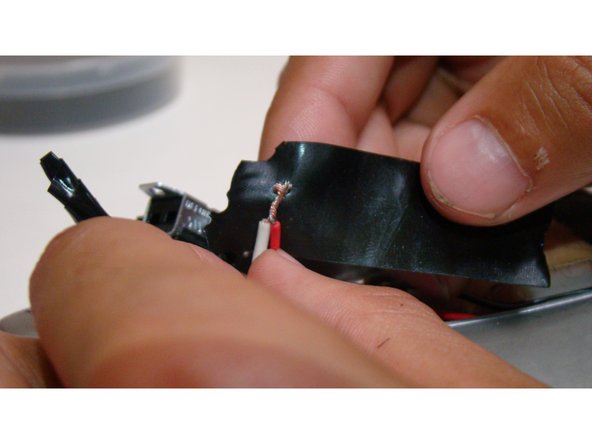
After you have twisted the wires together, use electrical tape to wrap the stripped wires. Leave some tape over the ends of the wires, and below the cutoff of the rubber around the wire as shown in the photo. Wrap the tape around the wires as tight as possible.
-


另外一个人完成了本指南。
团队

Sam Houston State, Team 16-2, Nardone Fall 2015 Sam Houston State, Team 16-2, Nardone Fall 2015 的会员
SHSU-NARDONE-F15S16G2
5 名成员
创作了1篇指南