跳转到主内容

Amazon Fire HDX 8.9" 4th Gen. Screen Replacement

你所需要的

  1. Amazon Fire HDX 8.9" 4th Gen. Screen Replacement, Screen: 步骤 1 中的图像 1,3 Amazon Fire HDX 8.9" 4th Gen. Screen Replacement, Screen: 步骤 1 中的图像 2,3 Amazon Fire HDX 8.9" 4th Gen. Screen Replacement, Screen: 步骤 1 中的图像 3,3
    • Ensure that the device is turned off.

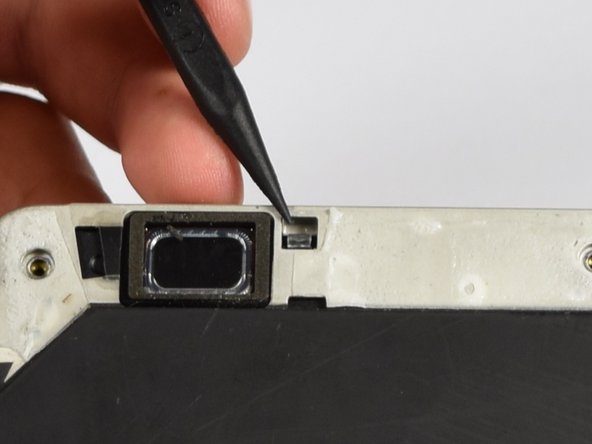
    • Holding the device firmly, wedge a plastic opening tool between the speaker cover and the device. Then pry up to separate it from the device.

    • Then begin to firmly pry up the plastic cover with the plastic opening tool.

    • The backing is connected with adhesive so force may be necessary.

    • Be careful to not damage the plastic in any way.

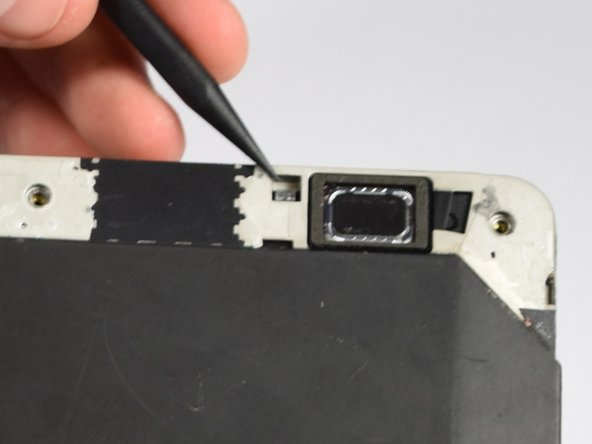
    • Once you can fit your finger under the plastic cover, begin to slide your finger down the cover while simultaneously prying up.

  2. Amazon Fire HDX 8.9" 4th Gen. Screen Replacement: 步骤 2 中的图像 1,2 Amazon Fire HDX 8.9" 4th Gen. Screen Replacement: 步骤 2 中的图像 2,2
    • Once you reach the end of the plastic cover you should be able to completely remove it from the device.

  3. Amazon Fire HDX 8.9" 4th Gen. Screen Replacement: 步骤 3 中的图像 1,2 Amazon Fire HDX 8.9" 4th Gen. Screen Replacement: 步骤 3 中的图像 2,2
    • Use a T5 screwdriver to remove the four 3.5 mm T5 screws at the top of the device, where the black plastic trim was located.

  4. Amazon Fire HDX 8.9" 4th Gen. Screen Replacement: 步骤 4 中的图像 1,3 Amazon Fire HDX 8.9" 4th Gen. Screen Replacement: 步骤 4 中的图像 2,3 Amazon Fire HDX 8.9" 4th Gen. Screen Replacement: 步骤 4 中的图像 3,3
    • Release the two clear plastic clips at the top of the device near the speaker using the spudger.

    • Simply push down the clip with the tip of the spudger.

    • Push lightly to ensure that the clips aren't damaged.

  5. Amazon Fire HDX 8.9" 4th Gen. Screen Replacement: 步骤 5 中的图像 1,3 Amazon Fire HDX 8.9" 4th Gen. Screen Replacement: 步骤 5 中的图像 2,3 Amazon Fire HDX 8.9" 4th Gen. Screen Replacement: 步骤 5 中的图像 3,3
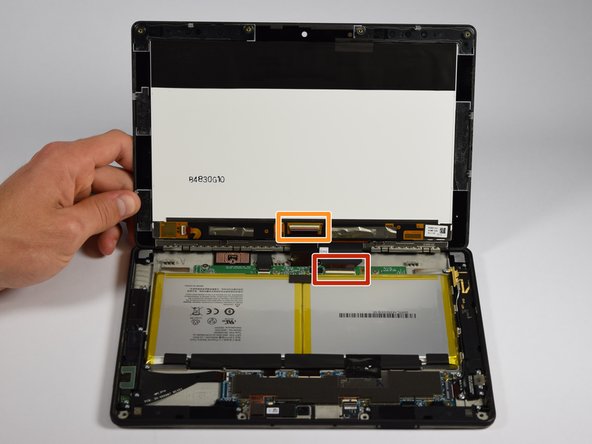
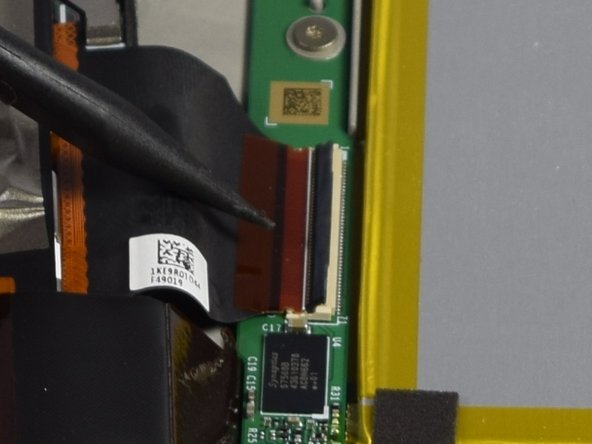
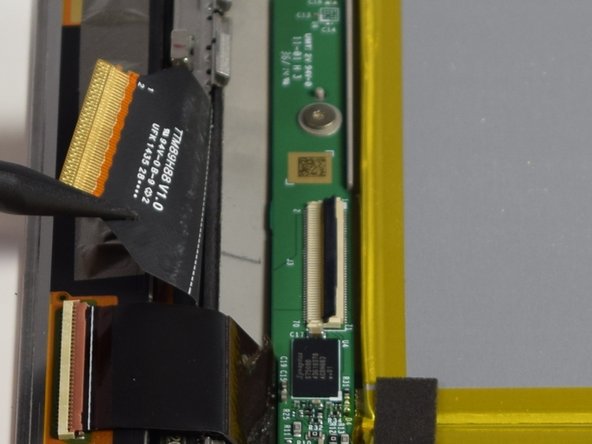
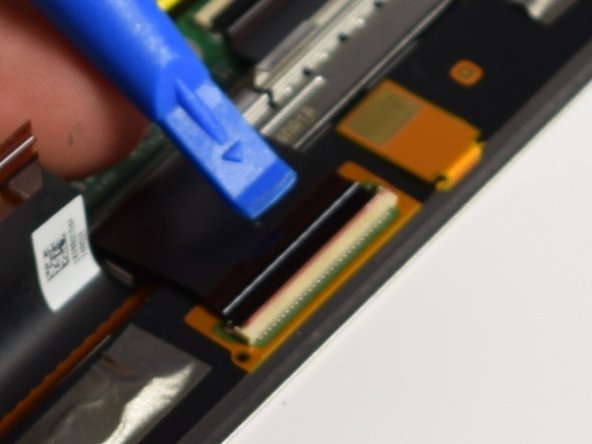
    • Use a plastic opening tool to wedge between the screen and the device, while simultaneously holding the clip open from step 4.

    • Pry the screen very gently to avoid cracking the glass

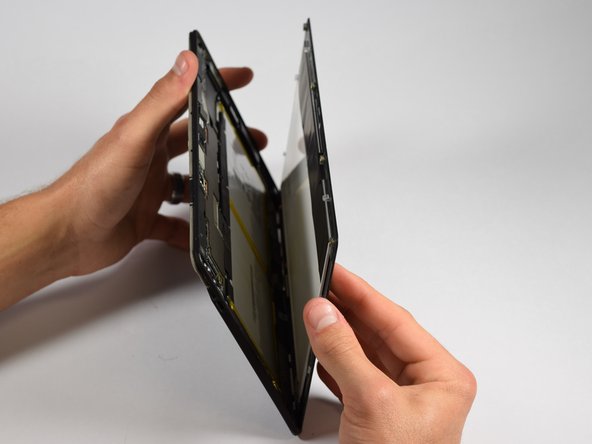
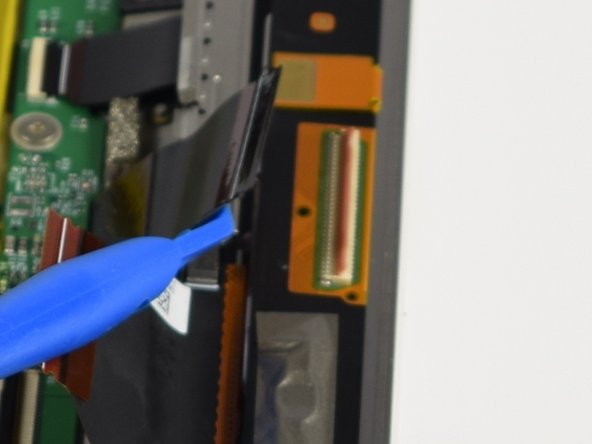
    • Start to remove the screen from where the black plastic trim was removed and work the tool around the sides of the device. You will here small pops from the clips on the sides being released.

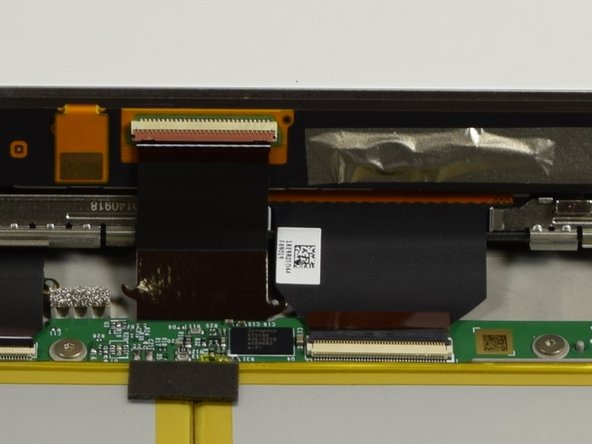
    • The Amazon Fire can now be opened with the two flex cables at the base still connected

  6. Amazon Fire HDX 8.9" 4th Gen. Screen Replacement: 步骤 6 中的图像 1,2 Amazon Fire HDX 8.9" 4th Gen. Screen Replacement: 步骤 6 中的图像 2,2
    • Now we have to remove the two flex cables attached to both the screen assembly and body of the device.

    • The cable addressed in step 8 is highlighted in orange.

  7. Amazon Fire HDX 8.9" 4th Gen. Screen Replacement: 步骤 7 中的图像 1,3 Amazon Fire HDX 8.9" 4th Gen. Screen Replacement: 步骤 7 中的图像 2,3 Amazon Fire HDX 8.9" 4th Gen. Screen Replacement: 步骤 7 中的图像 3,3
    • First turn the device 90 degrees counterclockwise.

    • Wedge a spudger or plastic opening tool under the black flap of the larger connector and lift up.

    • Pull the belt out of the connector and lift it up.

  8. Amazon Fire HDX 8.9" 4th Gen. Screen Replacement: 步骤 8 中的图像 1,3 Amazon Fire HDX 8.9" 4th Gen. Screen Replacement: 步骤 8 中的图像 2,3 Amazon Fire HDX 8.9" 4th Gen. Screen Replacement: 步骤 8 中的图像 3,3
    • Turn the device 180 degrees.

    • Repeat step 7 for the smaller flex cable connection.

  9. Amazon Fire HDX 8.9" 4th Gen. Screen Replacement: 步骤 9 中的图像 1,1
    • Your screen assembly has now been removed and can be replaced.

结论

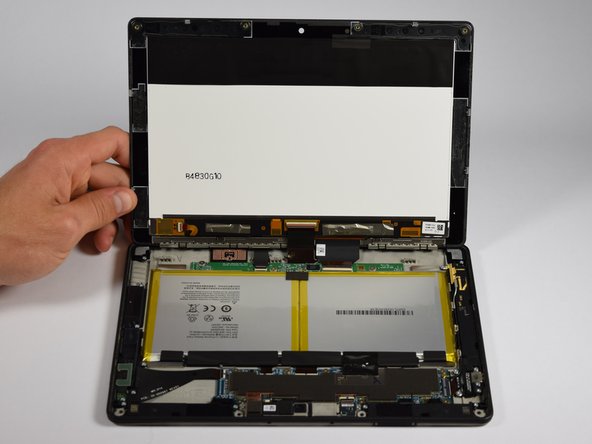
To reassemble your device, follow these instructions in reverse order.

4等其他人完成本指南。

Sidney Stefani

于04/11/16注册

463 声望

创作了4篇指南

团队

Cal Poly, Team 1-8, Maness Spring 2016 Cal Poly, Team 1-8, Maness Spring 2016 的会员

CPSU-MANESS-S16S1G8

5 名成员

创作了6篇指南

0条评论

添加评论

浏览统计数据:

过去 24 小时: 0

过去 7 天: 0

过去 30 天: 8

总计 2,937