简介
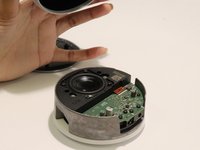
This guide will walk you through step by step instructions on how to replace the casing of the Amazon Echo Dot 3rd Generation. This repair is needed if the casing of the Echo Dot is damaged, cracked, or suffering from wear and tear. The process involves removing the adhesive, unscrewing four screws, and separating the casing. No special skills are necessary for this, but basic tools are required, such as a spudger and screwdriver. Make sure that the device is powered off and unplugged before starting this guide.
你所需要的
-
-
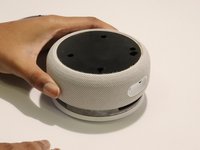
Turn the Echo Dot over so the barcode is facing up, giving you access to the bottom of the device.
-
-


To reassemble your Echo Dot, follow these instructions in reverse order. Ensure the casing fits properly before tightening the screws back on. Once reassembly is finished, check that the device powers on and functions correctly.
2等其他人完成本指南。

