跳转到主内容

Alienware P18G M14X R1 Optical Drive Replacement

你所需要的

  1. Alienware P18G M14X R1 Optical Drive Replacement, Back Cover: 步骤 1 中的图像 1,1
    • Loosen the top left and top right 6.5mm PH1 screws that hold down the back cover.

    • The screws will not be able to be removed from the back cover. They can only be loosened or tightened.

  2. Alienware P18G M14X R1 Optical Drive Replacement: 步骤 2 中的图像 1,1
    • Slide back cover forward using your thumbs.

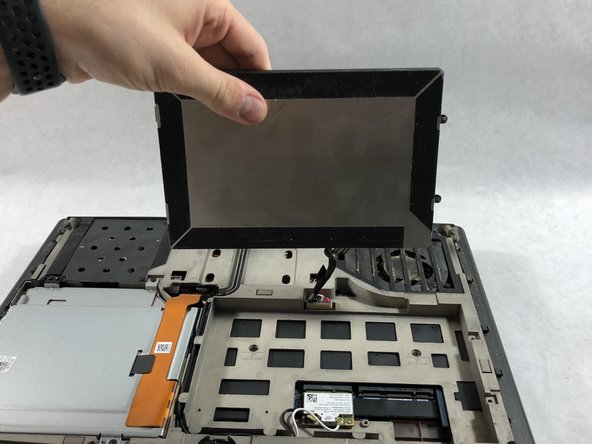
  3. Alienware P18G M14X R1 Optical Drive Replacement: 步骤 3 中的图像 1,1
    • Lift up the cover and set aside exposing the internals of the computer.

  4. Alienware P18G M14X R1 Optical Drive Replacement, Battery: 步骤 4 中的图像 1,1
    • Make sure the laptop is turned off before starting.

    • Using PH1 screwdriver loosen the two screws on the right of the battery.

    • The screws will not be able to be removed from the battery. They can only be loosened or tightened.

  5. Alienware P18G M14X R1 Optical Drive Replacement: 步骤 5 中的图像 1,2 Alienware P18G M14X R1 Optical Drive Replacement: 步骤 5 中的图像 2,2
    • Pull battery up using the tab provided.

  6. Alienware P18G M14X R1 Optical Drive Replacement: 步骤 6 中的图像 1,1
    • Disconnect the clip connecting the battery to the computer.

    • Set battery aside.

  7. Alienware P18G M14X R1 Optical Drive Replacement, Optical Drive: 步骤 7 中的图像 1,1
    • Unscrew the four 6.35mm screws using the PH1, that hold down the optical drive.

  8. Alienware P18G M14X R1 Optical Drive Replacement: 步骤 8 中的图像 1,1
    • Using the plastic opening tool unclip the white connector holding down the orange cable.

  9. Alienware P18G M14X R1 Optical Drive Replacement: 步骤 9 中的图像 1,1
    • Using the tab on the optical drive, lift the optical drive out of the computer and set it aside.

结论

To reassemble your device, follow these instructions in reverse order.

Andonaq Grozdani

于03/01/18注册

892 声望

创作了5篇指南

团队

0条评论

添加评论

浏览统计数据:

过去 24 小时: 0

过去 7 天: 0

过去 30 天: 7

总计 420