跳转到主内容

Alienware M15x Hard Drive Replacement

你所需要的

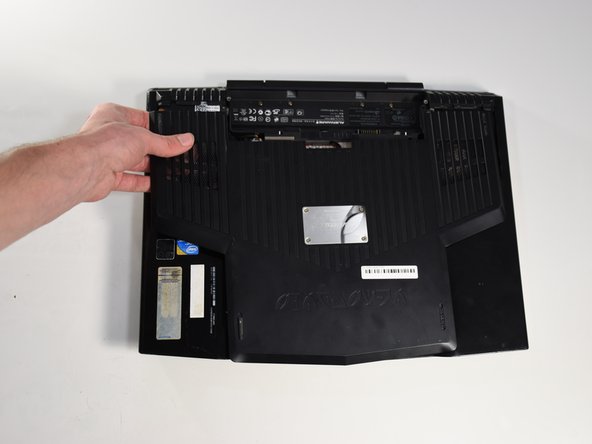
  1. Alienware M15x Hard Drive Replacement, Battery: 步骤 1 中的图像 1,3 Alienware M15x Hard Drive Replacement, Battery: 步骤 1 中的图像 2,3 Alienware M15x Hard Drive Replacement, Battery: 步骤 1 中的图像 3,3
    • Remove the battery by sliding the latch to the left and pulling the battery up.

  2. Alienware M15x Hard Drive Replacement, Compartment Door: 步骤 2 中的图像 1,2 Alienware M15x Hard Drive Replacement, Compartment Door: 步骤 2 中的图像 2,2
    • Remove the two 4-mm screws that hold the compartment door to the rest of the computer using a PH#0 screwdriver tip.

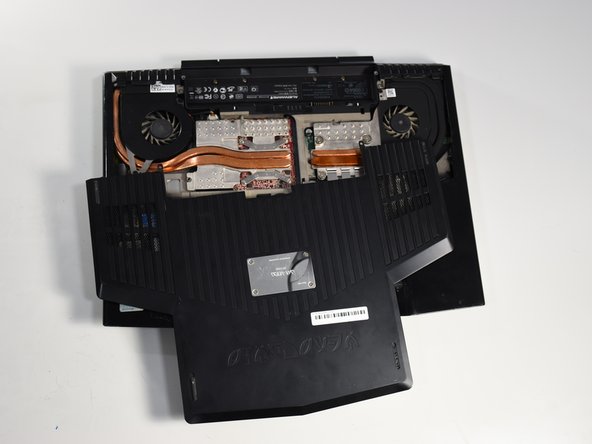
  3. Alienware M15x Hard Drive Replacement: 步骤 3 中的图像 1,3 Alienware M15x Hard Drive Replacement: 步骤 3 中的图像 2,3 Alienware M15x Hard Drive Replacement: 步骤 3 中的图像 3,3
    • Slide the compartment door towards the front of the computer and lift.

  4. Alienware M15x Hard Drive Replacement, Hard Drive: 步骤 4 中的图像 1,1
    • Use Phillips #1 screwdriver to loosen the four screws on the hard drive enclosure.

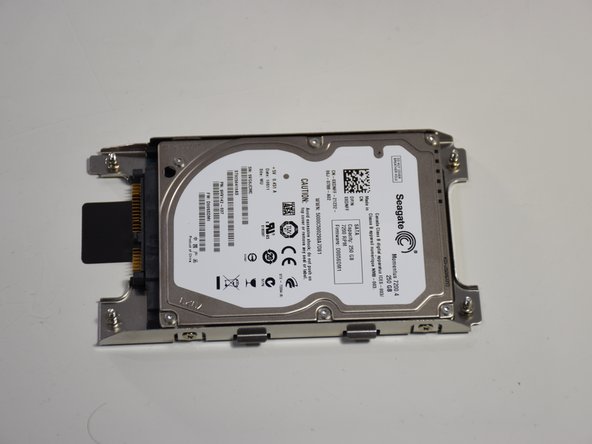
  5. Alienware M15x Hard Drive Replacement: 步骤 5 中的图像 1,2 Alienware M15x Hard Drive Replacement: 步骤 5 中的图像 2,2
    • Once the screws are loosened use the "PULL" tab to remove the current hard drive from the computer.

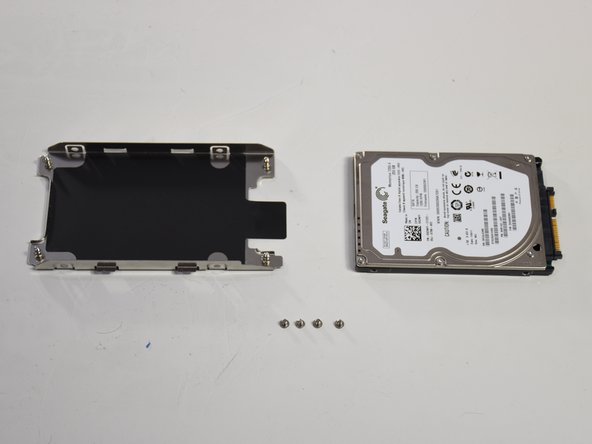
  6. Alienware M15x Hard Drive Replacement: 步骤 6 中的图像 1,2 Alienware M15x Hard Drive Replacement: 步骤 6 中的图像 2,2
    • Remove the four small screws indicated to remove the casing to the hard drive.

  7. Alienware M15x Hard Drive Replacement: 步骤 7 中的图像 1,1
    • Now take off the SATA converter and then connect it to the drive you would like to replace it with.

结论

To reassemble your device, follow these instructions in reverse order.

David Sann

于01/22/18注册

111 声望

撰写一个指南

团队

Cal Poly, Team S11-G3, Banghart Winter 2018 Cal Poly, Team S11-G3, Banghart Winter 2018 的会员

CPSU-BANGHART-W18S11G3

5 名成员

创作了6篇指南

0条评论

添加评论

浏览统计数据:

过去 24 小时: 0

过去 7 天: 2

过去 30 天: 7

总计 832