简介
It is extremely common that computer components will start to show some issues after extended use. Many of these issues become frustrating for the users, one of issues are mouse wheel malfunction, and in this case it is for the Akko 3068B Mechanical Keyboard. The gamers that use this keyboard have the ability to use this wireless using Bluetooth technology and the battery allows it to be used at a far range. By offering a clear, step-by-step process that is accompanied with detailed and to the point instructions with clear visuals in 9 simple steps, to replace the battery.
Purchasing an extra keyboard battery is advised from credible platforms such as,
The main reason people seek out solutions to their problems personally, is because they believe that it is cheaper doing so. Might be something small, or something big, the satisfaction from doing it yourself will always trump paying a 3rd party too solve your problems, especially when it comes to electronics. By following this guide, you will realize how somethings are really easy to fix, and will realize that the things that you thought were broken in the past could've been fixed as well. This guide will allow for hundreds of more hours of gaming and ease of use for the future.
Understanding the fundamentals of dissecting your gaming mouse will result in cheaper solutions in the future. It will save you from throwing the mouse away and buying a new mechanical keyboard might cost 50 dollars on the low end for a decent one, and upwards of 1000 dollars for a prestigious one, but either can break after extended use, they are all limited to time. Fixing it yourself will save you maybe hundreds of dollars in the future, that you might need later on.
你所需要的
-
-
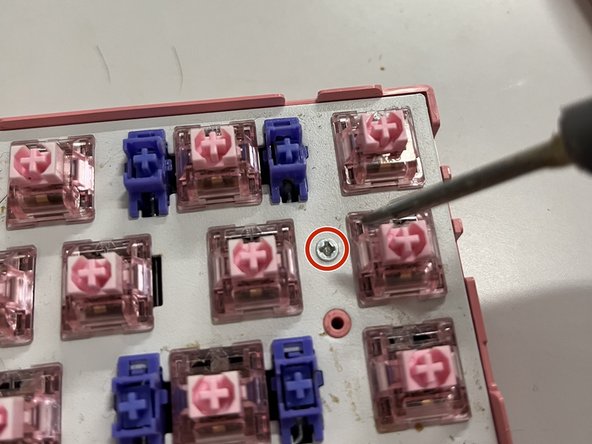
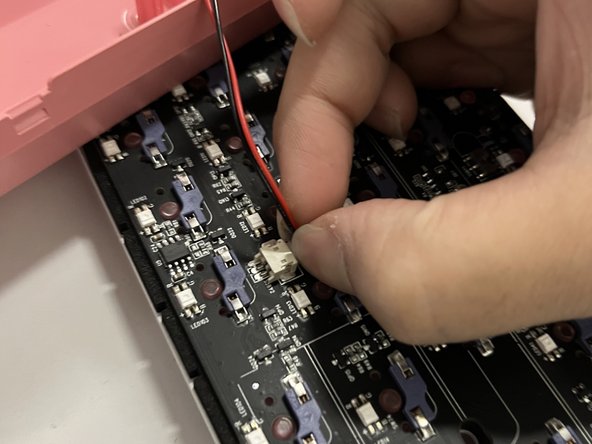
Remove the USB-C cable from the keyboard.
-
Turn off keyboard using the switch on the back.
-
-


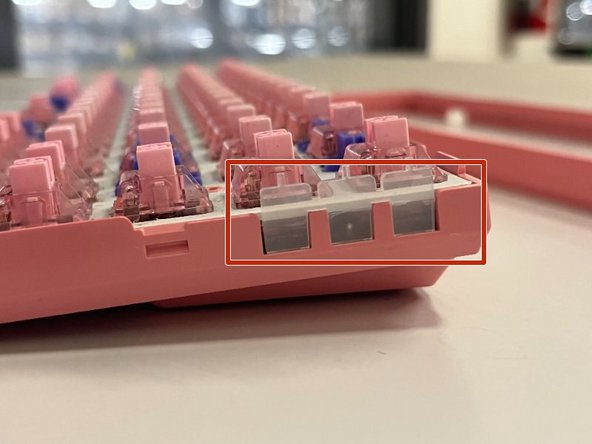

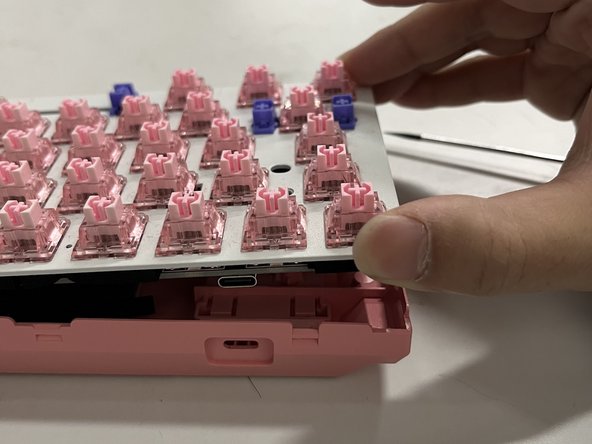
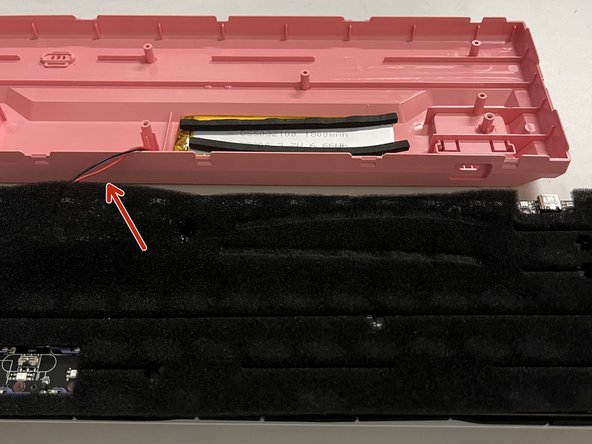


To reassemble your device, follow these instructions in reverse order.
To reassemble your device, follow these instructions in reverse order.

团队

York University, Team 1-28, O'Regan Winter 2024 York University, Team 1-28, O'Regan Winter 2024 的会员
YORK-O'REGAN-W24S1G28
1 名成员
创作了1篇指南