跳转到主内容

AcuRite 02032 Solar Panel Replacement

你所需要的

  1. AcuRite 02032 Solar Panel Replacement, Battery: 步骤 1 中的图像 1,3 AcuRite 02032 Solar Panel Replacement, Battery: 步骤 1 中的图像 2,3 AcuRite 02032 Solar Panel Replacement, Battery: 步骤 1 中的图像 3,3
    • Remove the battery compartment lid by lifting upward.

  2. AcuRite 02032 Solar Panel Replacement: 步骤 2 中的图像 1,1
    • Pull the ribbon to eject the 2 X AA alkaline batteries.

  3. AcuRite 02032 Solar Panel Replacement: 步骤 3 中的图像 1,3 AcuRite 02032 Solar Panel Replacement: 步骤 3 中的图像 2,3 AcuRite 02032 Solar Panel Replacement: 步骤 3 中的图像 3,3
    • Once the batteries are removed, it is safe to proceed.

  4. AcuRite 02032 Solar Panel Replacement, Base: 步骤 4 中的图像 1,1
    • Remove the four 0.8cm screws that attach the bottom panel to the device

    • An extended driver is needed to reach 3 of these screws. If you are using the 64 - bit driver kit you can extend the driver by inserting the driver PH1, (Phillips size 1) into the size 4 hexagonal adapter.

  5. AcuRite 02032 Solar Panel Replacement: 步骤 5 中的图像 1,2 AcuRite 02032 Solar Panel Replacement: 步骤 5 中的图像 2,2
    • Gently lift the top section of the weather center away from the base. With all the screws removed it should lift off easily.

  6. AcuRite 02032 Solar Panel Replacement, Wind Cup Assembly Opening: 步骤 6 中的图像 1,1
    • Remove the four 0.8cm screws inside the case located near the fan using the J1 screw bit.

  7. AcuRite 02032 Solar Panel Replacement: 步骤 7 中的图像 1,1
    • Remove the three 0.8cm screws inside of the solar panel housing.

  8. AcuRite 02032 Solar Panel Replacement: 步骤 8 中的图像 1,2 AcuRite 02032 Solar Panel Replacement: 步骤 8 中的图像 2,2
    • Gently twist and pull the black magnetic axle until it comes off. Hold the wind cups still in order to remove the axle easily.

    • Do not apply too much force to the axle or the wind cups. Light twisting or wobbling it side to side should loosen it enough for the axle to come off easily.

  9. AcuRite 02032 Solar Panel Replacement: 步骤 9 中的图像 1,1
    • Carefully slide apart the two parts of the solar panel housing.

  10. AcuRite 02032 Solar Panel Replacement, Solar Panel: 步骤 10 中的图像 1,3 AcuRite 02032 Solar Panel Replacement, Solar Panel: 步骤 10 中的图像 2,3 AcuRite 02032 Solar Panel Replacement, Solar Panel: 步骤 10 中的图像 3,3
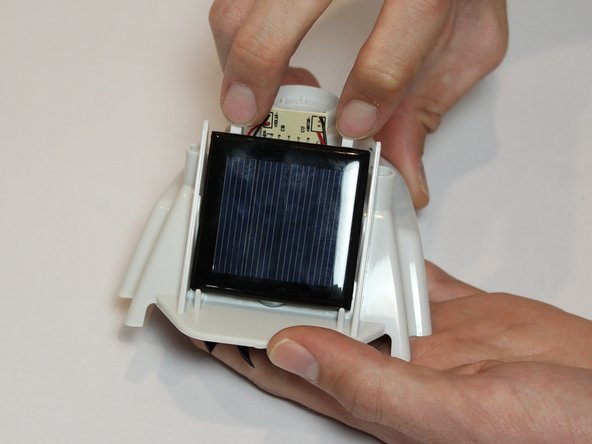
    • Gently pull up on the two hooks holding down the solar panel.

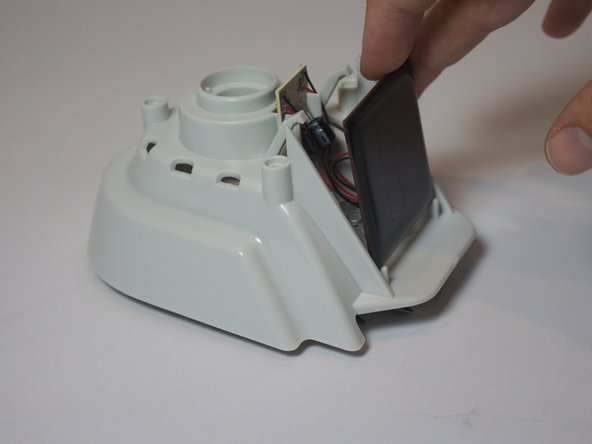
    • Gently pull down on the solar panel.

  11. AcuRite 02032 Solar Panel Replacement: 步骤 11 中的图像 1,2 AcuRite 02032 Solar Panel Replacement: 步骤 11 中的图像 2,2
    • Carefully pull the solar panel out.

    • Pulling on the panel too hard may damage to the electronic components inside.

    • Set the panel in the apparatus like so.

  12. AcuRite 02032 Solar Panel Replacement: 步骤 12 中的图像 1,2 AcuRite 02032 Solar Panel Replacement: 步骤 12 中的图像 2,2
    • Carefully lift the circuit board that the solar panel is attached to out of its apparatus.

    • Stretch out the panel and the board so you have more room to work.

  13. AcuRite 02032 Solar Panel Replacement: 步骤 13 中的图像 1,3 AcuRite 02032 Solar Panel Replacement: 步骤 13 中的图像 2,3 AcuRite 02032 Solar Panel Replacement: 步骤 13 中的图像 3,3
    • Clip the first wire connecting the old solar panel.

    • Cut as close to the solar panel as possible to make attaching the new solar panel easier.

  14. AcuRite 02032 Solar Panel Replacement: 步骤 14 中的图像 1,2 AcuRite 02032 Solar Panel Replacement: 步骤 14 中的图像 2,2
    • Clip the second wire the same way.

    • Cut as close to the solar panel as possible to make attaching the new solar panel easier.

  15. AcuRite 02032 Solar Panel Replacement: 步骤 15 中的图像 1,3 AcuRite 02032 Solar Panel Replacement: 步骤 15 中的图像 2,3 AcuRite 02032 Solar Panel Replacement: 步骤 15 中的图像 3,3
    • Strip the insulation off the wires to reveal the copper beneath.

    • The wires are very thin, so take care not to cut through them.

  16. AcuRite 02032 Solar Panel Replacement: 步骤 16 中的图像 1,3 AcuRite 02032 Solar Panel Replacement: 步骤 16 中的图像 2,3 AcuRite 02032 Solar Panel Replacement: 步骤 16 中的图像 3,3
    • Do not reverse the + and the - wires

    • Red wire is positive (+), Black wire is negative (-)

    • Using a soldering iron, melt the solder to attach the wires to the panel.

    • You may need a third hand for this step.

    • Be sure to completely cover the ends of the wire with the solder.

    • Soldering is dangerous as the iron must get very hot to melt the metal solder.

    • Solder dripping off the iron can cause sever burns and start fires on clothing and tables.

结论

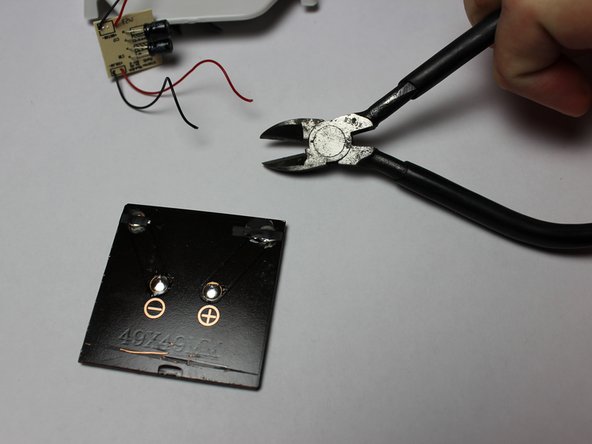
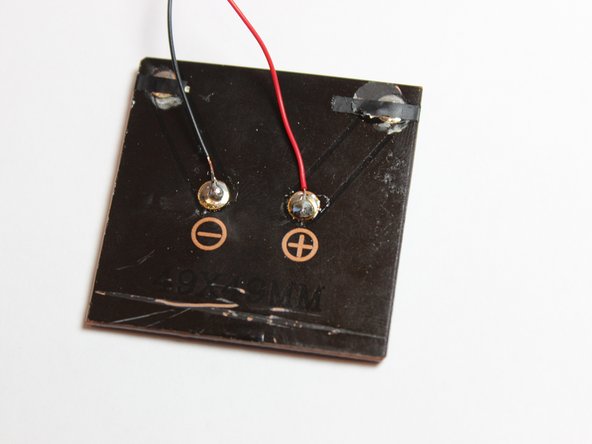
To reassemble your device, follow these instructions in reverse order.

4等其他人完成本指南。

Alec Vigil

于09/15/16注册

227 声望

撰写一个指南

团队

CSU Fullerton, Team 1-4, Bruce Fall 2016 CSU Fullerton, Team 1-4, Bruce Fall 2016 的会员

CSUF-BRUCE-F16S1G4

5 名成员

创作了7篇指南

4条评论

Replacing the panel may not be enough. Even after the company replaced mine with a new double-paneled head, its temp still reads much higher than actual, because the case-cooling fan’s motor that the panel drives won’t start up. Once running it’s okay, although it probably doesn’t cool the case enough even then. But as the sun comes up the panel puts out not enough to get the motor rolling, then the motor can’t overcome static resistance even as the sun goes through the day. If you bump the device a little while the panel is solar exposed, the momentum energy will get it turning (a few years ago I added a brief video to YouTube demonstrating that). But there’s no practical way to bump the case each day while the device is mounted in place.

Hafcanadian - 回复

I even replaced the motor with a well-rated one, but it still doesn’t start easily enough to turn the fan and give accurate temperature readings. In winter it’s relatively accurate, but in summer when keeping the inner case from overheating in direct sun is critical, the motor fails to overcome start resistance and the readout can get up to 10 degrees higher than the accepted actual temp.

Hafcanadian - 回复

The design of this cooling system is bad. I too upgraded to the “Pro” unit that has two solar cells. The cells developed a “crust” after two summers in the sun, as if the factory failed to remove the protective film from the cells during assembly. I was unable to remove this “crust”.

It would be helpful, if you could provide details of the replacement cell you used. I also replaced the motor with a Mabuchi, but the noise continues, when the unit is in place with the shaft facing downward.

Raul - 回复

what is the part number and where can i buy a panel at..?

Rich ZUCHINSKI - 回复

添加评论

浏览统计数据:

过去 24 小时: 0

过去 7 天: 0

过去 30 天: 2

总计 1,107