跳转到主内容

Acer One 10 S1003-114M Motherboard Replacement

你所需要的

  1. Acer One 10 S1003-114M Motherboard Replacement, Battery: 步骤 1 中的图像 1,2 Acer One 10 S1003-114M Motherboard Replacement, Battery: 步骤 1 中的图像 2,2
    • Make sure the device is turned off and disconnected from any power source.

    • To disconnect the tablet from the keyboard attachment, open the laptop and lift the tablet component up from the keyboard dock.

    Nice guide, but warning!

    If doing step 5, be very carefull. Guide says "unscrew the two 2mm screws at the top right of the battery", but not explains, what you are doing. So here is explanation: doing so you release the metal bridge, which is fixing the battery connector. After you unscrew the second screw, the bridge is not fixed in any way, and can sudenly fall on the circuit board.

    I suggest to hold on this part and remove it carefully, because battery connector is still connected, so all components are powered. The metal part can cause a short circuit and demage motherboard. This is exactly what happened to me. Unfortunately, the manufacturer has not published service manual with a schematic and layout, so the only (really expensive) solution is to replace the motherboard. So watch out!!

    Anthony - 回复

  2. Acer One 10 S1003-114M Motherboard Replacement: 步骤 2 中的图像 1,3 Acer One 10 S1003-114M Motherboard Replacement: 步骤 2 中的图像 2,3 Acer One 10 S1003-114M Motherboard Replacement: 步骤 2 中的图像 3,3
    • While handling the device, make sure to avoid pushing the power button. Device must remain powered off.

    • Metal spudgers and similar prying tools can damage internal components like the motherboard. It is ideal to use a regular black nylon spudger or a plastic opening tool, but for this device the metal jimmy and spudger were the only tools that worked.

    • Starting from the corner of the tablet, use a jimmy to create a gap between the screen and the back covering.

    • Insert a metal spudger in the gap that you created with the Jimmy.

    • Slowly maneuver the metal spudger along the perimeter of the tablet to pry the screen and back covering apart.

    • Separate the back covering from the screen.

  3. Acer One 10 S1003-114M Motherboard Replacement: 步骤 3 中的图像 1,2 Acer One 10 S1003-114M Motherboard Replacement: 步骤 3 中的图像 2,2
    • Using your hands, peel off the Polyimide tape (yellow tape).

  4. Acer One 10 S1003-114M Motherboard Replacement: 步骤 4 中的图像 1,3 Acer One 10 S1003-114M Motherboard Replacement: 步骤 4 中的图像 2,3 Acer One 10 S1003-114M Motherboard Replacement: 步骤 4 中的图像 3,3
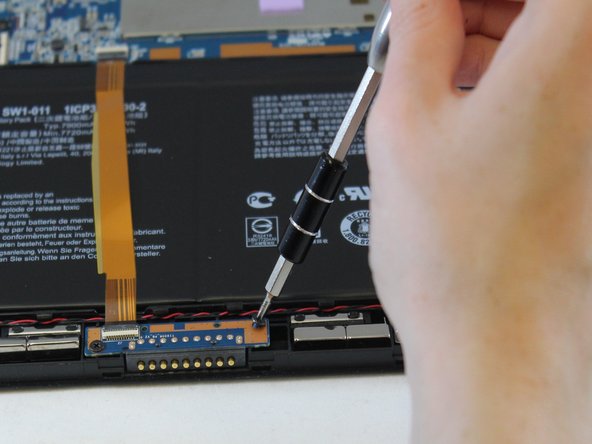
    • Using the Phillips #00 screwdriver, unscrew the two 2mm screws at the bottom of the tablet and open the ZIF latch.

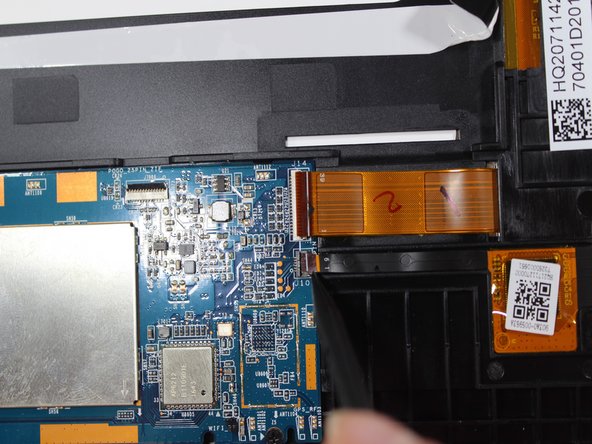
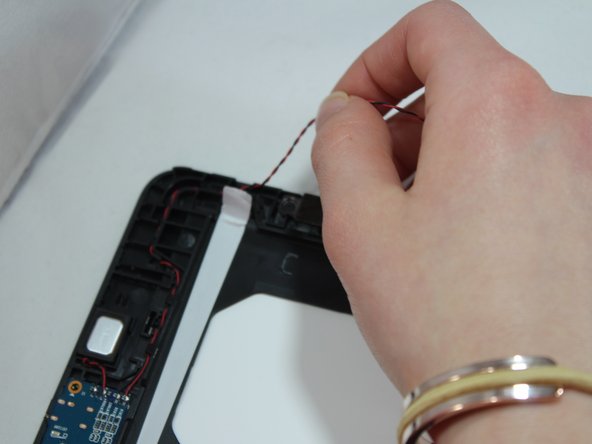
    • Gently remove the gold ribbon cable covering the battery and set it aside.

    for removing the upper-end of the ribbon, one have to lift a little bit the connector, then it is very easy to extract the upper side of the ribbon

    trasferimento trasferimento - 回复

    In step 4, the instructions say: "unscrew the two 2mm screws at the bottom of the tablet and open the ZIF latch". If you do it as described, you risk damaging the motherboard. Why?

    When you unscrew the screws, you release the metal bridge, fixing the connector. Although this part will remain glued to the battery cable, it is not fixed in any way, so it can fall on the circuit board at any time. But until you disconnect the battery from the PCB, the components on the board are powered and the metal part can cause a short circuit and irreversibly destroy the motherboard.

    This is exactly what happened to me. Unfortunately, the manufacturer has not published service documentation with a diagram and layout of components, so the only solution (and expensive one) is to replace the motherboard. So I recommend holding the metal bridge while loosening the screws, carefully remove it and only then handle the ZIF connector. It is even safer to cover the PCB around the connector with insulating material.

    Anthony - 回复

  5. Acer One 10 S1003-114M Motherboard Replacement: 步骤 5 中的图像 1,2 Acer One 10 S1003-114M Motherboard Replacement: 步骤 5 中的图像 2,2
    • Using the Phillips #00 screwdriver, unscrew the two 2mm screws at the top right of the battery.

  6. Acer One 10 S1003-114M Motherboard Replacement: 步骤 6 中的图像 1,2 Acer One 10 S1003-114M Motherboard Replacement: 步骤 6 中的图像 2,2
    • Peel the three shiny black stickers from the battery (top left, bottom right, and bottom left), but keep them attached to the motherboard.

  7. Acer One 10 S1003-114M Motherboard Replacement: 步骤 7 中的图像 1,2 Acer One 10 S1003-114M Motherboard Replacement: 步骤 7 中的图像 2,2
    • Battery is adhered to the tablet.

    • Avoid putting pressure on the glass while separating the battery from the screen.

    • Use the spudger to separate the battery from glue that holds the battery to the screen. Carefully pry the battery from the tablet.

  8. Acer One 10 S1003-114M Motherboard Replacement: 步骤 8 中的图像 1,1
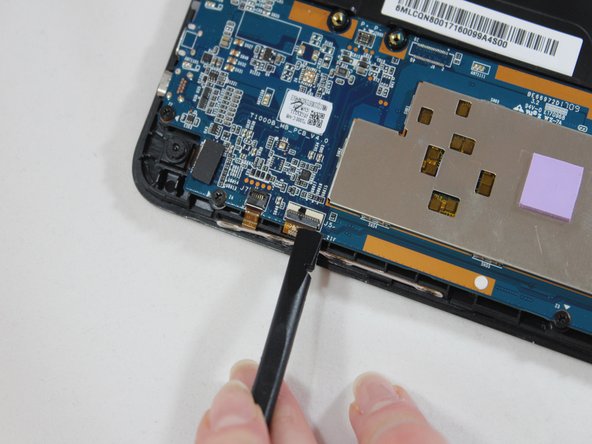
    • Remove the battery from the device.

    How l can get one battery like this one

    dr.m.fayaad - 回复

  9. Acer One 10 S1003-114M Motherboard Replacement, Motherboard: 步骤 9 中的图像 1,3 Acer One 10 S1003-114M Motherboard Replacement, Motherboard: 步骤 9 中的图像 2,3 Acer One 10 S1003-114M Motherboard Replacement, Motherboard: 步骤 9 中的图像 3,3
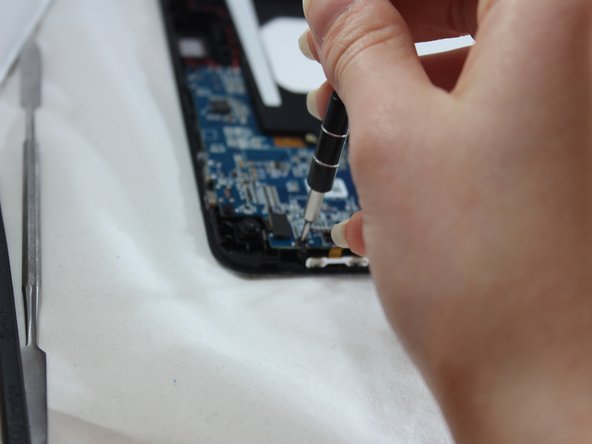
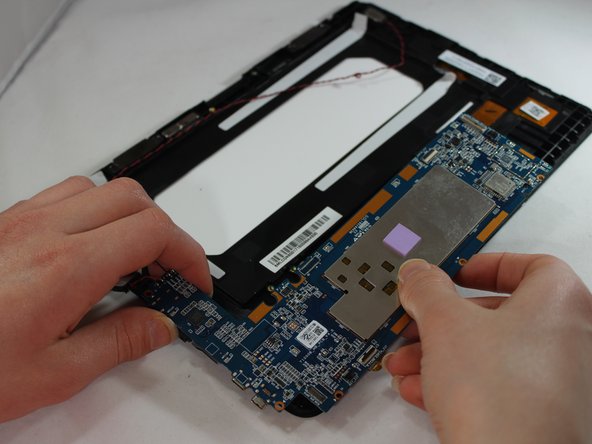
    • Using a spudger, disconnect the two ribbon cables on the top right and the three on the bottom left of the motherboard.

  10. Acer One 10 S1003-114M Motherboard Replacement: 步骤 10 中的图像 1,2 Acer One 10 S1003-114M Motherboard Replacement: 步骤 10 中的图像 2,2
    • Use a Phillips #00 screwdriver to remove the five 2mm screws from the motherboard. There are two on the left edge and three on the bottom edge of the motherboard.

  11. Acer One 10 S1003-114M Motherboard Replacement: 步骤 11 中的图像 1,2 Acer One 10 S1003-114M Motherboard Replacement: 步骤 11 中的图像 2,2
    • Using the spudger, pry the speaker from the right side of the tablet.

    • Lift the red and black wires attached to speaker on right side out of the track to where it connects to motherboard and the speaker on the left side.

    • Using the spudger, pry the speaker from the left side of the tablet.

  12. Acer One 10 S1003-114M Motherboard Replacement: 步骤 12 中的图像 1,3 Acer One 10 S1003-114M Motherboard Replacement: 步骤 12 中的图像 2,3 Acer One 10 S1003-114M Motherboard Replacement: 步骤 12 中的图像 3,3
    • Use a spudger to create a gap between motherboard and back covering.

    • Using the spudger, gently pry the motherboard away from the back covering.

    • Gently lift and remove the motherboard and speakers from tablet.

结论

To reassemble your device, follow these instructions in reverse order.

2等其他人完成本指南。

3条评论

Is it crutial to remove the battery? Or can this be done with it disconnected?

Thomas Richardson - 回复

Where is the bios battery?

Ramon - 回复

Bios battery don't exist! UEFI Bios Flash memory NVRAM

philip - 回复

添加评论

浏览统计数据:

过去 24 小时: 2

过去 7 天: 9

过去 30 天: 16

总计 2,281