跳转到主内容

Acer Chromebook C740 Battery Replacement

你所需要的

  1. Acer Chromebook C740 Battery Replacement, Back Panel: 步骤 1 中的图像 1,1
    • Power down the Chromebook and disconnect the power adapter.

  2. Acer Chromebook C740 Battery Replacement: 步骤 2 中的图像 1,2 Acer Chromebook C740 Battery Replacement: 步骤 2 中的图像 2,2
    • Place the chromebook bottom side up on a flat surface.

    • Remove the thirteen 7 mm screws with a Phillips #0 screwdriver.

  3. Acer Chromebook C740 Battery Replacement: 步骤 3 中的图像 1,3 Acer Chromebook C740 Battery Replacement: 步骤 3 中的图像 2,3 Acer Chromebook C740 Battery Replacement: 步骤 3 中的图像 3,3
    • Insert the plastic opening tool into the slit near the hinges and pry upwards to lift the back panel.

    • Applying pressure may be necessary. A click indicates the panel is ready to come off.

  4. Acer Chromebook C740 Battery Replacement, Battery: 步骤 4 中的图像 1,3 Acer Chromebook C740 Battery Replacement, Battery: 步骤 4 中的图像 2,3 Acer Chromebook C740 Battery Replacement, Battery: 步骤 4 中的图像 3,3
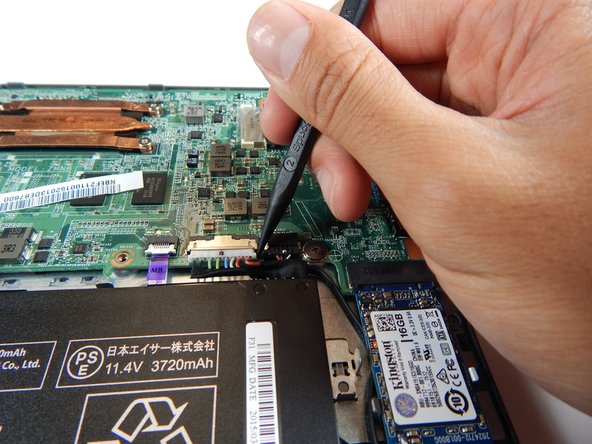
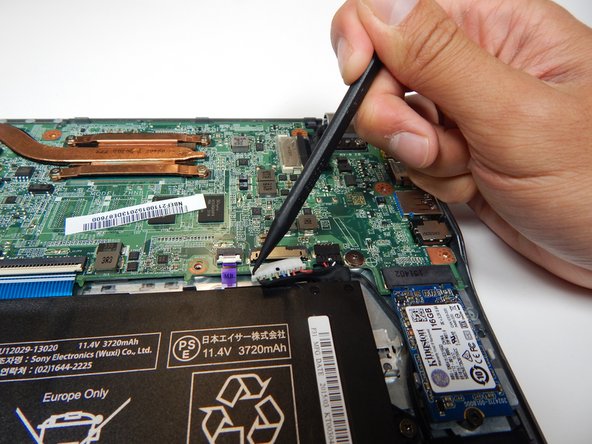
    • Unplug the white 8-wire battery connector from the motherboard by using a spudger to push the two L-shaped indentations towards the battery.

    • The connector is a tight fit. This process requires going back-and-forth between the two indentations and plenty of patience.

  5. Acer Chromebook C740 Battery Replacement: 步骤 5 中的图像 1,2 Acer Chromebook C740 Battery Replacement: 步骤 5 中的图像 2,2
    • Remove the the two 3.7 mm screws with a Phillips #0 screwdriver.

  6. Acer Chromebook C740 Battery Replacement: 步骤 6 中的图像 1,1
    • Lift the battery from the frame.

结论

To reassemble your device, follow these instructions in reverse order.

7等其他人完成本指南。

Flor De La Rosa

于04/25/17注册

875 声望

创作了4篇指南

团队

Cal Poly, Team S22-G2, Livingston Spring 2017 Cal Poly, Team S22-G2, Livingston Spring 2017 的会员

CPSU-LIVINGSTON-S17S22G2

4 名成员

创作了12篇指南

0条评论

添加评论

浏览统计数据:

过去 24 小时: 3

过去 7 天: 12

过去 30 天: 31

总计 7,298