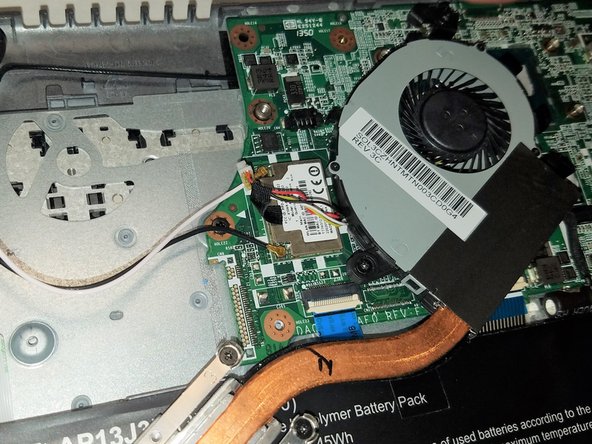
跳转到主内容

Acer Chromebook C720 Heat Sink and Cooling Fan Replacement

你所需要的

  1. Acer Chromebook C720 Heat Sink and Cooling Fan Replacement, Heat Sink and Cooling Fan: 步骤 1 中的图像 1,3 Acer Chromebook C720 Heat Sink and Cooling Fan Replacement, Heat Sink and Cooling Fan: 步骤 1 中的图像 2,3 Acer Chromebook C720 Heat Sink and Cooling Fan Replacement, Heat Sink and Cooling Fan: 步骤 1 中的图像 3,3
    • Operating on your device while it is on, or plugged in may result in electrical shock. Make sure the device is not powered before continuing.

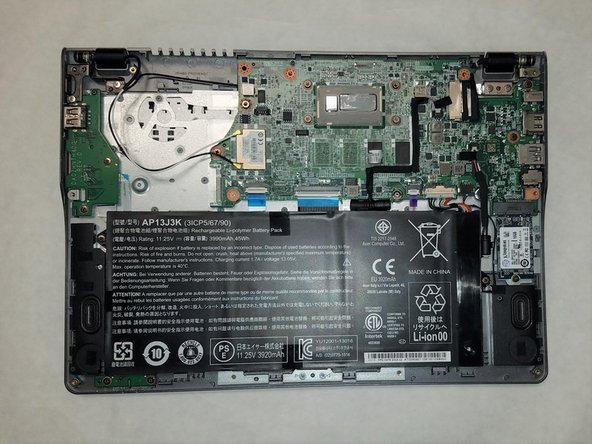
    • Remove the thirteen 6mm screws using the Phillips #0 screwdriver.

    • Gently pry the back plate off using the plastic opening tool, leveraging the groove along the device's hinge.

  2. Acer Chromebook C720 Heat Sink and Cooling Fan Replacement: 步骤 2 中的图像 1,2 Acer Chromebook C720 Heat Sink and Cooling Fan Replacement: 步骤 2 中的图像 2,2
    • Remove the four 3mm screws securing the heat sink using the Phillips #0 screwdriver.

    • Remove the two 3mm screws securing the fan using the Phillips #0 screwdriver.

  3. Acer Chromebook C720 Heat Sink and Cooling Fan Replacement: 步骤 3 中的图像 1,2 Acer Chromebook C720 Heat Sink and Cooling Fan Replacement: 步骤 3 中的图像 2,2
    • Gently pry the fan module away from the motherboard. After a bit of force, it should pop out of its slot.

    • Carefully unwrap the wires from around the fan.

  4. Acer Chromebook C720 Heat Sink and Cooling Fan Replacement: 步骤 4 中的图像 1,3 Acer Chromebook C720 Heat Sink and Cooling Fan Replacement: 步骤 4 中的图像 2,3 Acer Chromebook C720 Heat Sink and Cooling Fan Replacement: 步骤 4 中的图像 3,3
    • Gently disconnect the fan module from the motherboard.

结论

To reassemble your device, follow these instructions in reverse order.

2等其他人完成本指南。

Benjamin Rahman

于04/01/19注册

517 声望

创作了3篇指南

团队

IUPUI, Team S2-G5, Harley Spring 2019 IUPUI, Team S2-G5, Harley Spring 2019 的会员

IUPUI-HARLEY-S19S2G5

4 名成员

创作了7篇指南

0条评论

添加评论

浏览统计数据:

过去 24 小时: 0

过去 7 天: 0

过去 30 天: 8

总计 511