跳转到主内容

Acer Chromebook C710-2833 Fan Replacement

你所需要的

  1. Acer Chromebook C710-2833 Fan Replacement, Fan: 步骤 1 中的图像 1,1
    • Flip your Chromebook over so the bottom is facing up.

  2. Acer Chromebook C710-2833 Fan Replacement: 步骤 2 中的图像 1,2 Acer Chromebook C710-2833 Fan Replacement: 步骤 2 中的图像 2,2
    • Locate the 6 mm Phillips #00 screw that holds the back cover together. Use your driver with the PH00 bit attached to unscrew it.

    • Once completely unscrewed, carefully lift the cover off.

    • Place the cover and screw safely to the side for now.

  3. Acer Chromebook C710-2833 Fan Replacement: 步骤 3 中的图像 1,2 Acer Chromebook C710-2833 Fan Replacement: 步骤 3 中的图像 2,2
    在这个步骤中使用的工具:
    Anti-Static Wrist Strap
    $7.95
    购买
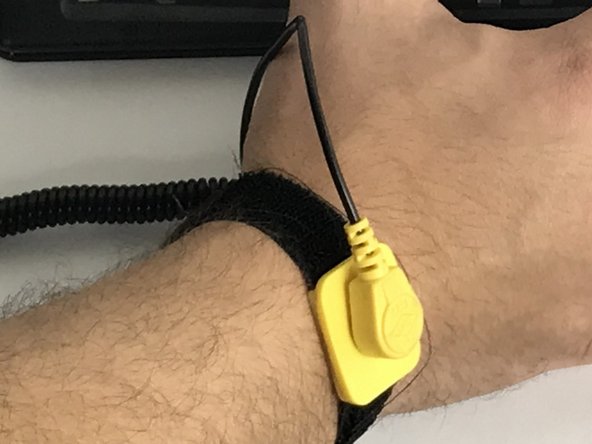
    • Now take your anti-static wrist strap and place it tightly on your wrist.

    • Attach the alligator clamp of the wrist strap to something that will ground yourself to avoid possible electric zaps.

    • The location chosen in the picture is recommended.

  4. Acer Chromebook C710-2833 Fan Replacement: 步骤 4 中的图像 1,2 Acer Chromebook C710-2833 Fan Replacement: 步骤 4 中的图像 2,2
    • Locate the two 6 mm Phillips #00 screws on the fan port.

    • Unscrew the two screws and place them aside for now.

  5. Acer Chromebook C710-2833 Fan Replacement: 步骤 5 中的图像 1,2 Acer Chromebook C710-2833 Fan Replacement: 步骤 5 中的图像 2,2
    • Carefully remove the fan from its port. You may need to use a little force as there will be an adhesive on the right side of the fan keeping it in place.

    • Locate the Molex cable connecting the fan to its port in the top left corner.

    • Disconnect the cable.

结论

To reassemble your device, follow these instructions in reverse order.

另外一个人完成了本指南。

Nicholas Latorre

于09/28/17注册

558 声望

创作了5篇指南

团队

USF Tampa, Team S1-G6, Nance Fall 2017 USF Tampa, Team S1-G6, Nance Fall 2017 的会员

USFT-NANCE-F17S1G6

4 名成员

创作了10篇指南

0条评论

添加评论

浏览统计数据:

过去 24 小时: 1

过去 7 天: 3

过去 30 天: 7

总计 891