跳转到主内容

Acer Chromebook 15 CB5-571-C09S Solid State Drive Replacement

你所需要的

  1. Acer Chromebook 15 CB5-571-C09S Solid State Drive Replacement, Back Cover: 步骤 1 中的图像 1,1
    • Place the device on a flat surface faced down so that the fan vents are at the top of the device.

  2. Acer Chromebook 15 CB5-571-C09S Solid State Drive Replacement: 步骤 2 中的图像 1,2 Acer Chromebook 15 CB5-571-C09S Solid State Drive Replacement: 步骤 2 中的图像 2,2
    • Unscrew the eighteen 6 mm PH0 Phillips head screws from the back of the device.

  3. Acer Chromebook 15 CB5-571-C09S Solid State Drive Replacement: 步骤 3 中的图像 1,2 Acer Chromebook 15 CB5-571-C09S Solid State Drive Replacement: 步骤 3 中的图像 2,2
    • Use a plastic opening tool to pry open the back cover around the edges of the device.

    • Be careful not to crack or break the back cover of the device.

    • You will have to adjust the position of the device to pry it open along all the edges.

  4. Acer Chromebook 15 CB5-571-C09S Solid State Drive Replacement: 步骤 4 中的图像 1,2 Acer Chromebook 15 CB5-571-C09S Solid State Drive Replacement: 步骤 4 中的图像 2,2
    • Stand the device up with the hinges on top and carefully pull apart the back cover from the device.

  5. Acer Chromebook 15 CB5-571-C09S Solid State Drive Replacement, Solid State Drive: 步骤 5 中的图像 1,3 Acer Chromebook 15 CB5-571-C09S Solid State Drive Replacement, Solid State Drive: 步骤 5 中的图像 2,3 Acer Chromebook 15 CB5-571-C09S Solid State Drive Replacement, Solid State Drive: 步骤 5 中的图像 3,3
    • The Solid State Drive is the blue chip locate right beneath the fan.

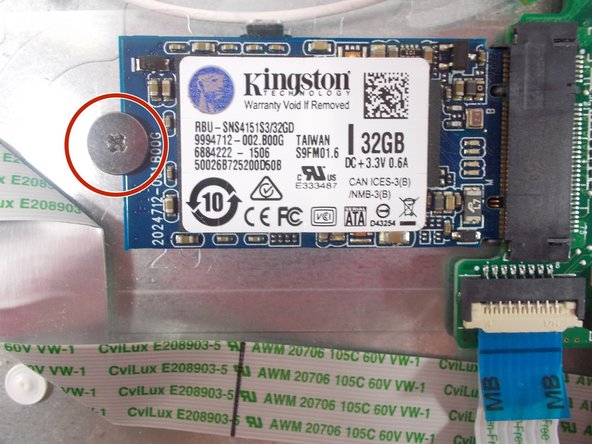
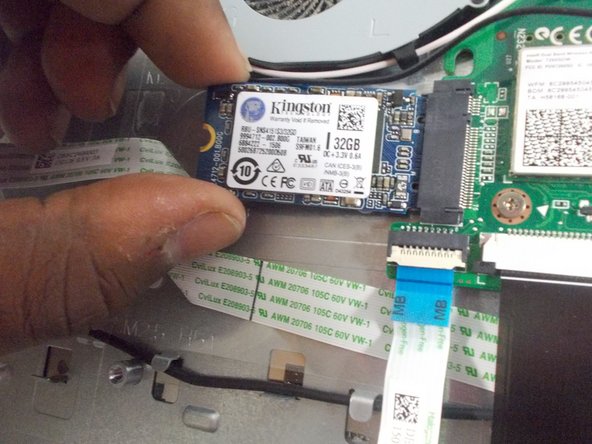
    • Unscrew the 3 mm PH00 Phillips head screw located on the left side of the SSD.

  6. Acer Chromebook 15 CB5-571-C09S Solid State Drive Replacement: 步骤 6 中的图像 1,2 Acer Chromebook 15 CB5-571-C09S Solid State Drive Replacement: 步骤 6 中的图像 2,2
    • Grab the top and bottom edges of the SSD and carefully pull it out from the motherboard.

结论

To reassemble your device, follow these instructions in reverse order.

5等其他人完成本指南。

Sakiynah Howard

于10/17/17注册

1,000 声望

创作了6篇指南

团队

UMass Dartmouth, Team S1-G3, Simcock Fall 2017 UMass Dartmouth, Team S1-G3, Simcock Fall 2017 的会员

UMASSD-SIMCOCK-F17S1G3

3 名成员

创作了12篇指南

一条评论

Mine has a positive and neutral wire moving away from the SSD, and removing the chip entirely hasn't impeded operation whatsoever despite me doing it to force developer mode.

Helios Bajammin - 回复

添加评论

浏览统计数据:

过去 24 小时: 1

过去 7 天: 10

过去 30 天: 38

总计 3,267