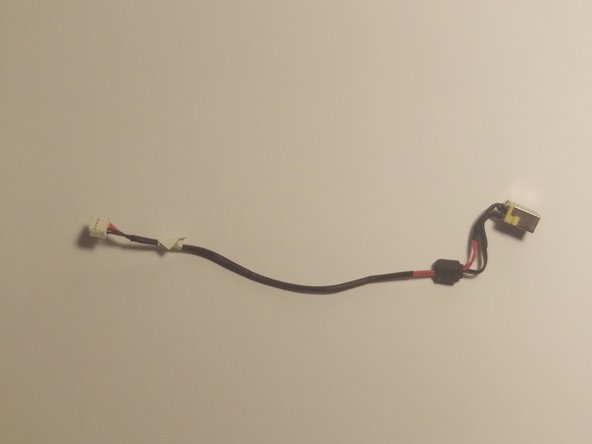
跳转到主内容

Acer Aspire TimelineX 4830T-6682 Power Plug Replacement Replacement

你所需要的

  1. Acer Aspire TimelineX 4830T-6682 Power Plug  Replacement Replacement, Lower Back Panel: 步骤 1 中的图像 1,3 Acer Aspire TimelineX 4830T-6682 Power Plug  Replacement Replacement, Lower Back Panel: 步骤 1 中的图像 2,3 Acer Aspire TimelineX 4830T-6682 Power Plug  Replacement Replacement, Lower Back Panel: 步骤 1 中的图像 3,3
    • Remove the single screw with a Phillips #0 screwdriver.

    • Use a plastic opening tool on the upper part of the panel to remove it and access the RAM.

    • The other way to remove the panel is by sliding it away from the laptop. The difficulty of sliding it depends on the condition of your laptop.

  2. Acer Aspire TimelineX 4830T-6682 Power Plug  Replacement Replacement, Keyboard: 步骤 2 中的图像 1,1
    • Remove the eleven screws that hold that back panel to the laptop using a J0 Phillips screwdriver bit.

  3. Acer Aspire TimelineX 4830T-6682 Power Plug  Replacement Replacement: 步骤 3 中的图像 1,3 Acer Aspire TimelineX 4830T-6682 Power Plug  Replacement Replacement: 步骤 3 中的图像 2,3 Acer Aspire TimelineX 4830T-6682 Power Plug  Replacement Replacement: 步骤 3 中的图像 3,3
    • Place the laptop in the upright position, the lower front touchpad panel should be easily detatched at this point.

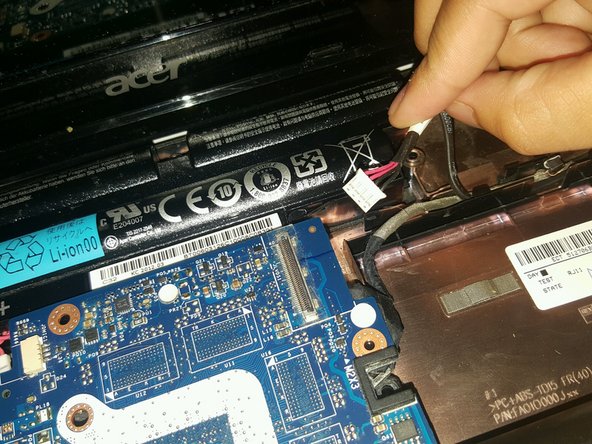
    • Remove the lower front touchpad panel by using an angled tweezers to disconnect the only wired tape connected to the motherboard.

  4. Acer Aspire TimelineX 4830T-6682 Power Plug  Replacement Replacement: 步骤 4 中的图像 1,1
    • Next, disconnect the 4 wired tapes of the keyboard from the motherboard just like we did with the lower front touchpad panel.

  5. Acer Aspire TimelineX 4830T-6682 Power Plug  Replacement Replacement: 步骤 5 中的图像 1,2 Acer Aspire TimelineX 4830T-6682 Power Plug  Replacement Replacement: 步骤 5 中的图像 2,2
    • Finally, using an opening tool, gently pry along the edge of the keyboard to separate it from the laptop.

  6. Acer Aspire TimelineX 4830T-6682 Power Plug  Replacement Replacement, Power Plug: 步骤 6 中的图像 1,1
    • The power connector is easy to spot once you have removed the keyboard.

  7. Acer Aspire TimelineX 4830T-6682 Power Plug  Replacement Replacement: 步骤 7 中的图像 1,1
    • Slide the DVD drive out of the computer to gain access to the cables

  8. Acer Aspire TimelineX 4830T-6682 Power Plug  Replacement Replacement: 步骤 8 中的图像 1,2 Acer Aspire TimelineX 4830T-6682 Power Plug  Replacement Replacement: 步骤 8 中的图像 2,2
    • The rubber block is attached with a mild adhesive. Use the spudger tool to loosen it

    • Once the block is loose, use the spudger to unhook the wires from their guides.

  9. Acer Aspire TimelineX 4830T-6682 Power Plug  Replacement Replacement: 步骤 9 中的图像 1,2 Acer Aspire TimelineX 4830T-6682 Power Plug  Replacement Replacement: 步骤 9 中的图像 2,2
    • The body of the plug is glued to the computer. Use the spudger tool to wiggle the plug until it comes loose.

  10. Acer Aspire TimelineX 4830T-6682 Power Plug  Replacement Replacement: 步骤 10 中的图像 1,3 Acer Aspire TimelineX 4830T-6682 Power Plug  Replacement Replacement: 步骤 10 中的图像 2,3 Acer Aspire TimelineX 4830T-6682 Power Plug  Replacement Replacement: 步骤 10 中的图像 3,3
    • Use gentle pressure to pull the plug from its socket on the motherboard. Once the plug is loose, you can pull the entire plug assembly from the computer.

结论

To reassemble your device, follow these instructions in reverse order.

0条评论

添加评论

浏览统计数据:

过去 24 小时: 0

过去 7 天: 2

过去 30 天: 2

总计 382