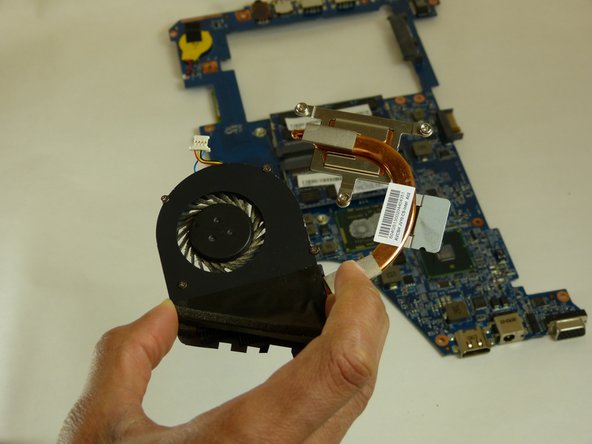
跳转到主内容

Acer Aspire TimelineX 1830T-68U118 Fan Replacement

你所需要的

  1. Acer Aspire TimelineX 1830T-68U118 Fan Replacement, Battery: 步骤 1 中的图像 1,1
    • Turn your laptop over, and find the laptop battery release button locks for your Acer laptop.

  2. Acer Aspire TimelineX 1830T-68U118 Fan Replacement: 步骤 2 中的图像 1,3 Acer Aspire TimelineX 1830T-68U118 Fan Replacement: 步骤 2 中的图像 2,3 Acer Aspire TimelineX 1830T-68U118 Fan Replacement: 步骤 2 中的图像 3,3
    • Hold the battery release button, and pull the battery out of the laptop.

  3. Acer Aspire TimelineX 1830T-68U118 Fan Replacement, Fan: 步骤 3 中的图像 1,3 Acer Aspire TimelineX 1830T-68U118 Fan Replacement, Fan: 步骤 3 中的图像 2,3 Acer Aspire TimelineX 1830T-68U118 Fan Replacement, Fan: 步骤 3 中的图像 3,3
    • Remove battery before beginning.

    • Use a Phillips #0 screwdriver to remove the 5 screws from the bottom cover.

    • Pry open the cover using the Spudger tool.

  4. Acer Aspire TimelineX 1830T-68U118 Fan Replacement: 步骤 4 中的图像 1,3 Acer Aspire TimelineX 1830T-68U118 Fan Replacement: 步骤 4 中的图像 2,3 Acer Aspire TimelineX 1830T-68U118 Fan Replacement: 步骤 4 中的图像 3,3
    • Remove the keyboard with a plastic opening tool or spudger.

    • There is a plastic film that needs to be gently peeled from the laptop base.

    • Use caution when removing the keyboard as it is fragile.

  5. Acer Aspire TimelineX 1830T-68U118 Fan Replacement: 步骤 5 中的图像 1,2 Acer Aspire TimelineX 1830T-68U118 Fan Replacement: 步骤 5 中的图像 2,2
    • Use a Phillips #0 screwdriver to remove the 4 screws from the motherboard shield.

  6. Acer Aspire TimelineX 1830T-68U118 Fan Replacement: 步骤 6 中的图像 1,2 Acer Aspire TimelineX 1830T-68U118 Fan Replacement: 步骤 6 中的图像 2,2
    • Remove the motherboard from the base of the laptop by unscrew the screw drivers using PH0 mm Phillips Head.

    • Carefully remove the charger attachment in the top left.

  7. Acer Aspire TimelineX 1830T-68U118 Fan Replacement: 步骤 7 中的图像 1,3 Acer Aspire TimelineX 1830T-68U118 Fan Replacement: 步骤 7 中的图像 2,3 Acer Aspire TimelineX 1830T-68U118 Fan Replacement: 步骤 7 中的图像 3,3
    • Carefully remove the fan from the motherboard by detaching the plastic insert as seen in the pictures

结论

To reassemble your device, follow these instructions in reverse order.

0条评论

添加评论

浏览统计数据:

过去 24 小时: 1

过去 7 天: 5

过去 30 天: 8

总计 1,223