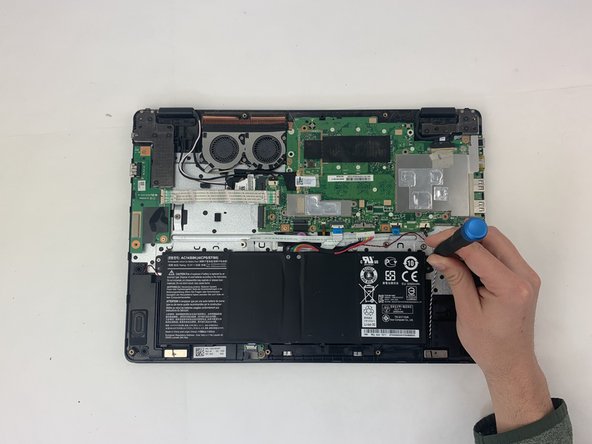
跳转到主内容

Acer Aspire R R5-471T-51UN SSD Replacement

你所需要的

  1. Acer Aspire R R5-471T-51UN SSD Replacement, Battery: 步骤 1 中的图像 1,3 Acer Aspire R R5-471T-51UN SSD Replacement, Battery: 步骤 1 中的图像 2,3 Acer Aspire R R5-471T-51UN SSD Replacement, Battery: 步骤 1 中的图像 3,3
    • Flip your laptop over so the bottom is facing you.

    • Remove the twelve 5 mm screws with a Phillips #0 screwdriver.

  2. Acer Aspire R R5-471T-51UN SSD Replacement: 步骤 2 中的图像 1,3 Acer Aspire R R5-471T-51UN SSD Replacement: 步骤 2 中的图像 2,3 Acer Aspire R R5-471T-51UN SSD Replacement: 步骤 2 中的图像 3,3
    • Insert the Jimmy between the back cover of the laptop and the base of the laptop and then slowly use the Jimmy to pry off the back cover of the laptop.

  3. Acer Aspire R R5-471T-51UN SSD Replacement: 步骤 3 中的图像 1,2 Acer Aspire R R5-471T-51UN SSD Replacement: 步骤 3 中的图像 2,2
    • Use your Phillips #0 screwdriver to remove the two 3mm screws on the battery.

  4. Acer Aspire R R5-471T-51UN SSD Replacement: 步骤 4 中的图像 1,3 Acer Aspire R R5-471T-51UN SSD Replacement: 步骤 4 中的图像 2,3 Acer Aspire R R5-471T-51UN SSD Replacement: 步骤 4 中的图像 3,3
    • Gently and cautiously pinch the white ends of the battery connector cable and slowly pull it from the motherboard.

  5. Acer Aspire R R5-471T-51UN SSD Replacement: 步骤 5 中的图像 1,2 Acer Aspire R R5-471T-51UN SSD Replacement: 步骤 5 中的图像 2,2
    • Gently lift the battery out of the laptop.

    • Be cautious with the lithium ion battery as you remove it.

  6. Acer Aspire R R5-471T-51UN SSD Replacement, SSD: 步骤 6 中的图像 1,2 Acer Aspire R R5-471T-51UN SSD Replacement, SSD: 步骤 6 中的图像 2,2
    • Using the Phillips #0 screwdriver, unscrew the single 5mm screw holding the SSD in place.

  7. Acer Aspire R R5-471T-51UN SSD Replacement: 步骤 7 中的图像 1,2 Acer Aspire R R5-471T-51UN SSD Replacement: 步骤 7 中的图像 2,2
    • Gently pull the SSD to the left and out of the assembly.

结论

To reassemble your device, follow these instructions in reverse order.

2等其他人完成本指南。

0条评论

添加评论

浏览统计数据:

过去 24 小时: 0

过去 7 天: 1

过去 30 天: 12

总计 837