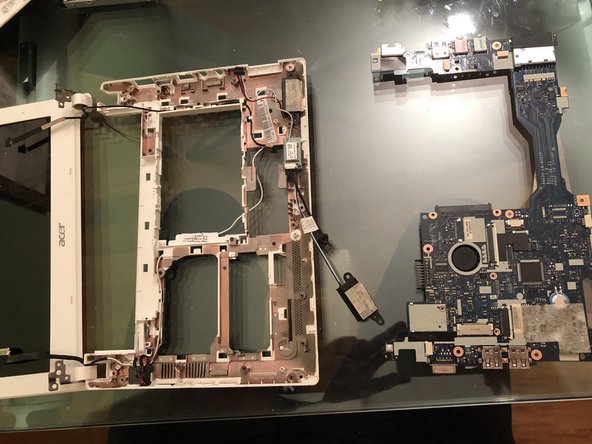
跳转到主内容

Acer Aspire One Happy Dissasembly

  1. Acer Aspire One Happy Dissasembly, Acer Aspire One Happy Dissasembly: 步骤 1 中的图像 1,3 Acer Aspire One Happy Dissasembly, Acer Aspire One Happy Dissasembly: 步骤 1 中的图像 2,3 Acer Aspire One Happy Dissasembly, Acer Aspire One Happy Dissasembly: 步骤 1 中的图像 3,3
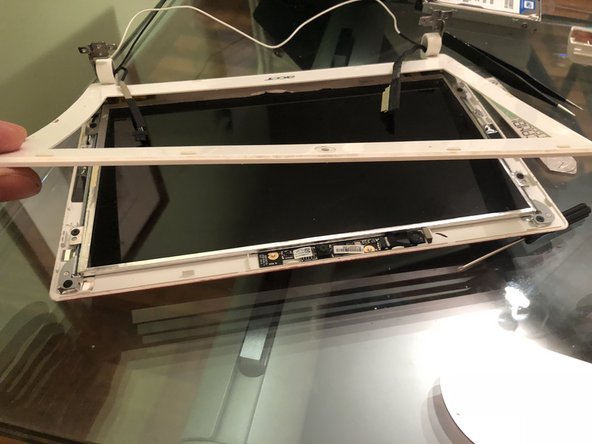
    • Remove the keyboard by using a lever-like motion with thin tools on the joints along the keyboard.

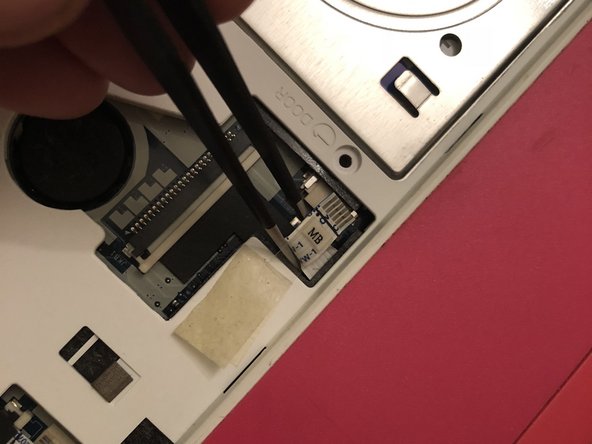
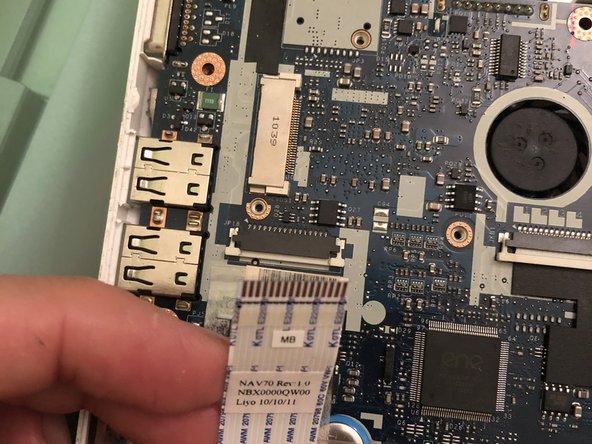
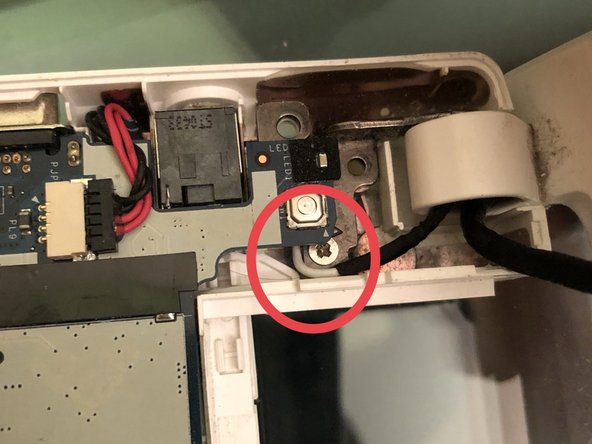
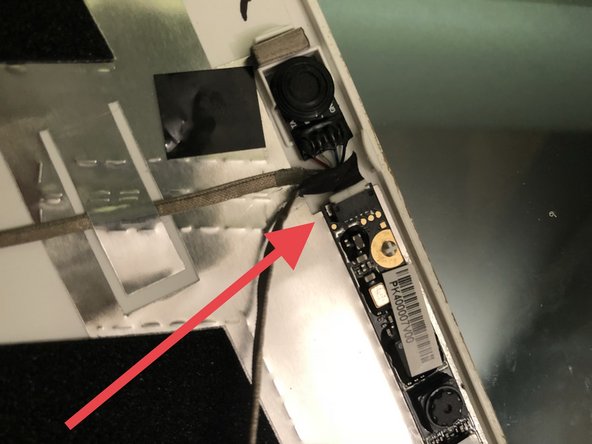
    • Carefully lift and disconnect the flat cable from the motherboard
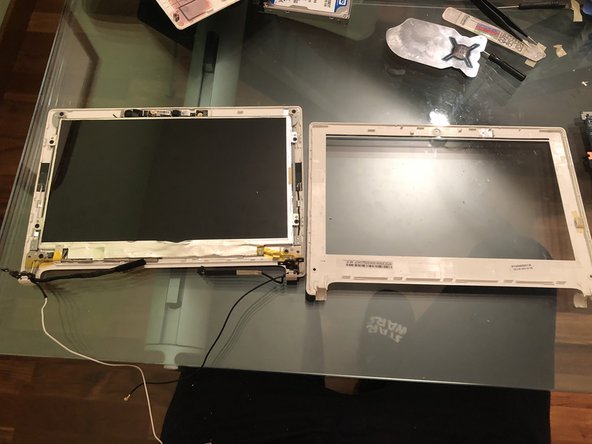
  2. Acer Aspire One Happy Dissasembly: 步骤 2 中的图像 1,1
    • Disconnect the battery

  3. Acer Aspire One Happy Dissasembly: 步骤 3 中的图像 1,2 Acer Aspire One Happy Dissasembly: 步骤 3 中的图像 2,2
    • Unclip and disconnect the connector to remove the keyboard

  4. Acer Aspire One Happy Dissasembly: 步骤 4 中的图像 1,3 Acer Aspire One Happy Dissasembly: 步骤 4 中的图像 2,3 Acer Aspire One Happy Dissasembly: 步骤 4 中的图像 3,3
    • Remove the eight screws that secure the lower shell.

    • We recommend the use of a flat tool to help you out.

    • Now it's possible to remove the lower shell

  5. Acer Aspire One Happy Dissasembly: 步骤 5 中的图像 1,3 Acer Aspire One Happy Dissasembly: 步骤 5 中的图像 2,3 Acer Aspire One Happy Dissasembly: 步骤 5 中的图像 3,3
    • Remove the screw that hold the hard drive in place

    • Disconnect the flat cable

    • Using a thin tool, unclip the hooks that hold the upper shell to the middle shell by separating them.

  6. Acer Aspire One Happy Dissasembly: 步骤 6 中的图像 1,2 Acer Aspire One Happy Dissasembly: 步骤 6 中的图像 2,2
    • Seperate the top case shell

    • Remove the hard drive

  7. Acer Aspire One Happy Dissasembly: 步骤 7 中的图像 1,3 Acer Aspire One Happy Dissasembly: 步骤 7 中的图像 2,3 Acer Aspire One Happy Dissasembly: 步骤 7 中的图像 3,3
    • Disconnect the WiFi card

    • Disconnect the display cable

  8. Acer Aspire One Happy Dissasembly: 步骤 8 中的图像 1,3 Acer Aspire One Happy Dissasembly: 步骤 8 中的图像 2,3 Acer Aspire One Happy Dissasembly: 步骤 8 中的图像 3,3
    • Unclip the connectors

    • Remove the 3 screws securing the card in place. Remove the card after it is free

  9. Acer Aspire One Happy Dissasembly: 步骤 9 中的图像 1,3 Acer Aspire One Happy Dissasembly: 步骤 9 中的图像 2,3 Acer Aspire One Happy Dissasembly: 步骤 9 中的图像 3,3
    • Remove the speaker

    • Release the connectors

    • Remove the 2 screws that secure the motherboard to the laptop

  10. Acer Aspire One Happy Dissasembly: 步骤 10 中的图像 1,2 Acer Aspire One Happy Dissasembly: 步骤 10 中的图像 2,2
    • Release the connectors

    • Carefully remove the motherboard from the laptop

  11. Acer Aspire One Happy Dissasembly: 步骤 11 中的图像 1,3 Acer Aspire One Happy Dissasembly: 步骤 11 中的图像 2,3 Acer Aspire One Happy Dissasembly: 步骤 11 中的图像 3,3
    • Remove both of the left and right screws holding the display assembly to the laptop

  12. Acer Aspire One Happy Dissasembly: 步骤 12 中的图像 1,3 Acer Aspire One Happy Dissasembly: 步骤 12 中的图像 2,3 Acer Aspire One Happy Dissasembly: 步骤 12 中的图像 3,3
    • Remove the adhesive that covers the 2 screws.

    • With an opening pick or Jimmy, seperate the bezel from the LCD assembly.

    • Remove the bezel

  13. Acer Aspire One Happy Dissasembly: 步骤 13 中的图像 1,3 Acer Aspire One Happy Dissasembly: 步骤 13 中的图像 2,3 Acer Aspire One Happy Dissasembly: 步骤 13 中的图像 3,3
    • Remove the 4 screws on the display

    • Disconnect the display cable

    • Remove the LCD

结论

To reassemble your device, follow these steps in reverse order.

2等其他人完成本指南。

由衷感谢以下译者:

it en

100%

这些译者帮助我们修补全世界! 您也想加入吗?
开始翻译 ›

Smilzo

于11/09/13注册

11,267 声望

创作了39篇指南

0条评论

添加评论

浏览统计数据:

过去 24 小时: 3

过去 7 天: 19

过去 30 天: 140

总计 6,080