跳转到主内容

Acer Aspire One 751h-1948 Hard Drive Replacement

你所需要的

  1. Acer Aspire One 751h-1948 Hard Drive Replacement, Battery: 步骤 1 中的图像 1,1
    • Close the laptop and flip it over to view the back of the laptop.

  2. Acer Aspire One 751h-1948 Hard Drive Replacement: 步骤 2 中的图像 1,3 Acer Aspire One 751h-1948 Hard Drive Replacement: 步骤 2 中的图像 2,3 Acer Aspire One 751h-1948 Hard Drive Replacement: 步骤 2 中的图像 3,3
    • Unlock the right side of the battery by sliding the battery lock to the right. Then slide the left lock to the left and remove the battery.

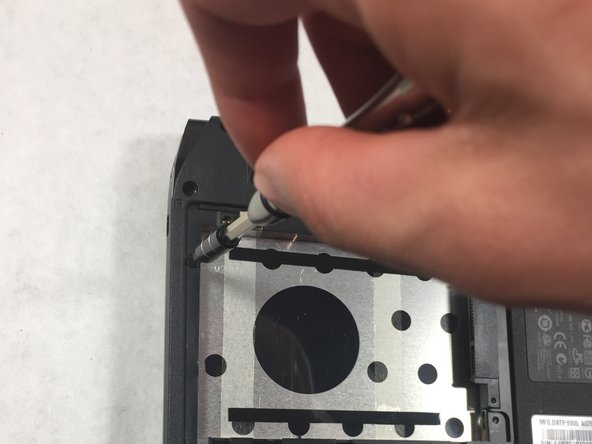
  3. Acer Aspire One 751h-1948 Hard Drive Replacement, Hard Drive: 步骤 3 中的图像 1,1
    • Unscrew the Phillips 0# (M2 L2.5 mm) screw and remove the cover panel.

    • These screws will not come out all the way.

  4. Acer Aspire One 751h-1948 Hard Drive Replacement: 步骤 4 中的图像 1,3 Acer Aspire One 751h-1948 Hard Drive Replacement: 步骤 4 中的图像 2,3 Acer Aspire One 751h-1948 Hard Drive Replacement: 步骤 4 中的图像 3,3
    • Remove the hard drive by sliding it to the left and pull it out.

  5. Acer Aspire One 751h-1948 Hard Drive Replacement: 步骤 5 中的图像 1,2 Acer Aspire One 751h-1948 Hard Drive Replacement: 步骤 5 中的图像 2,2
    • Unscrew the Phillips #0 (M2-L2.5 mm) screws.

结论

To reassemble your device, follow these instructions in reverse order.

0条评论

添加评论

浏览统计数据:

过去 24 小时: 0

过去 7 天: 1

过去 30 天: 4

总计 313