简介
If your Acer Aspire M5-583P-6423 is facing power issues and the battery keeps running out frequently, there might be a problem with the battery jack. This guide will provide steps to remove and replace the battery jack safely.
The battery jack allows you to charge your laptop battery by providing a stable source of electricity. If the battery jack fails, the laptop keeps running out of battery frequently, or the laptop battery will not charge. Once your computer shuts down due to these power issues, it will be unable to turn it back on.
Before using this guide, make sure the problem is not related to any other components in the laptop. Ensure that the power cord (laptop charger) is not the cause of battery issues. The guide link attached below helps you recognize the faulty power cord:
Once the issue with the battery jack is verified, carefully remove the battery by following the guide steps. Before removing the battery jack, don’t forget to disconnect the battery jack.
Before doing anything, make sure your laptop is shut down and is disconnected from any external power source.
你所需要的
-
-
Turn the computer off and close it. Disconnect the charging cable from the laptop and place the laptop upside down.
-
Remove seventeen M2.5x8mm screws on the back cover of the laptop with the Phillips #00 screwdriver.
-
-
-
-
Your laptop's battery jack is located in the red boxed area. The red arrow shows where your power cable connects.
-
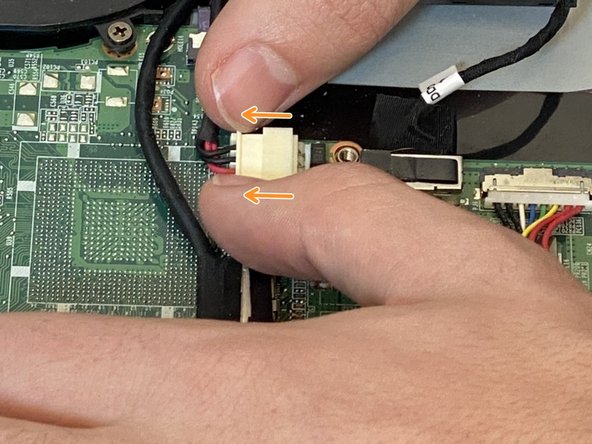
Disconnect the battery jack by gently pushing away the white slot in the arrows direction.
-
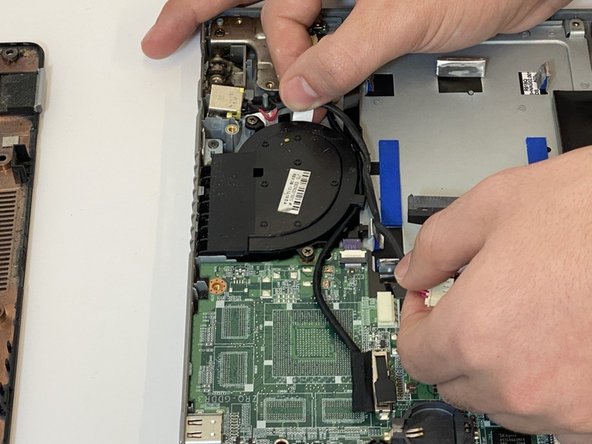
Gently grab the battery jack cable and remove it from the laptop’s motherboard.
-


To reassemble your device, follow these instructions in reverse order.
To reassemble your device, follow these instructions in reverse order.
另外一个人完成了本指南。

团队

Embry-Riddle Aeronautical University, Team S16-G6, Branham Spring 2020 Embry-Riddle Aeronautical University, Team S16-G6, Branham Spring 2020 的会员
ERAU-BRANHAM-S20S16G6
5 名成员
创作了5篇指南