跳转到主内容

Acer Aspire E5-573G Fan Replacement

你所需要的

  1. Acer Aspire E5-573G Fan  Replacement, Fan: 步骤 1 中的图像 1,2 Acer Aspire E5-573G Fan  Replacement, Fan: 步骤 1 中的图像 2,2
    • Remove the seventeen 5 mm screws from the back cover using a Phillips #00 screwdriver.

    • Be sure to unplug and power down your computer before starting any work.

  2. Acer Aspire E5-573G Fan  Replacement: 步骤 2 中的图像 1,2 Acer Aspire E5-573G Fan  Replacement: 步骤 2 中的图像 2,2
    • Remove the CD drive located on the side of the laptop.

  3. Acer Aspire E5-573G Fan  Replacement: 步骤 3 中的图像 1,1
    • Remove the three 2 mm screws from the disc drive bay using a Phillips #00 screwdriver.

  4. Acer Aspire E5-573G Fan  Replacement: 步骤 4 中的图像 1,3 Acer Aspire E5-573G Fan  Replacement: 步骤 4 中的图像 2,3 Acer Aspire E5-573G Fan  Replacement: 步骤 4 中的图像 3,3
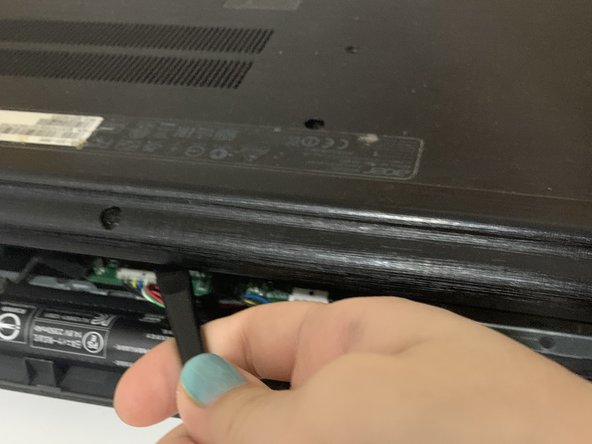
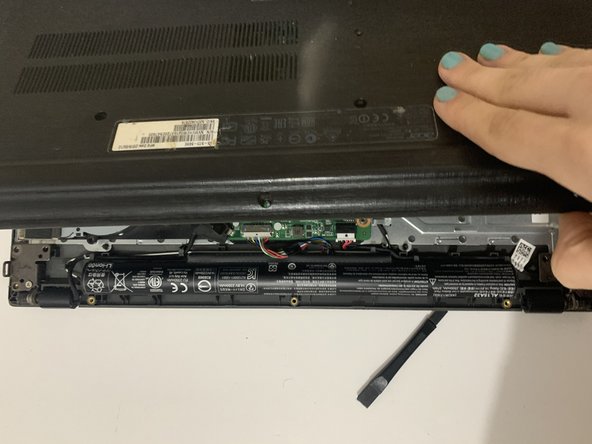
    • Use the spudger to pry open the back cover by sliding it along the sides.

    • Slowly lift the cover upwards.

    • Be gentle while removing the case as it is very thin and might break easily.

  5. Acer Aspire E5-573G Fan  Replacement: 步骤 5 中的图像 1,2 Acer Aspire E5-573G Fan  Replacement: 步骤 5 中的图像 2,2
    • Apply canned air or use a bellows to remove the dust on the motherboard.

    • Remove the two 2 mm screws holding the fan to the motherboard using Phillips #00 screwdriver.

    • Be gentle unscrewing both screws as the motherboard can get damaged with extra force.

  6. Acer Aspire E5-573G Fan  Replacement: 步骤 6 中的图像 1,3 Acer Aspire E5-573G Fan  Replacement: 步骤 6 中的图像 2,3 Acer Aspire E5-573G Fan  Replacement: 步骤 6 中的图像 3,3
    • Lift out the fan and detach the fan cable from the motherboard.

    • When detaching the cable be careful not to pull the wires. Instead pull the white section that connects the fan to the motherboard.

结论

To reassemble your device, follow these instructions in reverse order.

另外一个人完成了本指南。

Lara Mustafa

于01/08/21注册

133 声望

撰写一个指南

团队

0条评论

添加评论

浏览统计数据:

过去 24 小时: 0

过去 7 天: 3

过去 30 天: 15

总计 804