跳转到主内容

Acer Aspire E5-571-58CG Power Jack Replacement

你所需要的

  1. Acer Aspire E5-571-58CG Power Jack Replacement, Battery: 步骤 1 中的图像 1,2 Acer Aspire E5-571-58CG Power Jack Replacement, Battery: 步骤 1 中的图像 2,2
    • Make sure the laptop is powered off.

    • Flip the laptop over and locate the battery release switch.

    • Insert the pointed end of the spudger into the battery release switch.

    • Push the battery release switch to the right.

  2. Acer Aspire E5-571-58CG Power Jack Replacement: 步骤 2 中的图像 1,3 Acer Aspire E5-571-58CG Power Jack Replacement: 步骤 2 中的图像 2,3 Acer Aspire E5-571-58CG Power Jack Replacement: 步骤 2 中的图像 3,3
    • While the battery release switch is pushed to the right, carefully slide the battery out of its socket.

  3. Acer Aspire E5-571-58CG Power Jack Replacement, Power Jack: 步骤 3 中的图像 1,3 Acer Aspire E5-571-58CG Power Jack Replacement, Power Jack: 步骤 3 中的图像 2,3 Acer Aspire E5-571-58CG Power Jack Replacement, Power Jack: 步骤 3 中的图像 3,3
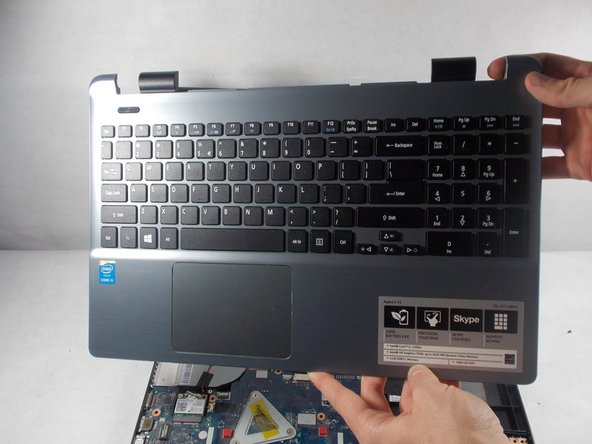
    • Remove the top panel of the laptop with the plastic opening tool.

  4. Acer Aspire E5-571-58CG Power Jack Replacement: 步骤 4 中的图像 1,2 Acer Aspire E5-571-58CG Power Jack Replacement: 步骤 4 中的图像 2,2
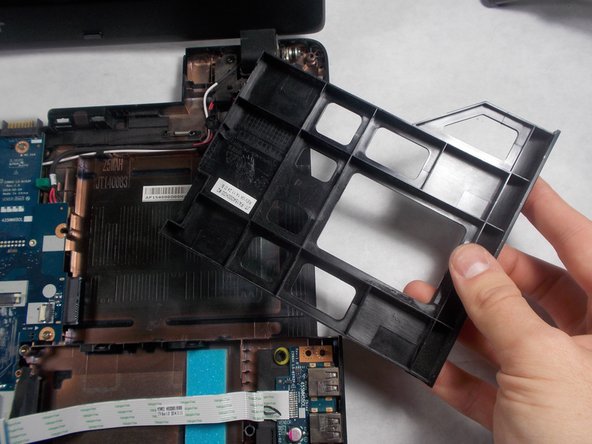
    • Remove the plastic safeguard from the CD drive slot.

  5. Acer Aspire E5-571-58CG Power Jack Replacement: 步骤 5 中的图像 1,3 Acer Aspire E5-571-58CG Power Jack Replacement: 步骤 5 中的图像 2,3 Acer Aspire E5-571-58CG Power Jack Replacement: 步骤 5 中的图像 3,3
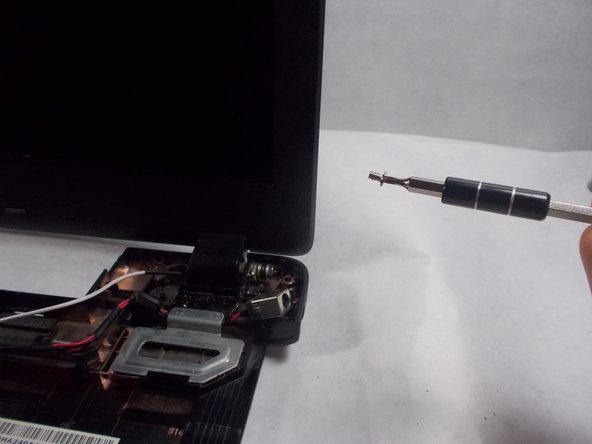
    • Remove the marked screws with the JIS #00 screwdriver.

  6. Acer Aspire E5-571-58CG Power Jack Replacement: 步骤 6 中的图像 1,2 Acer Aspire E5-571-58CG Power Jack Replacement: 步骤 6 中的图像 2,2
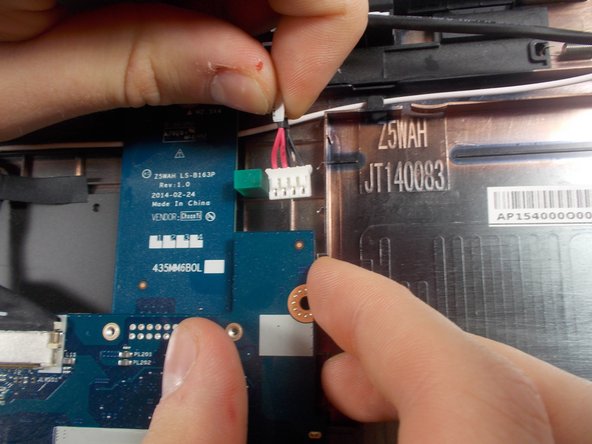
    • Disconnect the opposite end of the power jack from the motherboard by carefully pulling the wire.

  7. Acer Aspire E5-571-58CG Power Jack Replacement: 步骤 7 中的图像 1,2 Acer Aspire E5-571-58CG Power Jack Replacement: 步骤 7 中的图像 2,2
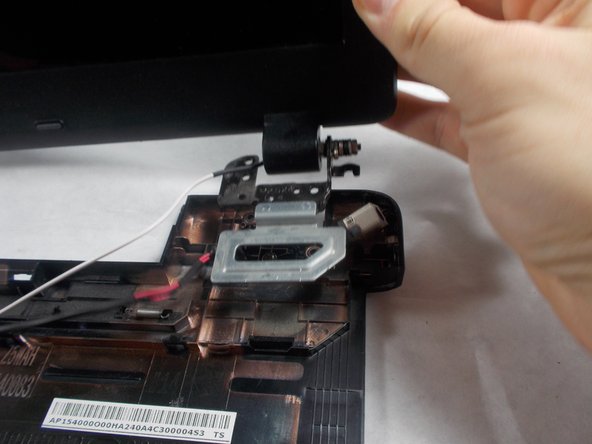
    • Lift the bottom right side of the screen to move the metal plate covering the power jack.

  8. Acer Aspire E5-571-58CG Power Jack Replacement: 步骤 8 中的图像 1,2 Acer Aspire E5-571-58CG Power Jack Replacement: 步骤 8 中的图像 2,2
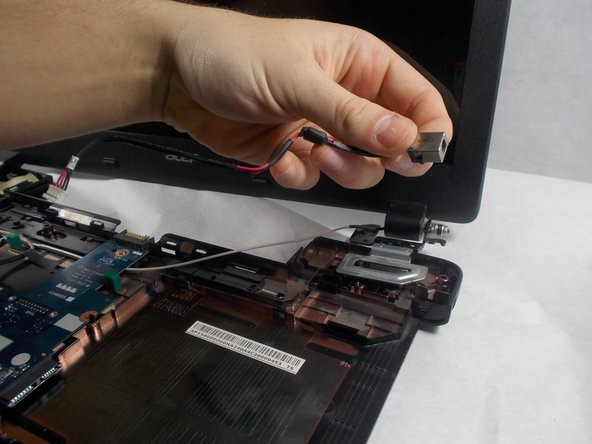
    • Carefully lift the power jack out of the laptop.

结论

To reassemble your device, follow these instructions in reverse order.

另外一个人完成了本指南。

Aliana Johnson

于10/24/18注册

145 声望

撰写一个指南

团队

UMass Dartmouth, Team S7-G7, Valliere Fall 2018 UMass Dartmouth, Team S7-G7, Valliere Fall 2018 的会员

UMASSD-VALLIERE-F18S7G7

5 名成员

创作了5篇指南

0条评论

添加评论

浏览统计数据:

过去 24 小时: 0

过去 7 天: 2

过去 30 天: 9

总计 1,255