跳转到主内容

Acer Aspire E1-572-6829 Fan Replacement

你所需要的

  1. Acer Aspire E1-572-6829 Fan Replacement, Battery: 步骤 1 中的图像 1,1
    • Before beginning, make sure the laptop is turned off and the charger is unplugged.

    • Flip the laptop over so that you are facing the back panel.

    • Locate the battery lock switch below the battery.

  2. Acer Aspire E1-572-6829 Fan Replacement: 步骤 2 中的图像 1,3 Acer Aspire E1-572-6829 Fan Replacement: 步骤 2 中的图像 2,3 Acer Aspire E1-572-6829 Fan Replacement: 步骤 2 中的图像 3,3
    • Slide the battery lock switch to the open position using your finger or a plastic spudger.

    • While holding this switch open, use your other hand to slide the battery out from the back of the laptop.

    • Your battery is removed. You can now let go of the lock switch.

    • To reinsert the battery, make sure that it's tabs are lined up with the laptop and that it is facing in the right direction. Then slide it straight back in without using the lock switch.

  3. Acer Aspire E1-572-6829 Fan Replacement, Keyboard and Touchpad Assembly: 步骤 3 中的图像 1,3 Acer Aspire E1-572-6829 Fan Replacement, Keyboard and Touchpad Assembly: 步骤 3 中的图像 2,3 Acer Aspire E1-572-6829 Fan Replacement, Keyboard and Touchpad Assembly: 步骤 3 中的图像 3,3
    • Use a Phillips #0 screwdriver to remove the seventeen 8 mm screws that secure the back panel.

    • Use a plastic spudger to pry open the lower back panel from its top edge.

    • Lift the panel up and out to remove it.

  4. Acer Aspire E1-572-6829 Fan Replacement: 步骤 4 中的图像 1,3 Acer Aspire E1-572-6829 Fan Replacement: 步骤 4 中的图像 2,3 Acer Aspire E1-572-6829 Fan Replacement: 步骤 4 中的图像 3,3
    • Use a Phillips #0 screwdriver to remove the three 8 mm screws on the inner side of the lower back panel.

    • Use the pull tab on the left side of the 2.5 inch hard disk tray to slide it out of the SATA port.

    • The hard disk along with the 2.5 inch tray can now be safely removed.

  5. Acer Aspire E1-572-6829 Fan Replacement: 步骤 5 中的图像 1,3 Acer Aspire E1-572-6829 Fan Replacement: 步骤 5 中的图像 2,3 Acer Aspire E1-572-6829 Fan Replacement: 步骤 5 中的图像 3,3
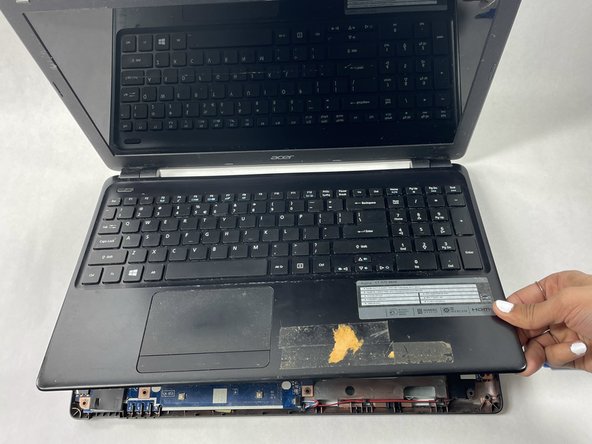
    • Flip the laptop over and open the lid so that the keyboard side is facing upwards.

    • Use a plastic pry tool to pry open the tabs holding the top panel on around all sides of the laptop.

    • Once all the tabs are free, carefully lift up the top panel to open it slightly.

    • Do not lift the top panel up too much or with excessive force since there are delicate ribbon cables on the inside that need to be disconnected before the assembly can be detached.

  6. Acer Aspire E1-572-6829 Fan Replacement: 步骤 6 中的图像 1,3 Acer Aspire E1-572-6829 Fan Replacement: 步骤 6 中的图像 2,3 Acer Aspire E1-572-6829 Fan Replacement: 步骤 6 中的图像 3,3
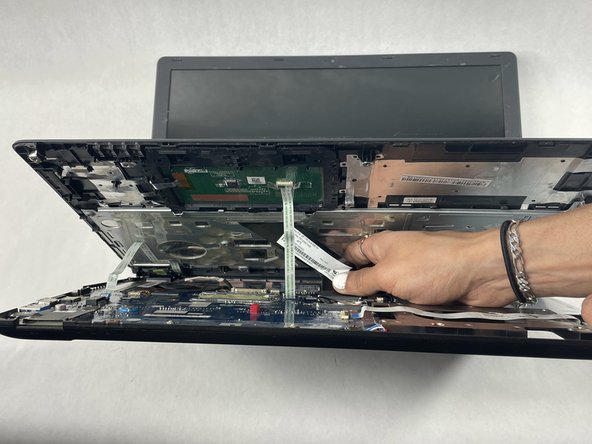
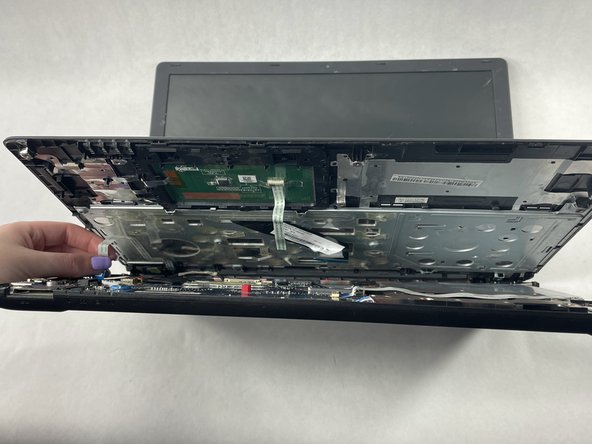
    • Carefully detach the 3 ribbon cables connecting the top panel to the motherboard.

    • Be careful when removing the ribbon cables. Some of the connectors might have small plastic tabs that need to be lifted up before the cable can be detached.

    • The 3 ribbon cables from left to right correspond to the power button, the touch-pad, and the keyboard respectively.

  7. Acer Aspire E1-572-6829 Fan Replacement: 步骤 7 中的图像 1,3 Acer Aspire E1-572-6829 Fan Replacement: 步骤 7 中的图像 2,3 Acer Aspire E1-572-6829 Fan Replacement: 步骤 7 中的图像 3,3
    • Once the ribbon cables are detached, the entire top panel consisting of the keyboard and the touch-pad assembly can safely be removed from the laptop.

  8. Acer Aspire E1-572-6829 Fan Replacement, Fan: 步骤 8 中的图像 1,3 Acer Aspire E1-572-6829 Fan Replacement, Fan: 步骤 8 中的图像 2,3 Acer Aspire E1-572-6829 Fan Replacement, Fan: 步骤 8 中的图像 3,3
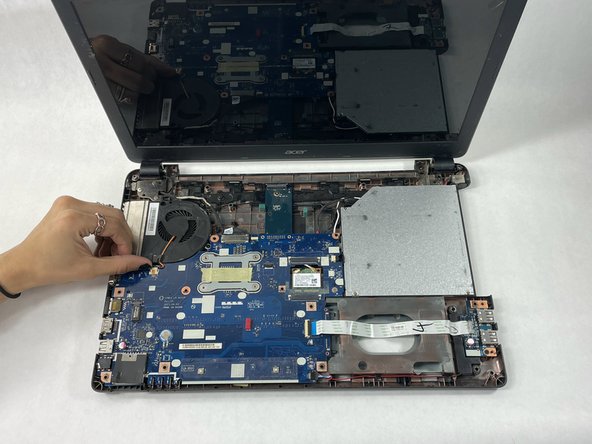
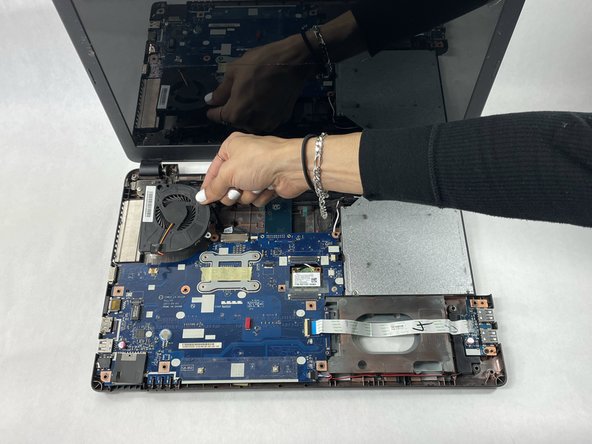
    • Use a Phillips #0 screwdriver to remove the two 5 mm screws on the fan.

    • Unplug the cable connecting the fan to the motherboard.

    • Lift the fan up and out of the laptop.

结论

To reassemble your device, follow these instructions in reverse order.

Anamika Menon

于03/13/23注册

493 声望

创作了5篇指南

团队

UMass Dartmouth, Team 2-2, Petersen Spring 2023 UMass Dartmouth, Team 2-2, Petersen Spring 2023 的会员

UMASSD-PETERSEN-S23S2G2

3 名成员

创作了6篇指南

0条评论

添加评论

浏览统计数据:

过去 24 小时: 0

过去 7 天: 0

过去 30 天: 5

总计 97