跳转到主内容

Acer Aspire 774G-58GS Thermal Paste Replacement

你所需要的

  1. Acer Aspire 774G-58GS Thermal Paste Replacement, Thermal Paste: 步骤 1 中的图像 1,3 Acer Aspire 774G-58GS Thermal Paste Replacement, Thermal Paste: 步骤 1 中的图像 2,3 Acer Aspire 774G-58GS Thermal Paste Replacement, Thermal Paste: 步骤 1 中的图像 3,3
    • Remove the three screws from the plate that covers the RAM and HDD using a Phillips #0 screwdriver.

    • Remove the plate from the laptop.

  2. Acer Aspire 774G-58GS Thermal Paste Replacement: 步骤 2 中的图像 1,2 Acer Aspire 774G-58GS Thermal Paste Replacement: 步骤 2 中的图像 2,2
    • Remove the DVD drive and the three screws that are underneath it.

    • Remove all the screws surrounding the backplate.

  3. Acer Aspire 774G-58GS Thermal Paste Replacement: 步骤 3 中的图像 1,3 Acer Aspire 774G-58GS Thermal Paste Replacement: 步骤 3 中的图像 2,3 Acer Aspire 774G-58GS Thermal Paste Replacement: 步骤 3 中的图像 3,3
    • Disconnect the speaker wire beneath the RAM.

    • Gently remove the backplate from the laptop.

  4. Acer Aspire 774G-58GS Thermal Paste Replacement: 步骤 4 中的图像 1,2 Acer Aspire 774G-58GS Thermal Paste Replacement: 步骤 4 中的图像 2,2
    • Remove the five screws from the heat sink.

    • Take a cotton ball and dab it with isopropyl alcohol.

    • Use the cotton ball to wipe the old thermal paste from the heat sink.

  5. Acer Aspire 774G-58GS Thermal Paste Replacement: 步骤 5 中的图像 1,3 Acer Aspire 774G-58GS Thermal Paste Replacement: 步骤 5 中的图像 2,3 Acer Aspire 774G-58GS Thermal Paste Replacement: 步骤 5 中的图像 3,3
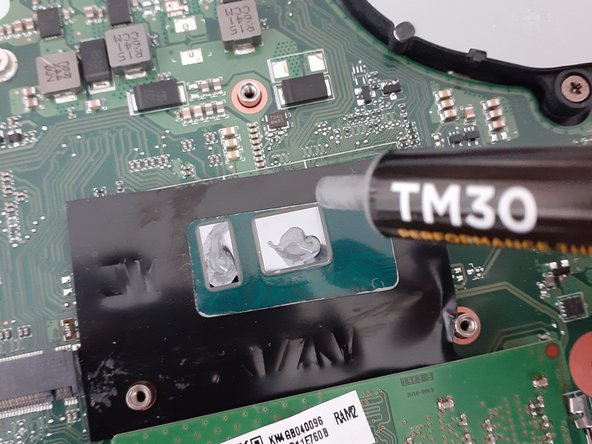
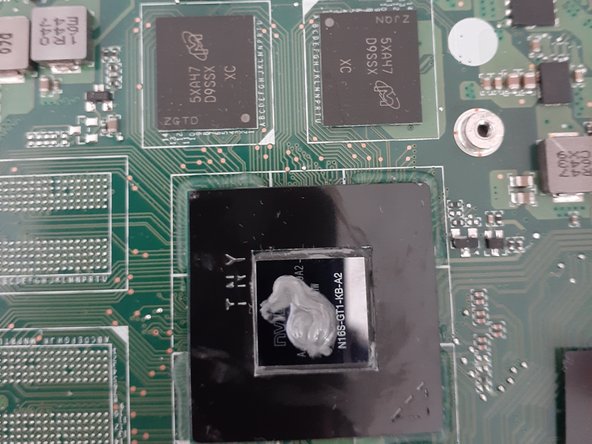
    • Take another cotton ball, dab it with isopropyl alcohol, and gently wipe the thermal paste off of the GPU and CPU.

    • There is no need to rub hard as it should come off with ease.

    • Once the thermal paste is completely off, let the heat sink dry for a couple of minutes.

    • Apply a dab of new thermal paste in the middle of the CPU and GPU.

    • Corsair TM30 thermal paste is used in this guide.

  6. Acer Aspire 774G-58GS Thermal Paste Replacement: 步骤 6 中的图像 1,1
    • Put the heatsink back on and screw it in place.

结论

To reassemble your device, follow these instructions in reverse order.

Abdul Munam Khan

于01/13/22注册

133 声望

撰写一个指南

团队

0条评论

添加评论

浏览统计数据:

过去 24 小时: 2

过去 7 天: 4

过去 30 天: 21

总计 625