你所需要的
-
-
-
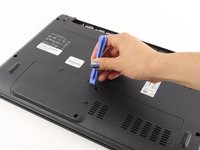
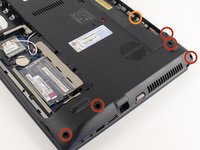
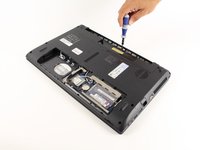
After you have removed all of the prerequisites its time to unscrew a few more screws. Flip your laptop over and first remove all the screw highlighted in red with the Phillips #00 screwdriver. These are 1/4" head diameter by 3/8" screw length screws.
-
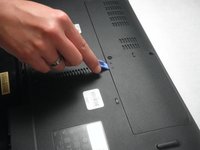
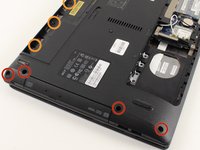
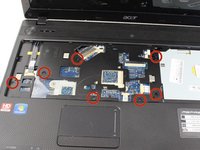
Now remove the screws highlighted in orange with the Phillips #00 screwdriver. These are 5/32" head diameter by 5/32" screw length screws. Keep these separate from the other screws.
-
-
-
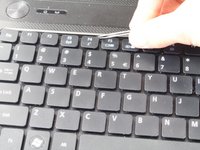
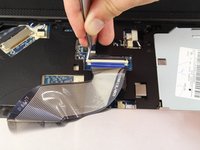
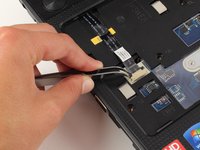
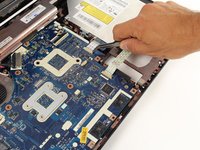
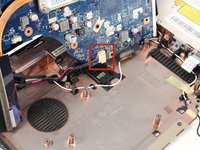
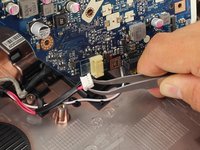
Here is a close-up of all of the connectors. Remember to use tweezers on the black part and carefully pull out both sides. Once it has been moved back slightly, pull the connector out just like the keyboard.
-
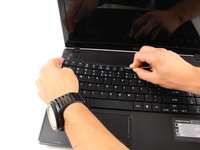
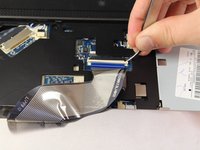
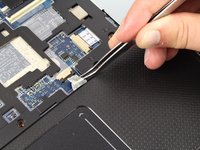
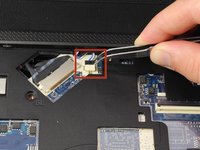
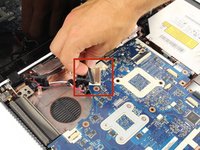
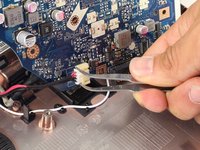
The third picture shows the connector to the speakers which can just be pulled straight out by tweezers.
-
-
-
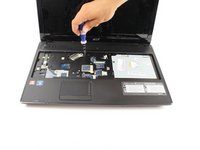
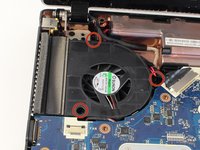
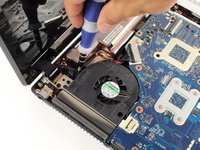
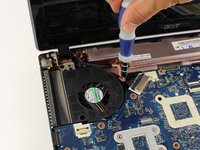
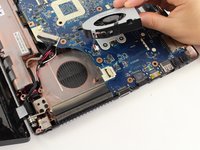
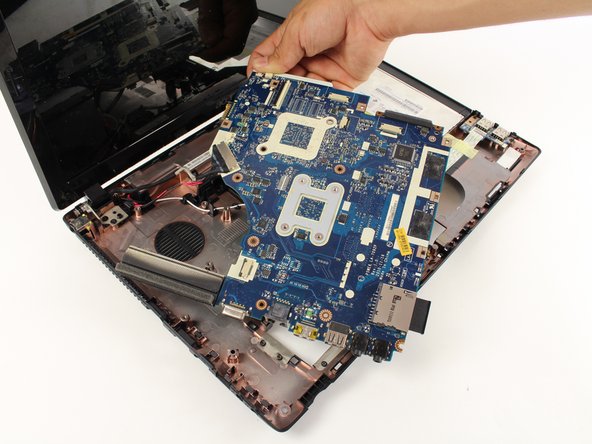
Now locate the three 1/4" diameter head and 7/32" length screws shown in the picture, and remove them with a #00 Phillips screwdriver.
-


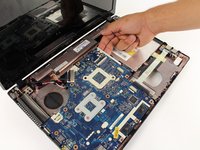

To reassemble your device, follow these instructions in reverse order.
To reassemble your device, follow these instructions in reverse order.
18等其他人完成本指南。
团队

Cal Poly, Team 8-11, Regan Spring 2014 Cal Poly, Team 8-11, Regan Spring 2014 的会员
CPSU-REGAN-S14S8G11
4 名成员
创作了15篇指南
2条评论
The removal of the hard drive and wireless antenna wires where not included as a step, this had caused problems for a friend performing this repair. Both the hard drive and the antenna wires should be disconnected around step 9 and 10, as they are needed for motherboard removal and the point in the instructions puts them in the same area being worked on.
Once the motherboard is removed do you replace it with a new one or just put everything back?