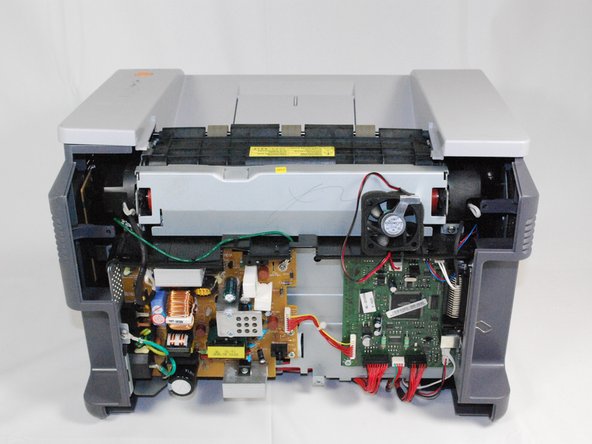
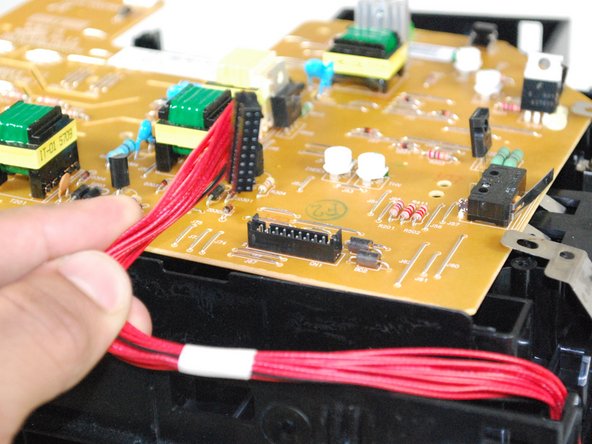
跳转到主内容

Accessing Samsung ML2510 Circuit Board

你所需要的

  1. Accessing Samsung ML2510 Circuit Board, Removing Samsung ML2510 Back Panel: 步骤 1 中的图像 1,3 Accessing Samsung ML2510 Circuit Board, Removing Samsung ML2510 Back Panel: 步骤 1 中的图像 2,3 Accessing Samsung ML2510 Circuit Board, Removing Samsung ML2510 Back Panel: 步骤 1 中的图像 3,3
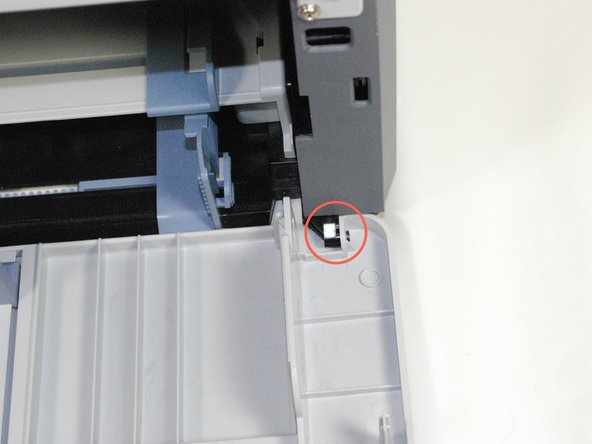
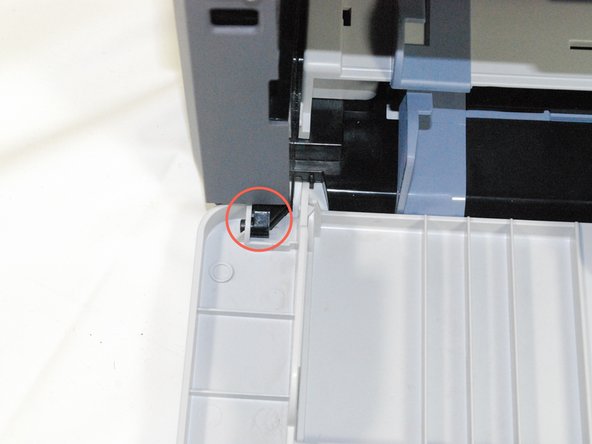
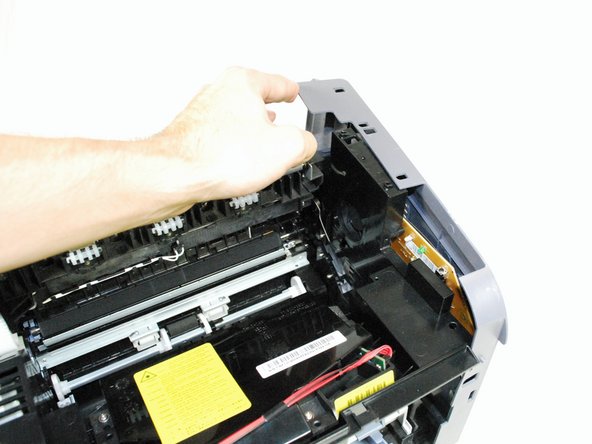
    • Remove the top hinged panel by taking out the pins at the bottom of this panel.

  2. Accessing Samsung ML2510 Circuit Board: 步骤 2 中的图像 1,1
    • Using a Phillips #2 screwdriver, remove the four screws on the back of the printer.

  3. Accessing Samsung ML2510 Circuit Board: 步骤 3 中的图像 1,3 Accessing Samsung ML2510 Circuit Board: 步骤 3 中的图像 2,3 Accessing Samsung ML2510 Circuit Board: 步骤 3 中的图像 3,3
    • Gently lift the top panel while simultaneously pulling off the back panel.

    • Before pulling out the back panel entirely, make sure to remove the rear cooling fan from its slot.

  4. Accessing Samsung ML2510 Circuit Board, Accessing Samsung ML2510 Circuit Board: 步骤 4 中的图像 1,3 Accessing Samsung ML2510 Circuit Board, Accessing Samsung ML2510 Circuit Board: 步骤 4 中的图像 2,3 Accessing Samsung ML2510 Circuit Board, Accessing Samsung ML2510 Circuit Board: 步骤 4 中的图像 3,3
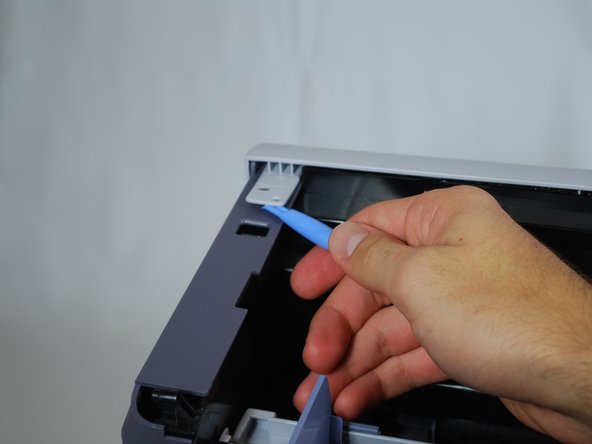
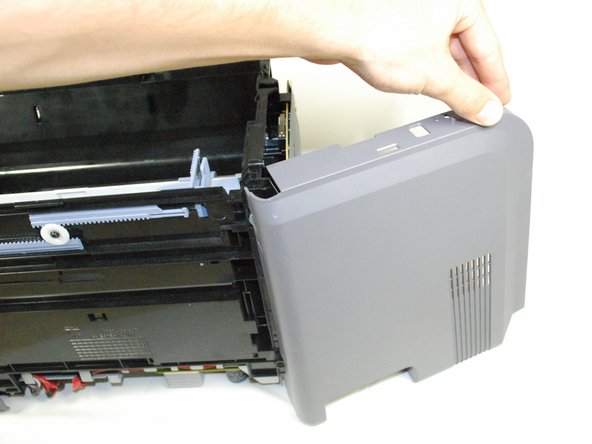
    • Remove the front panel by gently freeing the holes on the panel from the pegs attached to the main printer body one at a time. Make sure to remove the entire front panel, not just the flap on the paper tray.

  5. Accessing Samsung ML2510 Circuit Board: 步骤 5 中的图像 1,1
    • Using a Phillips #2 screwdriver, remove the two 1" screws on the front face of the printer.

  6. Accessing Samsung ML2510 Circuit Board: 步骤 6 中的图像 1,3 Accessing Samsung ML2510 Circuit Board: 步骤 6 中的图像 2,3 Accessing Samsung ML2510 Circuit Board: 步骤 6 中的图像 3,3
    • Using a plastic opening tool, gently lift one side of the top panel from its peg.

    • Repeat the process for the other side.

    • Lift the top panel from the front to remove it entirely.

  7. Accessing Samsung ML2510 Circuit Board: 步骤 7 中的图像 1,3 Accessing Samsung ML2510 Circuit Board: 步骤 7 中的图像 2,3 Accessing Samsung ML2510 Circuit Board: 步骤 7 中的图像 3,3
    • Lift the right panel up from the raised stops.

    • Rotate the panel gently as indicated in the picture to remove the panel entirely.

  8. Accessing Samsung ML2510 Circuit Board: 步骤 8 中的图像 1,1
    • Using a Phillips #2 screwdriver, remove the four 1" screws attaching the gray plate to the printer.

    • Remove the plastic cover by sliding it carefully under the silver hinges on the right.

  9. Accessing Samsung ML2510 Circuit Board: 步骤 9 中的图像 1,1
    • Using a Phillips #2 screwdriver, remove the 1" screw attaching the circuit board to the printer.

  10. Accessing Samsung ML2510 Circuit Board: 步骤 10 中的图像 1,2 Accessing Samsung ML2510 Circuit Board: 步骤 10 中的图像 2,2
    • Turn over the circuit board to access main wiring.

    • Unplug the wiring from the circuit board gently.

结论

To reassemble your device, follow these instructions in reverse order.

3等其他人完成本指南。

bbaustin

于10/12/11注册

268 声望

创作了6篇指南

团队

Cal Poly, Team 17-18, Regan Fall 2011 Cal Poly, Team 17-18, Regan Fall 2011 的会员

CPSU-REGAN-F11S17G18

4 名成员

创作了12篇指南

0条评论

添加评论

浏览统计数据:

过去 24 小时: 0

过去 7 天: 0

过去 30 天: 6

总计 2,829